 |
 |
|
 |
|
| Author |
Message |
ItalianNinja86
Community Member
Joined: 11 Feb 2009
Posts: 49
|
 Posted: Fri Feb 28, 2014 8:51 pm Post subject: Blade Runner Blaster Airsoft Build (reposted from RPF) Posted: Fri Feb 28, 2014 8:51 pm Post subject: Blade Runner Blaster Airsoft Build (reposted from RPF) |
 |
|
So I won't go into much detail needless to say this was the prop that started me on the road to this hobby and would eventually be my first prop when I got my hands on a Rick Ross PKD-1
But on to this build in late 2012 I got from a member on the RPF a Kanamaru Charter Arms Bulldog and immediately formed the idea that would result in this thread. However I hit a roadblock because at this time Rich retired because of health problems. But when one door closes another opens and that door was assembly kit of the tomensuke pro Blaster.
What follows this intial intro post is the original build diary re-posted from the RPF for hopefully the benefit of the Propsummit community
Please enjoy. |
|
| Back to top |
|
|
|
|
 |
|
 |
|
|
|
|
| Author |
Message |
ItalianNinja86
Community Member
Joined: 11 Feb 2009
Posts: 49
|
| Posted: Fri Feb 28, 2014 8:53 pm Post subject: |
|
|
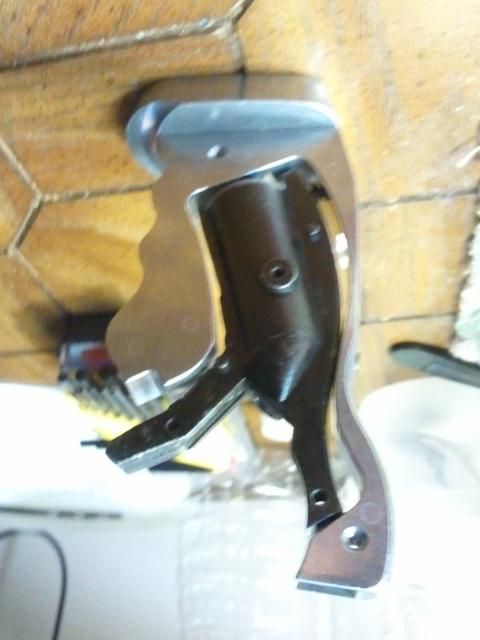
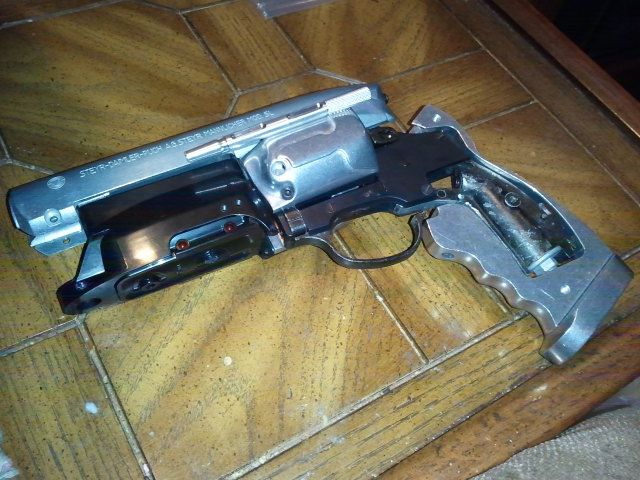
UPDATE 1: the Kanamaru Charter Arms .44 Bulldog
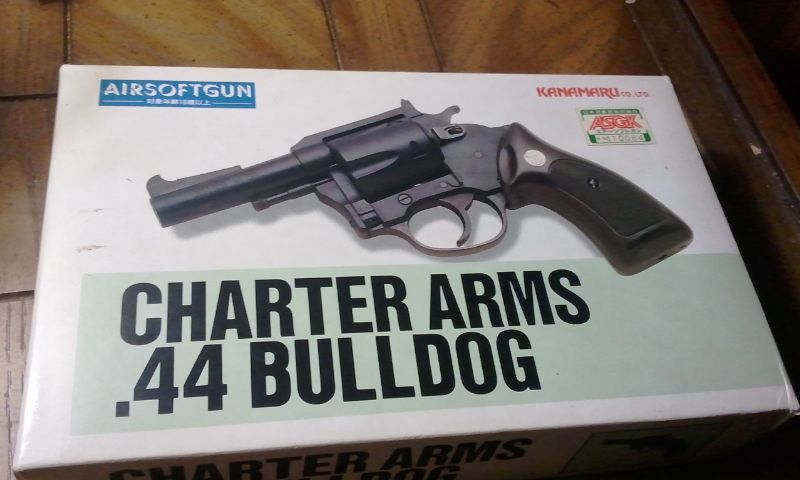
its a truly remarkable little airsoft gun for being I guess almost 30 years old at this point.
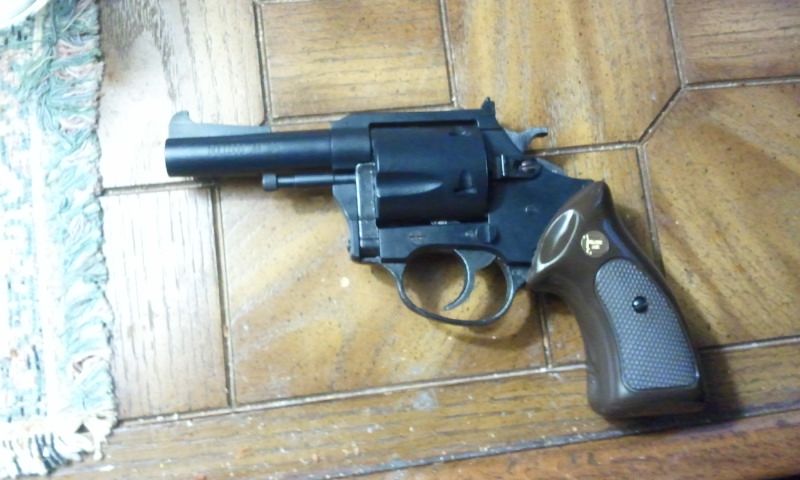
With an ABS plastic frame, plastic cylinder that folds out on one side to load, and a lot of meal pieces (hammer, trigger, the swig arm and I believe the frame for the grip are all metal) giving this gun a great weight and feel.
It was a shame doing to it what I had to do but surprisingly as you will see its a very simple airsoft gun to take apart.
It even comes with a blown up diagram showing what parts go where
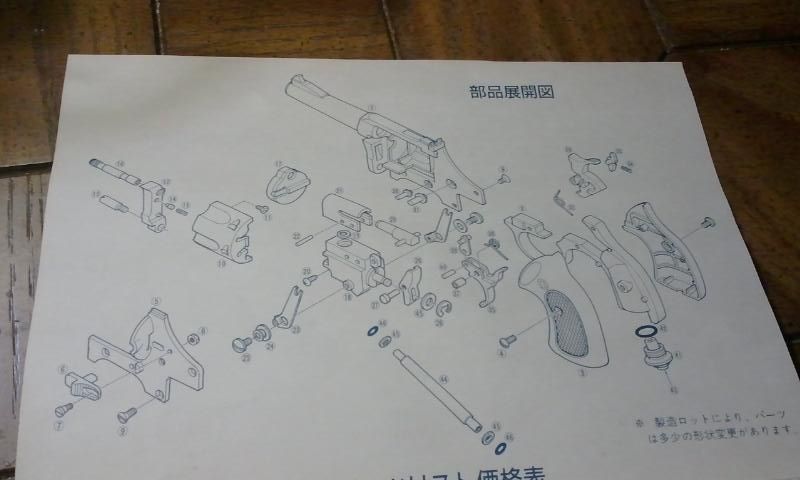
This made taking it apart easy and putting it back together while a little different once I make the modifications required
should be just as easy.
Update 2: tearing down in order to rebuild
in all honesty the Bulldog tears down really easy few simple screws and its in pieces but I'll let the pictures do the talking (with some words written by me :p)
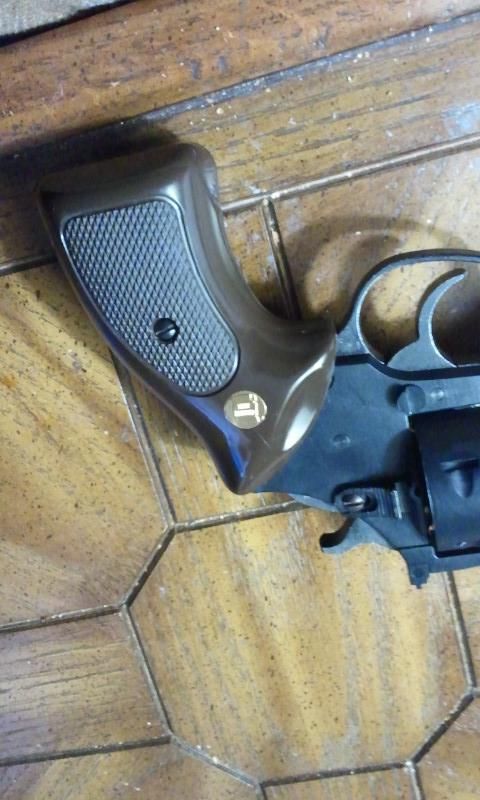
First off the grips are removed
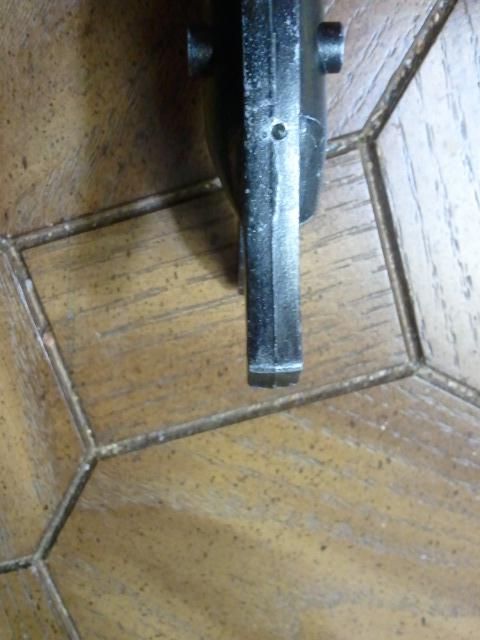
Now some may think it bad but since I knew what I wanted to do to this thing when I bought it I consider it lucky that the glue holding the barrel was loose and easily allowed me to take it off with out any damage to the barrel of frame.
also in the above picture you'll notice three screws holding the grip to the frame this is repeated on the other side as well this brings us to the next step.
remove the screw holding the swing arm in place. but be careful theres a small spring in the arm that goes up against the cyclinder cover. This screw also holds the front of the grip to the body of the air gun.
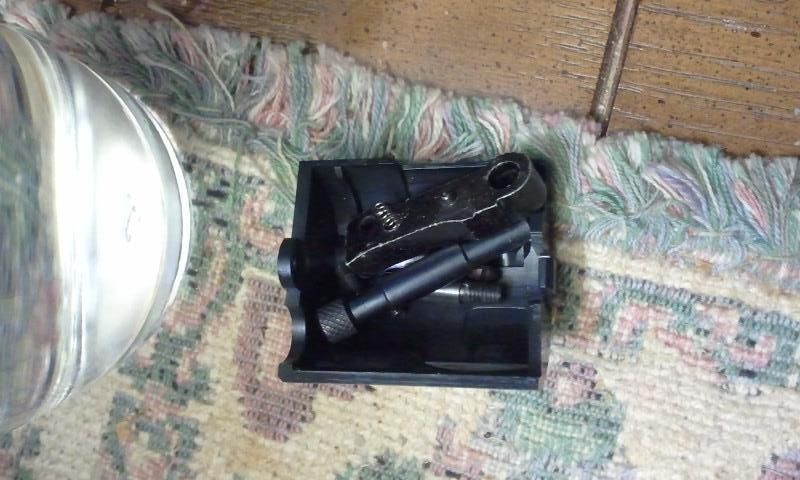
Once the swing arm is off you can remove it,the ejector rod, and the side cover. There's also a screw in the cover holding the ejector rod and arm to the side cover so remove those also.
Doing so should break the side whole assembly down like this:
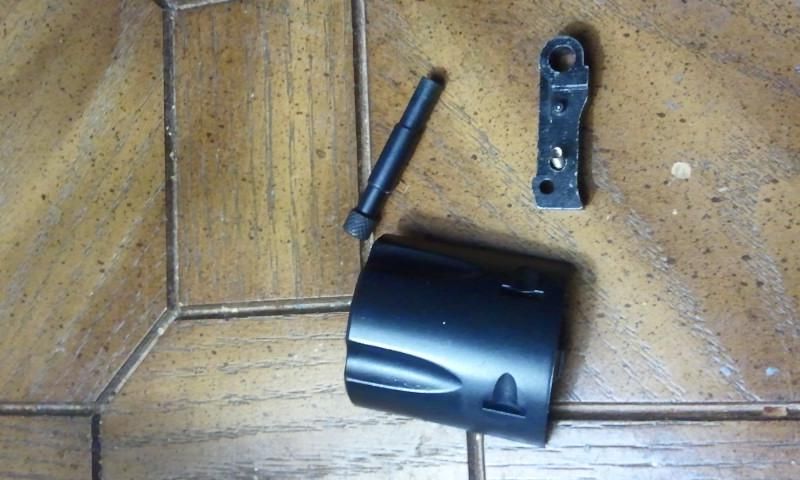
See the little spring I mentioned earlier (the blurry silver thing) do not lose this piece as it is a p.i.a. to find when dropped
Do what I did and use the side cover to hold all small pieces for now:
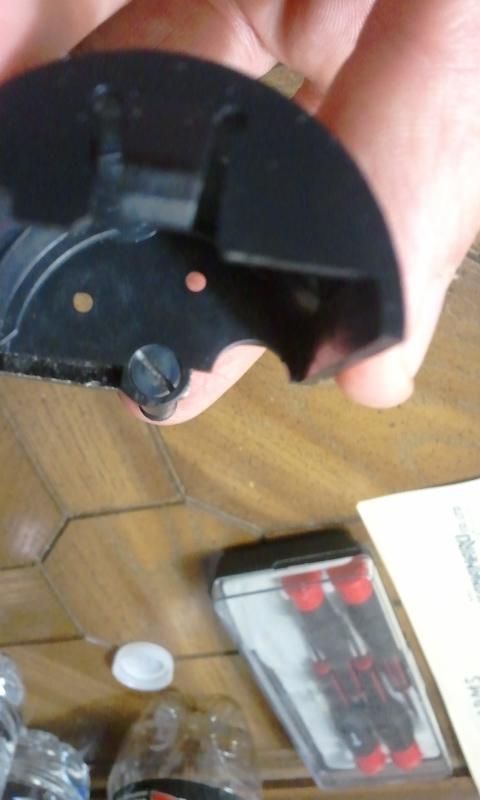
Also now is a good time to remove the screw holding the side latch
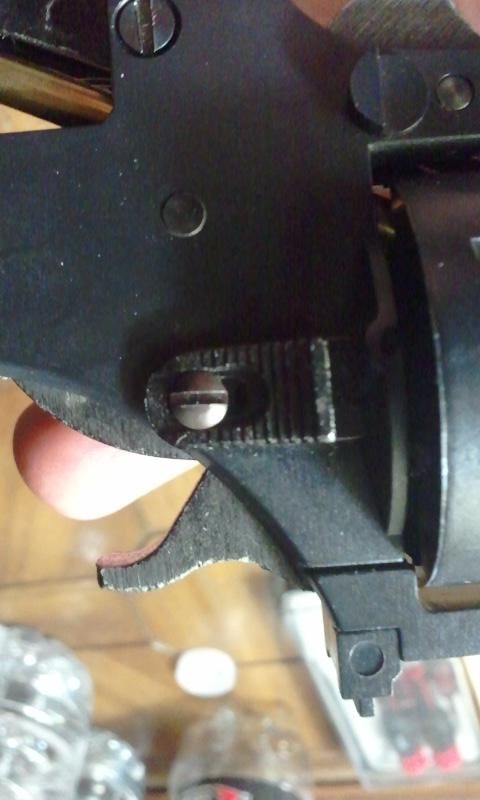
Be careful however cause on the other side is a small gold color threaded washer embedded into this side cover of the frame (make sure this stays in place or make sure to work over a surface where it will be easy to find if it does fall out).
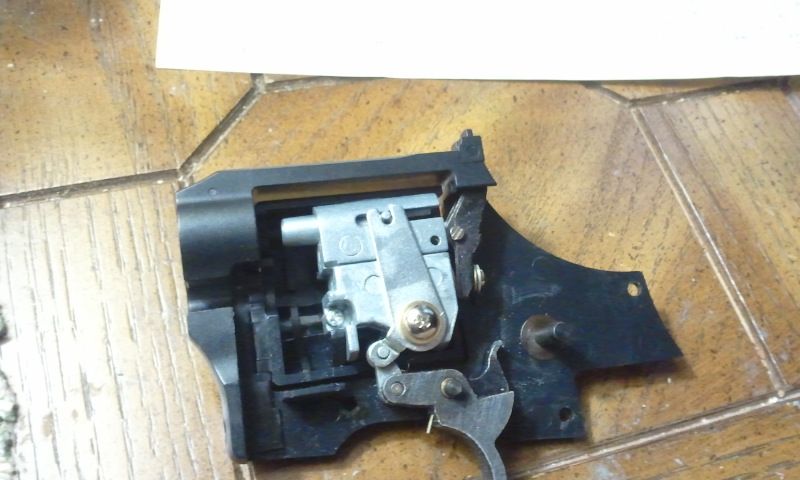
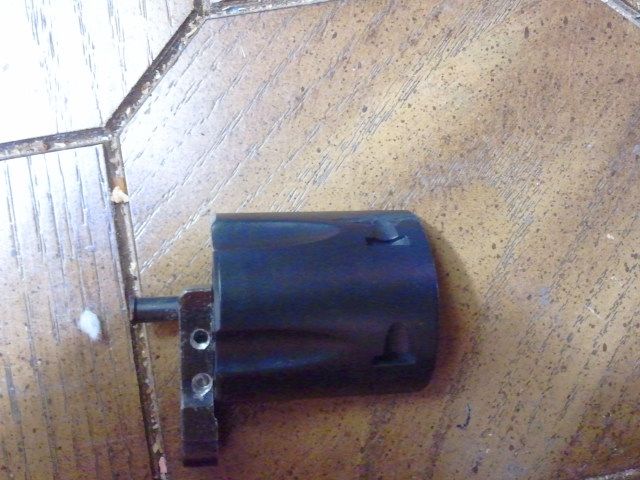
Remember how I told you there were six screws holding the grip to the body well now is the time to remove them and in doing so a side panel should slide right off showing the inner workings like so:
 |
|
| Back to top |
|
|
|
|
|
|
|
|
|
|
|
| Author |
Message |
ItalianNinja86
Community Member
Joined: 11 Feb 2009
Posts: 49
|
| Posted: Fri Feb 28, 2014 8:58 pm Post subject: |
|
|
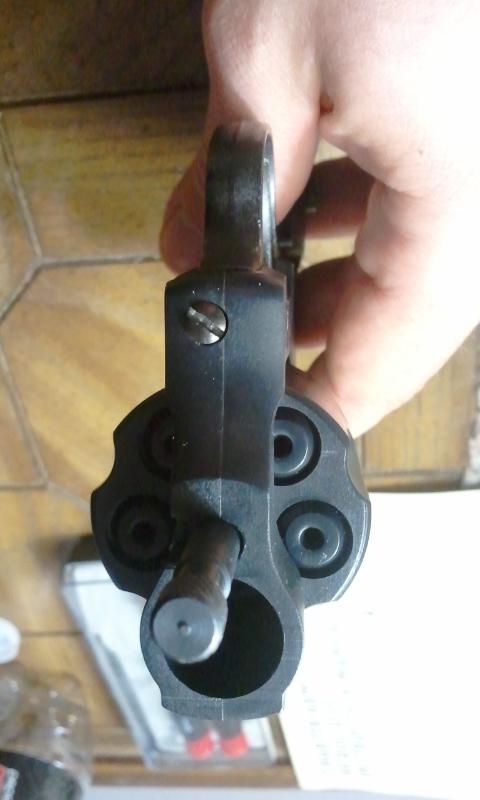
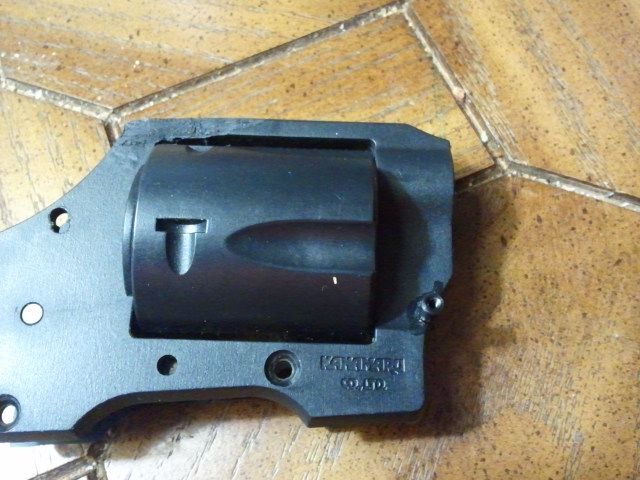
Update 2 part 2: the Tear Down Continues
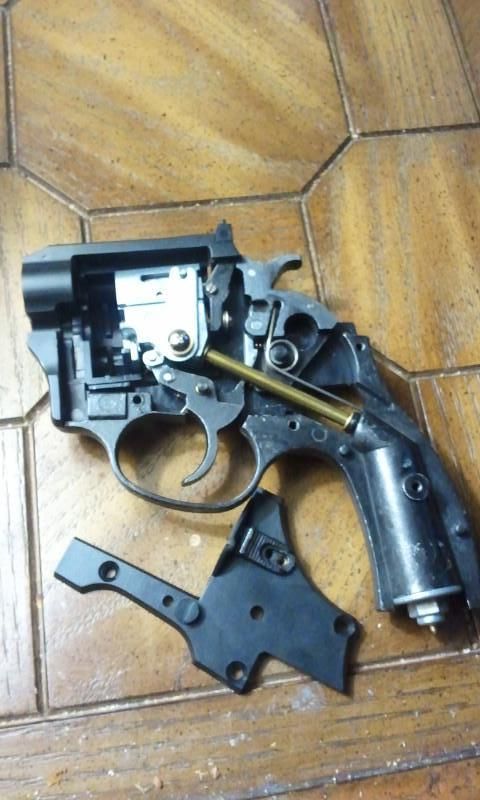
When I last left off it was on this image:
Why repost this image. Simple this picture single handedly shows all the major points inside the gun. From here we can see where the hammer sits, the trigger sits, the main spring for the hammer and how its sits on both hammer and grip, and finally the gas pipe.
First remove the spring be careful not to damage it in anyway or lose it when it comes out of its setting.
Next remove the three screws on the opposite side (you'll notice the three big holes in the side cover these repeat on the other side) this will allow you to remove the grip frame from the body.
Once the grip is removed carefully slide the gas pipe out of the grip (simple pull on it LIGHTLY) and make sure not to lose the O rings inside the holes.
Finally you can take the hammer off leaving the gun looking like this:
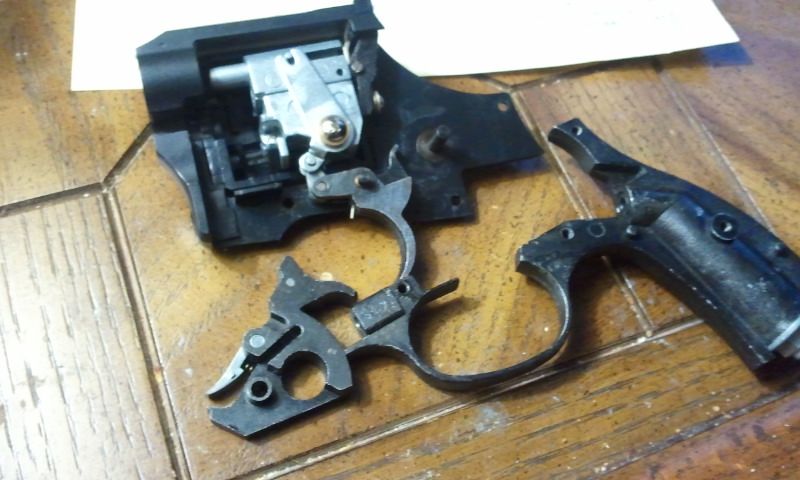
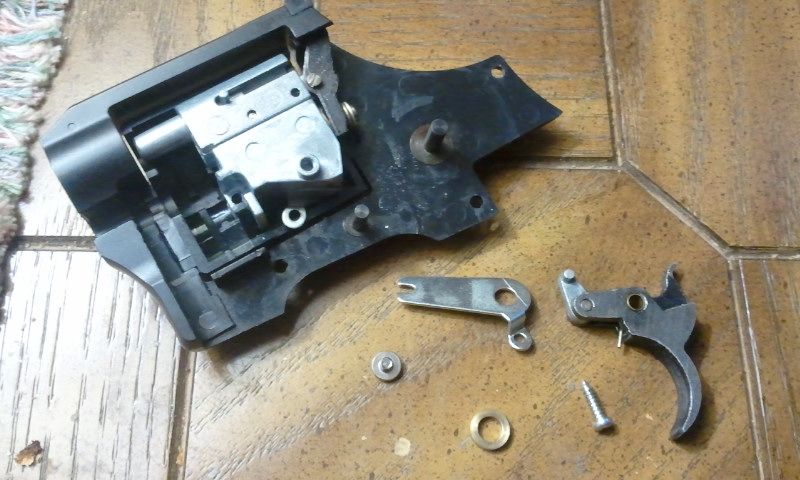
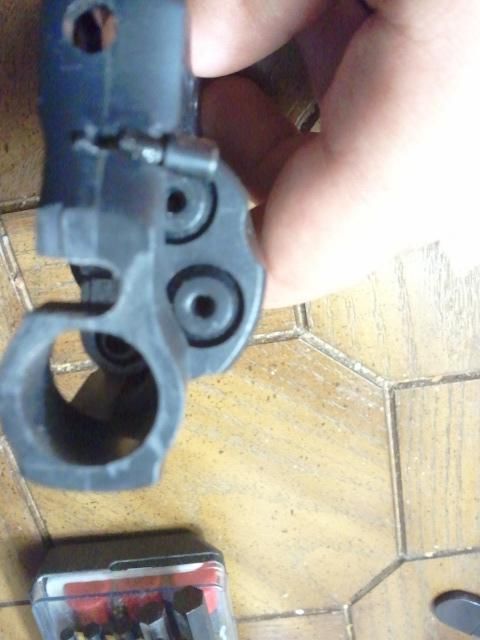
Next remove the trigger
you can see the trigger is held by an arm which works the bolt of the gear box this is repeated on the other side of the gearbox as well but luckily only this arm needs be removed to take the trigger out.
unscrew the arm screw and carefully take it out (it's a lot shorter then you think) next take the brass washer off, then finally carefull lift of the arm and remove the trigger.
it should break down like so:
Update 3:
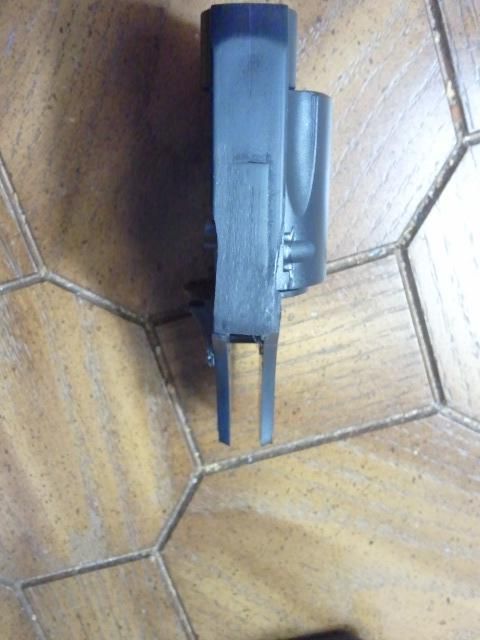
I removed the trigger guard quick and easy Then after fitting it into the frame realized it was slightly to wide so I had to cut it down some in order to fit in the tomenosuke outer frame this took the longest and was a major pain in the ass and slightly nerve wracking cause I was guessing how deep to cut it .
Drilled the hole for the front frame screw quick and clean drilled and tapped
Then came the rear frame screw this was more nerve wracking then triming the grip down because if I drilled to deep I puncture the air tank then its completely fubar.
Took forever cause I took my time with it but managed to make it through with no mistakes tapped it and it was done
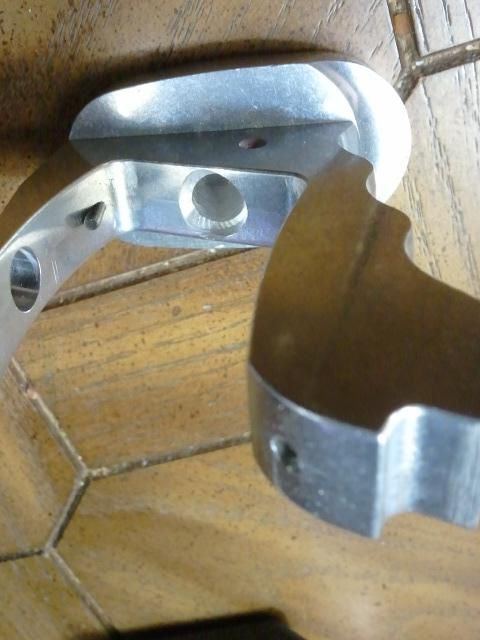
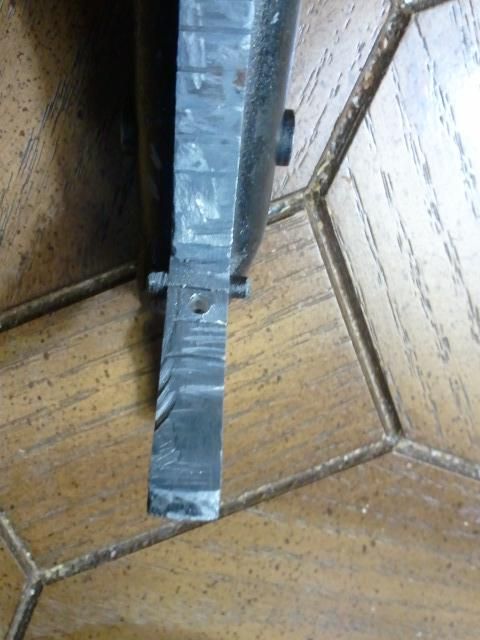
Then it was time for the first major modification to the Tomenosuke kit I had to drill the bottom of the frame to fit the air valve used three bits of various sizes to get the hole right the biggest bit being the biggest pain since I had to drill from inside the frame in order to make the hole deep enough the work (unlike the other two bits which where used from the outside bottom of the from)
Another shot of the hole from an angle showing how it looks
And another shot this time from the bottom of it showing that it runs all the way through the frame
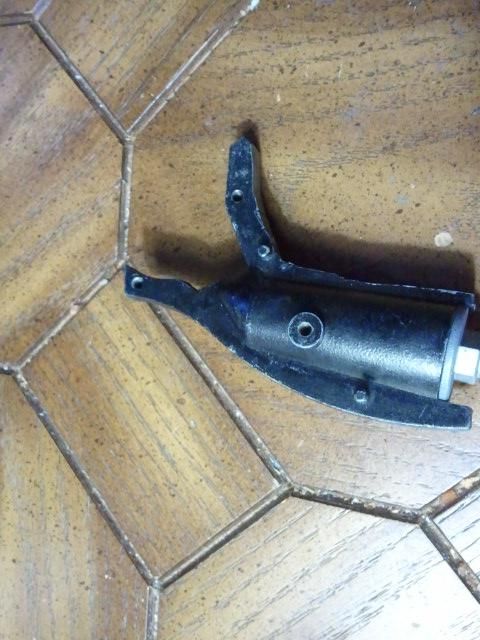
and after all that work we end up with this. The completed grip.
Next up Body modification and you
You may notice an extra screw thats because it holds the gear box in place however I believe the gearbox is also epoxied into place. |
|
| Back to top |
|
|
|
|
|
|
|
|
|
|
|
| Author |
Message |
ItalianNinja86
Community Member
Joined: 11 Feb 2009
Posts: 49
|
| Posted: Fri Feb 28, 2014 9:00 pm Post subject: |
|
|
Update 4: The Fellowship of the Body Modifications
Nothing much to really report on this section other then a few straight forward changes
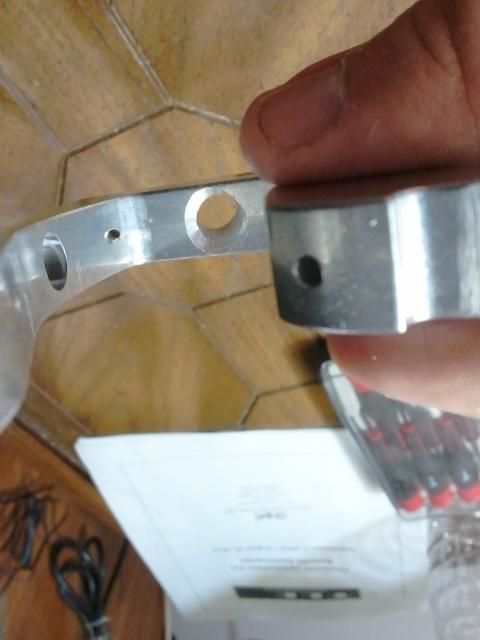
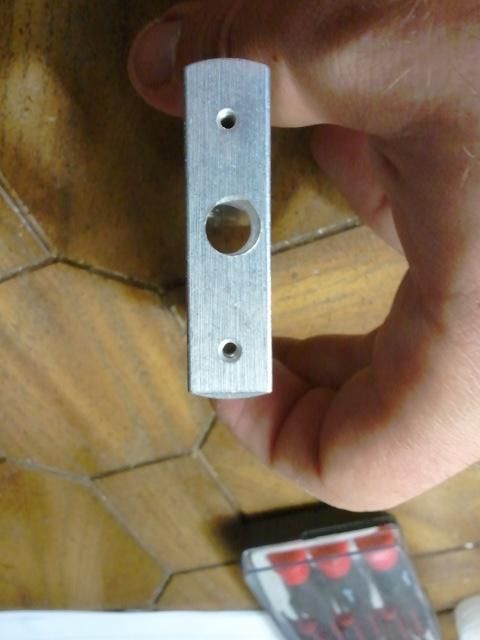
removed the rear sight and had to sand down thw sides of the rear frame so hat the bolt end cap would both fit around the body and also clear when pulled back.
had to route a hole in the front in order to fit the post so that the right side covers had a place to sit. I know it looks crooker in this pic but the parts sit straight and flush to the body.
This pic just shows what it looks like in profile and notice how the post is much straighter when viewed like this.
Side cover holes drilled out on the swing arm for the left side cover one screw wasnt long enough but I have a few on order
Update 5: The Two Preview Pics (Or why didn't I just included this in the other post)
And here are two preview pics a lot has been done since these where taken such as the whole upper receiver has been blued and the grip, butt plate, and side covers have all been painted a lovely shade of satin black

So what still needs to be done before its complete well....
Aluminum pipe for the barrel is ordered and should be here Saturday(hopefully) then I need to modify the bulldog barrel and a spare inner airsoft barrel I had lying around from when I turned my non functioning airsoft Thompson into a pulse rifle and some acrylic rod I have for another project to build and finish the barrel then blue it.
cut down and modifiy part of the original trigger guard and the second trigger so they combine into one piece that will allow the trigger assembly to function right (just realized this today when I started putting to gun back together and already have it worked out and all the pieces marked) need to also blue the second trigger.
File down where I cut parts of the tomensuke rigger guard to work with the bulldog also need to find the right screw for the front of it and make a small drill hole for the small screw that goes in the rear of the guard and need to blue the trigger guard.
Need to finish filing the area that I cut the ejector rod at so it movers more easily as it is now its in rather tight once the ammo box goes on.
Get a new bottle of gas and test fire it.
And that pretty much covers it with luck I should be done in a weeks time |
|
| Back to top |
|
|
|
|
|
|
|
|
|
|
|
| Author |
Message |
hirohawa
Community Member

Joined: 18 May 2006
Posts: 1067
|
| Posted: Fri Feb 28, 2014 10:24 pm Post subject: |
|
|
Holy cow!
Amazing work! |
|
| Back to top |
|
|
|
|
|
|
|
|
|
|
|
| Author |
Message |
ItalianNinja86
Community Member
Joined: 11 Feb 2009
Posts: 49
|
| Posted: Fri Feb 28, 2014 11:05 pm Post subject: |
|
|
Thanks Hirohawa.
but thats not even the best part
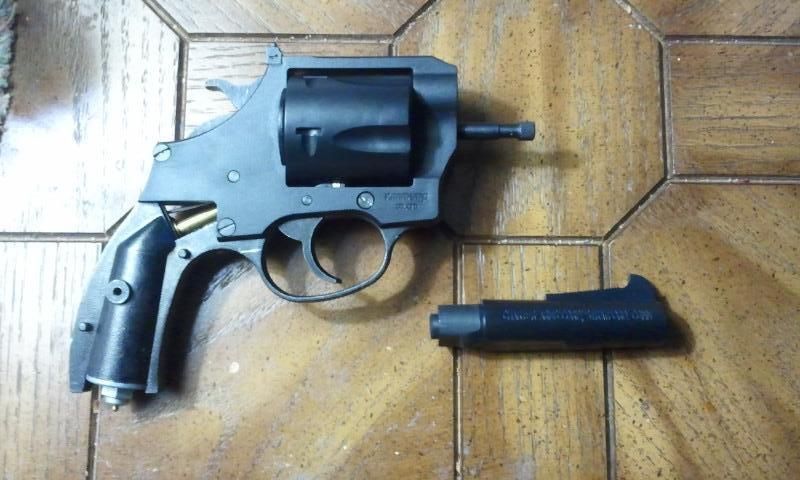
UpDATE 6: THE RETURN OF THE BUILD
Two months and a day later I'm finally back and ready to show the final stages of the build and the finished results.
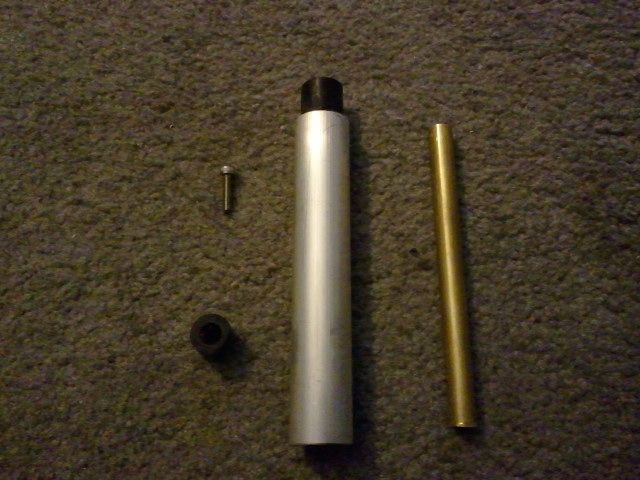
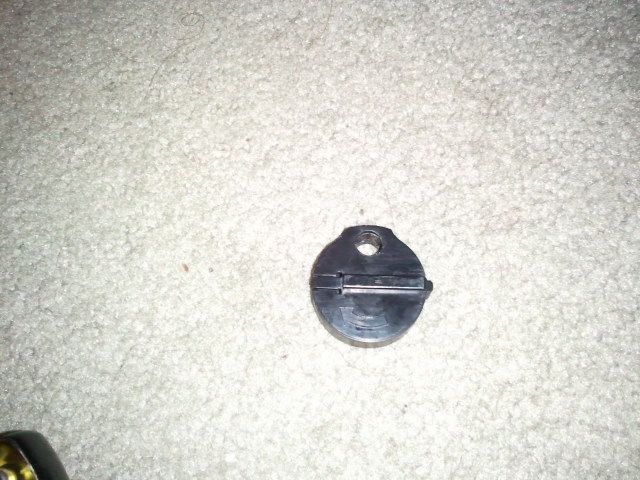
The aluminum barrel the black plug attached to it is/was the base of the bulldog barrel. The other black plug goes inside the barrel and was also part of the bulldog barrel. the brass pipe is a cut down inner tube from a M1A1 Thompson airsoft rifle I turned into my pulse rifle(yay for recycling pieces!) and the screw is actually one of the correct replacement screws I had to order since the other ones were half threads and not full threads (stupid poorly written amazon descriptions >_<)
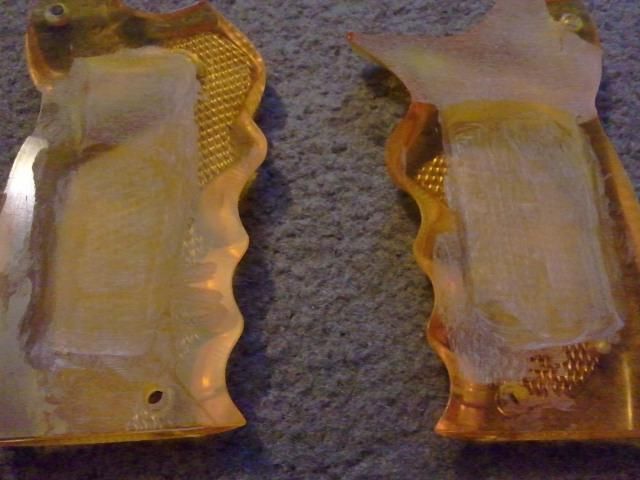
I'm sure this hurt some to look at but I had to dremel out some of the grips in order for the gas tank to sit properly you'll see the end results further down this post.
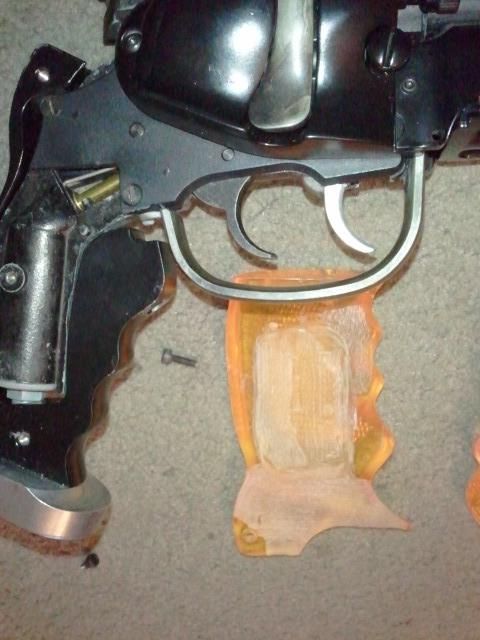
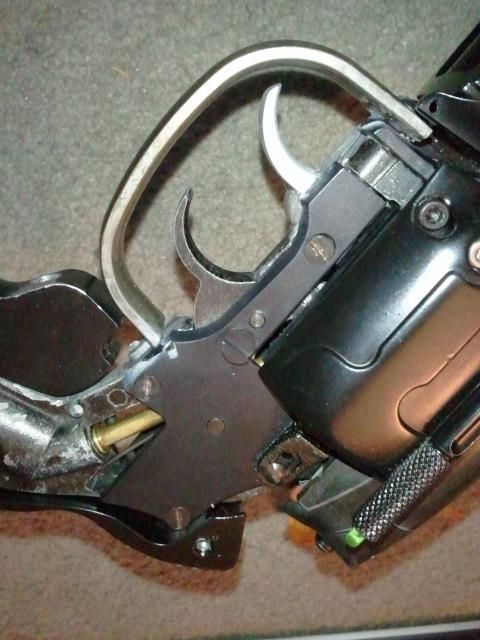
Two shots of the trigger guard attached (yeah I know I said its down and the second trigger isn't blued yet but its the thought that counts right?).
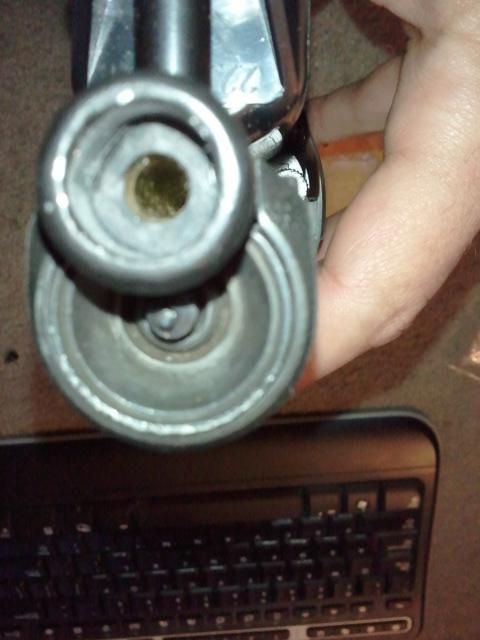
shot of inside the barrel since the brass tube sits inside both plugs and the end plug was a little loose I wrapped a bit of electrical tape around it and the fit is nice and snug now.
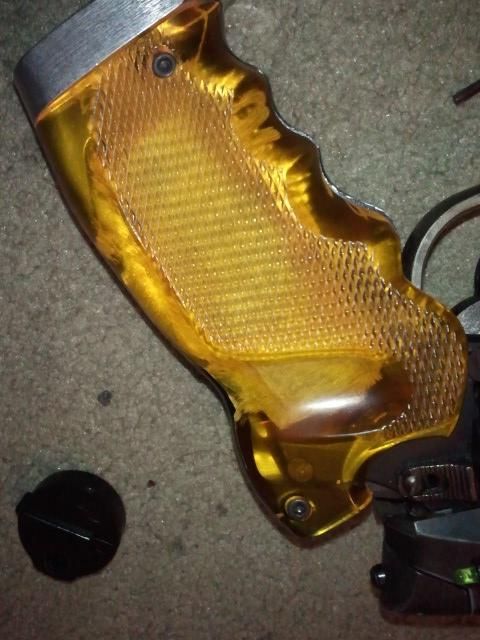
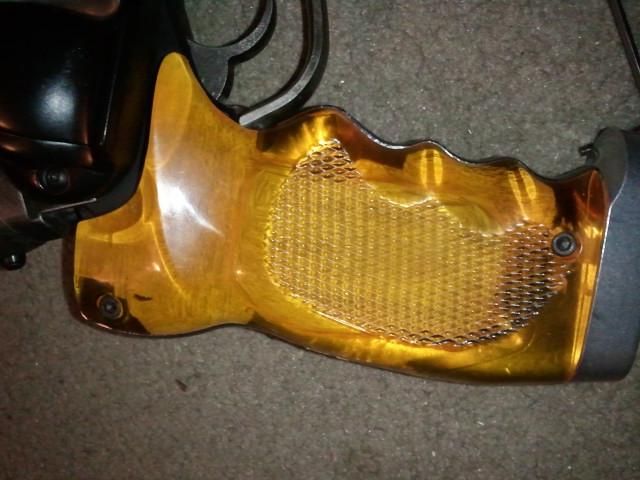
Two shots showing how the grips look when attached its noticable that it's been dug out but since it's a grip and the hands will cover the majority of them its almost completely hidden.
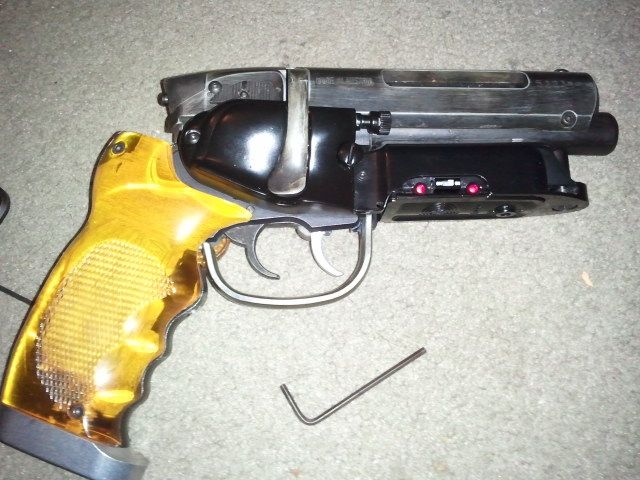
Two profile shots of the finished piece.
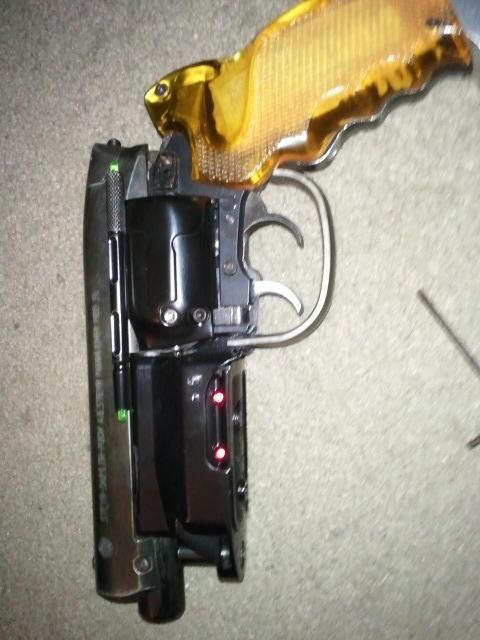
EROTIC AMMO CLIP PICTURE!!!

Side panel opens freely to allow the ammo clip to be loaded/unloaded and the clip slips in and out easily nothing grinds bumps scratches or makes life difficult to access the internals.
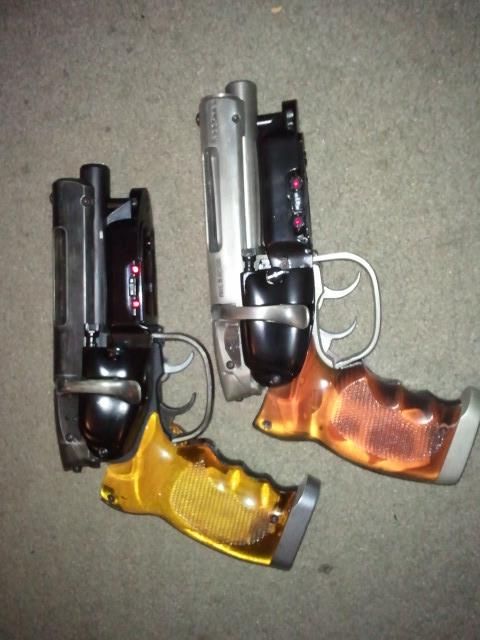
finally a comparison between the tomenosuke/airsoft hybrid and my 2010 Racprops model.
Both of these are nice but in the end the Racprops is a display piece while my hybrid model is made more for play how ever I will always love the Grips on this versions of Richs blaster they're just nice a beefy like they go with the rest of the gun. |
|
| Back to top |
|
|
|
|
|
|
|
|
|
|
|
| Author |
Message |
andy
Community Guide

Joined: 01 Nov 2006
Posts: 6237
Location: Rochester, NY
|
| Posted: Sat Mar 01, 2014 12:09 am Post subject: |
|
|
Impressive build man! Very nice work.
Andy |
|
| Back to top |
|
|
|
|
|
|
|
|
|
|
|
| Author |
Message |
joberg
Community Member
.jpg)
Joined: 06 Oct 2008
Posts: 9472
|
| Posted: Sat Mar 01, 2014 3:59 pm Post subject: |
|
|
Yes, indeed very good work on that gun. As far as I'm concerned, these grips are A+ in my book  |
|
| Back to top |
|
|
|
|
|
|
|
|
|
|
|
|
You cannot post new topics in this forum
You cannot reply to topics in this forum
You cannot edit your posts in this forum
You cannot delete your posts in this forum
You cannot vote in polls in this forum
|
|
|
|
|
|
|
|


