 |
 |
|
 |
|
| Author |
Message |
andy
Community Guide

Joined: 01 Nov 2006
Posts: 6237
Location: Rochester, NY
|
 Posted: Tue Dec 15, 2015 12:20 pm Post subject: Posted: Tue Dec 15, 2015 12:20 pm Post subject: |
 |
|
Very nice work, can't wait to see the finished project.
Andy |
|
| Back to top |
|
|
|
|
 |
|
 |
|
|
|
|
| Author |
Message |
hirohawa
Community Member

Joined: 18 May 2006
Posts: 1067
|
| Posted: Tue Dec 15, 2015 11:56 pm Post subject: |
|
|
| Amazing. When can I buy one? |
|
| Back to top |
|
|
|
|
|
|
|
|
|
|
|
| Author |
Message |
hole dweller
Community Member
Joined: 13 Aug 2009
Posts: 78
Location: Canada
|
| Posted: Sat Dec 19, 2015 12:35 pm Post subject: |
|
|
Wonderful work, where can I get one?
_________________
WWW.GFORCEMODELS.COM |
|
| Back to top |
|
|
|
|
|
|
|
|
|
|
|
| Author |
Message |
tinylight
Community Member
Joined: 19 Aug 2015
Posts: 29
Location: UK
|
| Posted: Sun Dec 20, 2015 9:21 am Post subject: |
|
|
Hirohawa & Hole Dweller - I'm casting them up at the moment and will hopefully have some kits ready and available early in the new year.
Just a small update.
I have used the same technique of layering thin glazes of colour on the trousers has I used for the shirt, however with the trousers being very dark the tonal variations are very subtle and virtually imperceptible in the photo. 
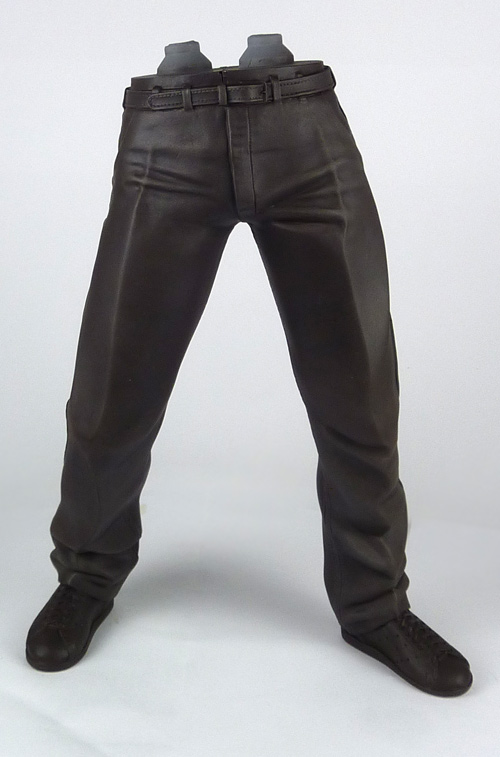
Belt painted. I have glazed the belt with some layers of dark brown ink to get a pleasing leathery sheen.
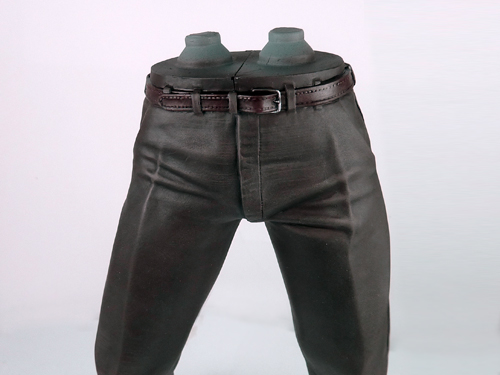
The shoes have been given a similar treatment to the belt but I have given them some extra weathering with powdered pigments.
Legs and torso assembled. The figure painting has been a little more challenging than I had anticipated and although I'm keen to see him finished I don't want to rush. However, most of the work so far will end up underneath the jacket and trench coat but it'll be nice to know it's there. 

Apparently there is a holiday coming up, so progress may slow down a little but it will be good to have a break and come back refreshed.

_________________
I make friends. They're toys. My friends are toys. I make them. It's a hobby. |
|
| Back to top |
|
|
|
|
|
|
|
|
|
|
|
| Author |
Message |
joberg
Community Member
.jpg)
Joined: 06 Oct 2008
Posts: 9447
|
| Posted: Sun Dec 20, 2015 9:54 am Post subject: |
|
|
This is a crazy paint job  Unbelievable!! Really eager to see the next update! Unbelievable!! Really eager to see the next update! |
|
| Back to top |
|
|
|
|
|
|
|
|
|
|
|
| Author |
Message |
hirohawa
Community Member
Joined: 18 May 2006
Posts: 1067
|
| Posted: Mon Dec 21, 2015 1:48 am Post subject: |
|
|
| tinylight wrote: | Hirohawa & Hole Dweller - I'm casting them up at the moment and will hopefully have some kits ready and available early in the new year.
|
Thanks! Looking forward to it! |
|
| Back to top |
|
|
|
|
|
|
|
|
|
|
|
| Author |
Message |
Velvet Morning
Community Member
Joined: 18 Nov 2011
Posts: 132
Location: San Francisco
|
| Posted: Wed Dec 30, 2015 12:54 pm Post subject: |
|
|
That paint work is fantastic, tinylight!
Best-S. |
|
| Back to top |
|
|
|
|
|
|
|
|
|
|
|
| Author |
Message |
tinylight
Community Member
Joined: 19 Aug 2015
Posts: 29
Location: UK
|
| Posted: Sun Jan 10, 2016 9:21 am Post subject: |
|
|
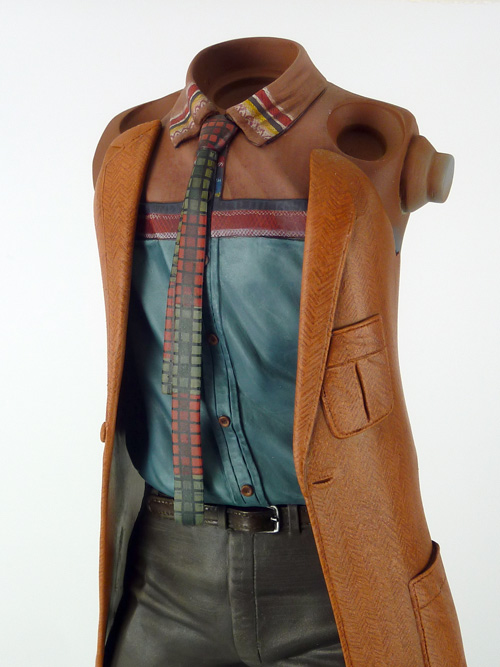
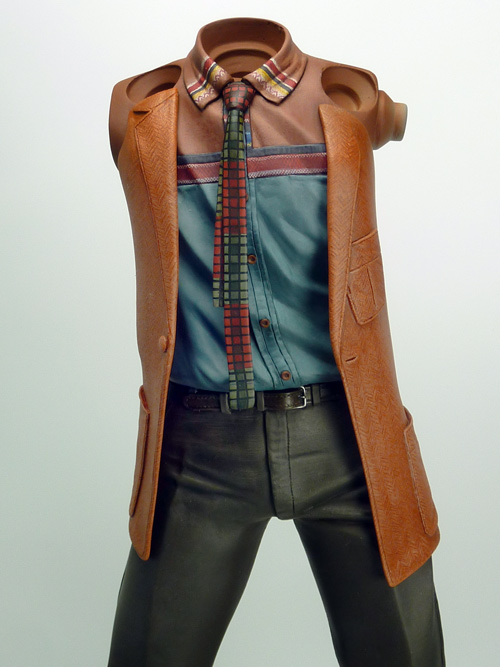
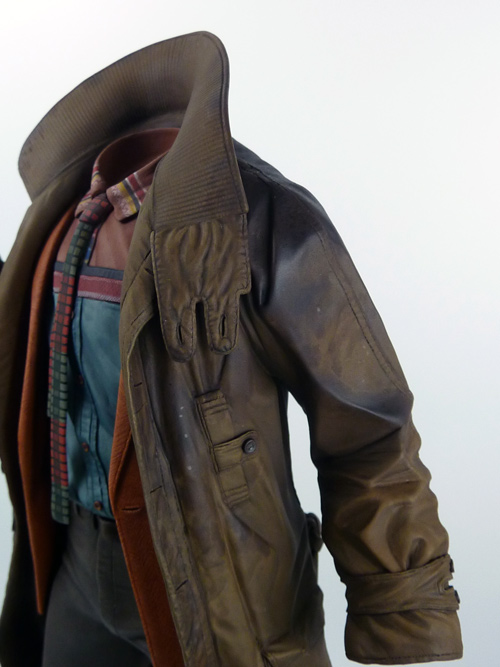
With the holidays over far too quickly it's time to return to the workbench and start work on the jacket.
The jacket is a heavier, more textured fabric so rather than use the airbrush for the base-coat I opted to apply the paint with a fine sponge. This meant that the paint had to be a little thicker than I usually work with and by sponging on several layers a fine texture began to cover the surface but not obstruct too many of the sculpted details.
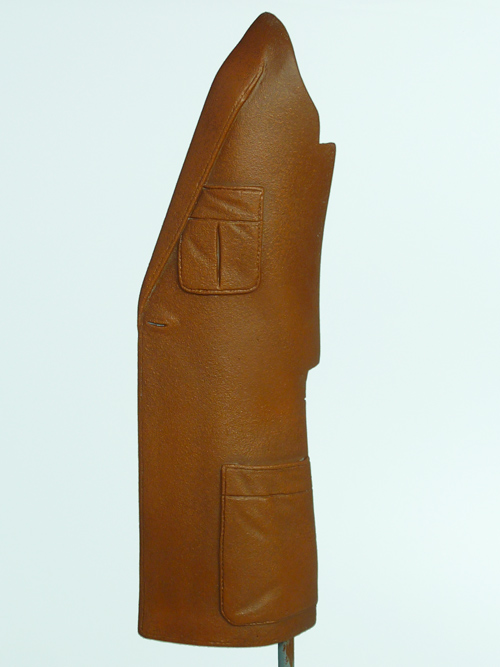
Layers were gradually built up with successively lighter tones, providing some highlights and also adding to the texture.
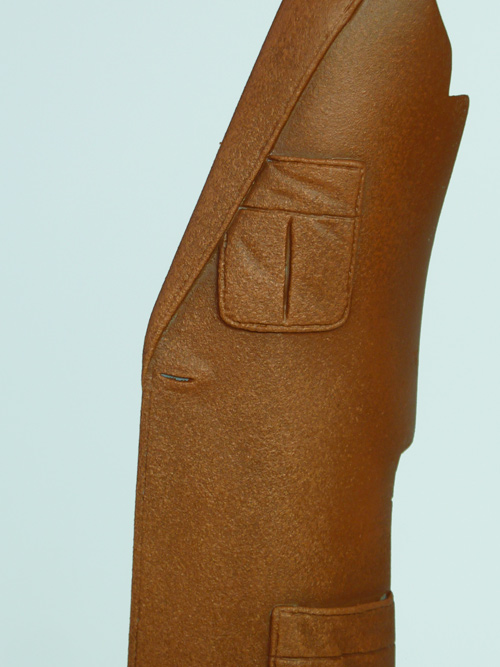
Both parts of the jacket were given the same treatment.
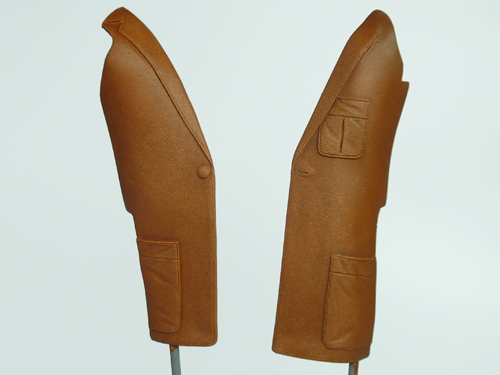
Once I was happy with the sponged texture and tonal variation I went over the pieces with a brush and painted in some further shadows and highlights. I also decided to paint in some more textural details to the fabric to help contrast it with the other elements of the outfit, the shirt, trousers etc.
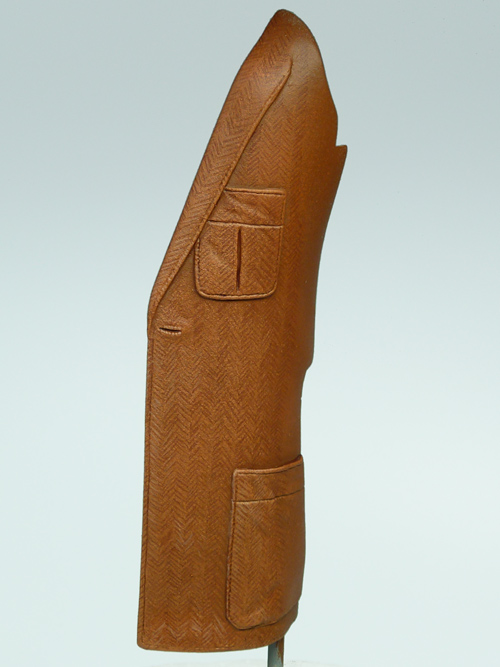
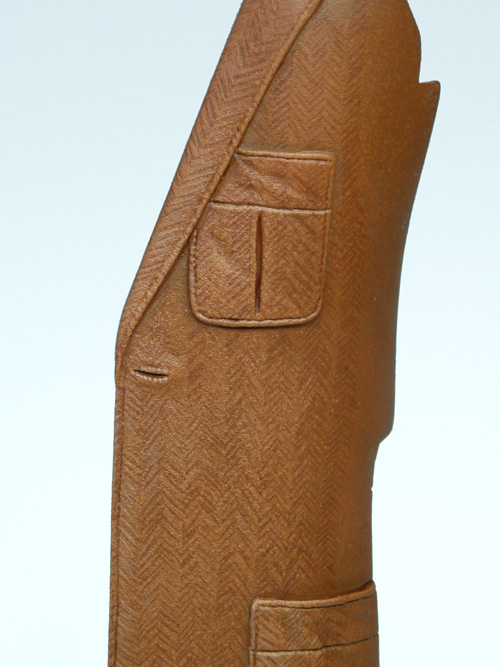
Jacket attached. Most of the jacket will be hidden but I wanted to be sure that once the trench coat is attached there wouldn't be any unpainted areas on show as it would be a real pain to try and get in there with a brush.
More soon...
_________________
I make friends. They're toys. My friends are toys. I make them. It's a hobby. |
|
| Back to top |
|
|
|
|
|
|
|
|
|
|
|
| Author |
Message |
Nexus7
Community Member

Joined: 13 Sep 2014
Posts: 440
Location: New York Metro Area
|
| Posted: Sun Jan 10, 2016 10:09 am Post subject: |
|
|
| Just amazing. |
|
| Back to top |
|
|
|
|
|
|
|
|
|
|
|
| Author |
Message |
Nexus7
Community Member
Joined: 13 Sep 2014
Posts: 440
Location: New York Metro Area
|
| Posted: Sun Jan 10, 2016 10:11 am Post subject: |
|
|
| Don't suppose you'd offer a version fully painted by you? |
|
| Back to top |
|
|
|
|
|
|
|
|
|
|
|
| Author |
Message |
joberg
Community Member
Joined: 06 Oct 2008
Posts: 9447
|
| Posted: Tue Jan 12, 2016 5:30 pm Post subject: |
|
|
That jacket is crazy (luv the herring bone pattern on it)...I noticed on the pics that the inside is not painted. Since the original jacket was not lined, the fabric inside is basically the same as the outside
Besides that, Pro-Job all the way! |
|
| Back to top |
|
|
|
|
|
|
|
|
|
|
|
| Author |
Message |
Velvet Morning
Community Member
Joined: 18 Nov 2011
Posts: 132
Location: San Francisco
|
| Posted: Thu Jan 14, 2016 4:36 pm Post subject: |
|
|
Now that is some serious paint detail!
The herringbone is top notch!
Best-S. |
|
| Back to top |
|
|
|
|
|
|
|
|
|
|
|
| Author |
Message |
tinylight
Community Member
Joined: 19 Aug 2015
Posts: 29
Location: UK
|
| Posted: Wed Jan 20, 2016 3:09 pm Post subject: |
|
|
Thanks guys.
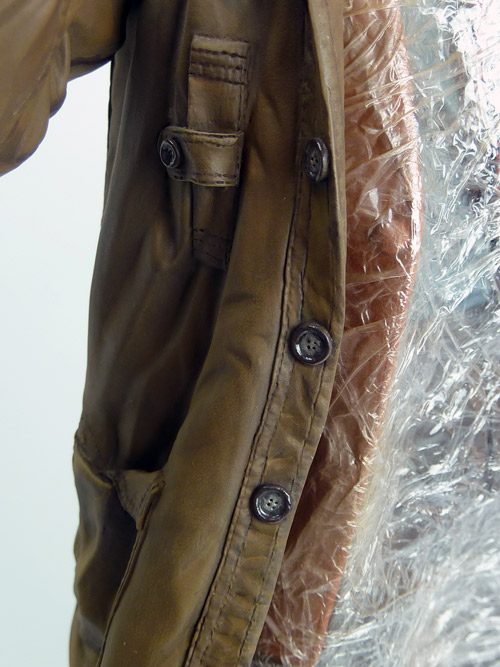
joberg - The jacket is painted on the inside, however light is creeping in behind the jacket piece and reflecting off the surface. I hadn't really noticed when I took the pic, photography isn't my strong point 
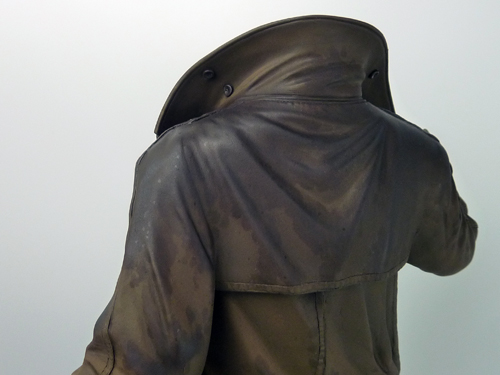
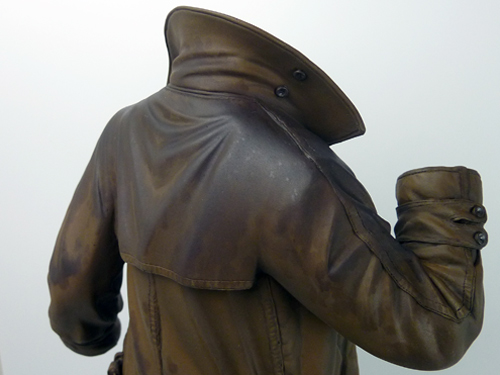
As the trenchcoat is in separate pieces it has to be assembled onto the figure before it can be painted. Thankfully the inside of the coat could be painted before assembly and the figure was masked with some plastic film, remembering to make it removable from under the finished coat.
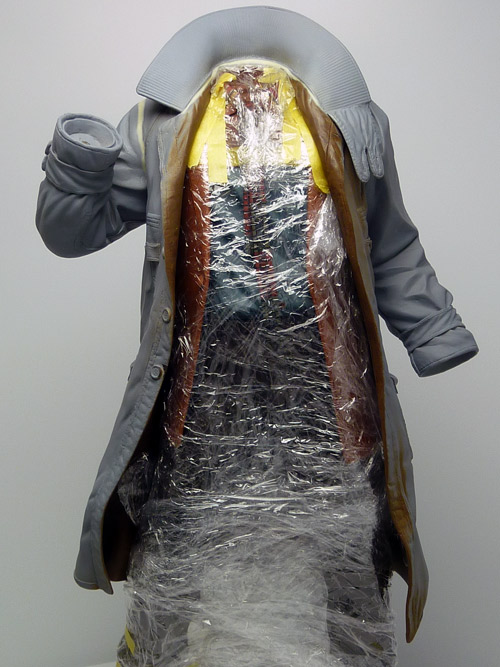
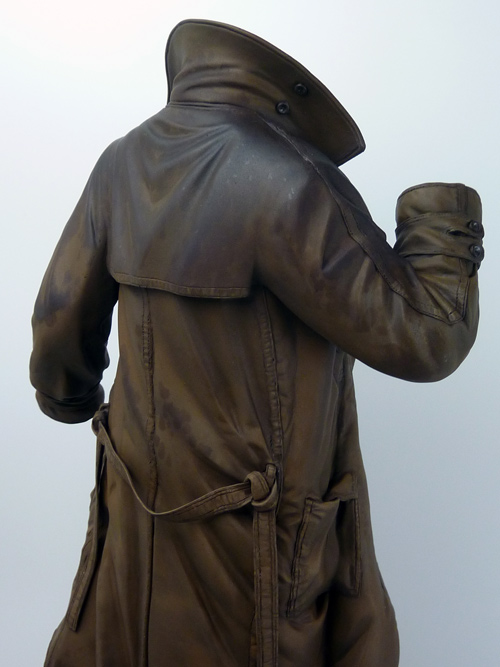
The trenchcoat is glued in place and the joints between the pieces are smoothed over with putty.
Working from dark to light the coat is given a generous basecoat of dark brown paint.
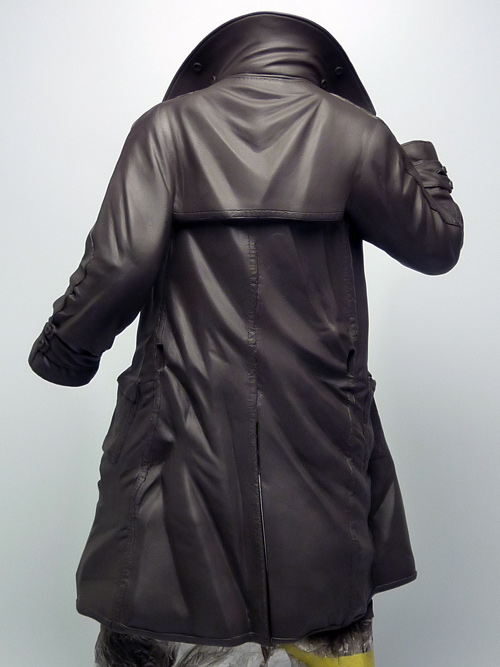
The coat is painted in a similar way to the rest of the clothing. Using a combination of airbrush and hand painting, the tones are gradually built up over several layers paying particular attention to where and how the light falls across the sculpted surface. Transparent glazes are also used to add some tonal variation and break up some of the large surfaces. Details and stitching are also picked out with the thin glazes and highlighted to make them stand out a little.
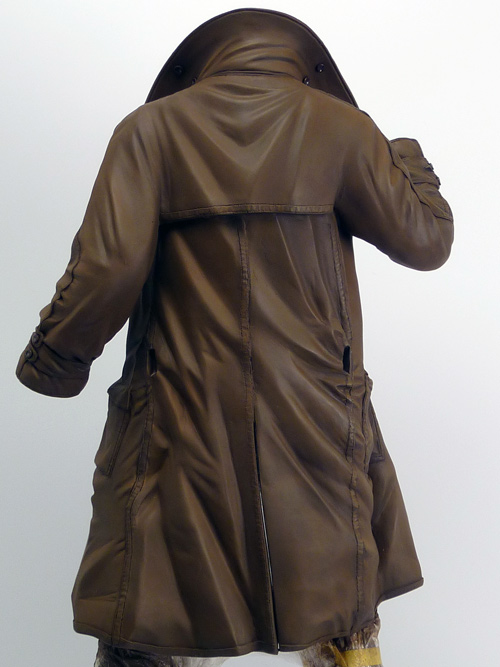
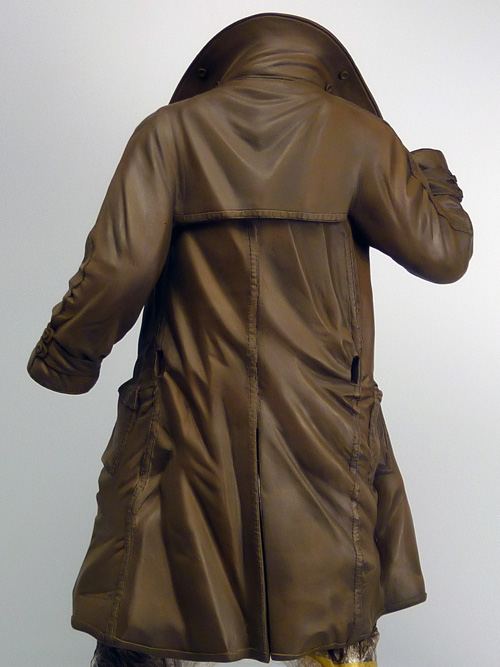
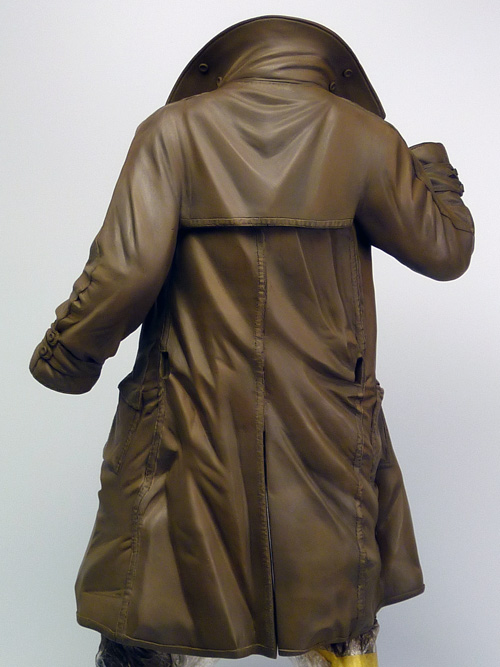
Buttons are painted in and given a coat of semi-gloss varnish.
Masking is carefully removed and any areas overlooked between the inside and outside of the coat are touched in by hand.

Finally, the belt is painted in the same colours as the coat and attached.
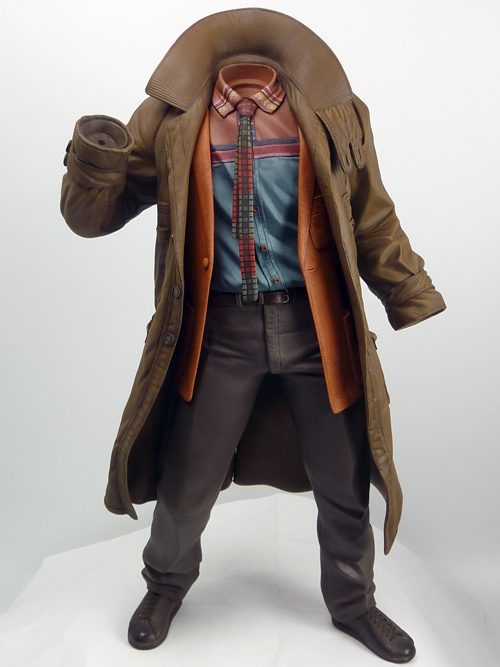
I'm undecided as whether or not to add some rain marks to the coat. I'm keen not to overdo the effect and don't want the figure to look as though it's in the midst of a downpour, but would like to show some 'environmental influence' to add a little more to the 'feel' of the figure. Maybe something like this perhaps?

What do you guys think?
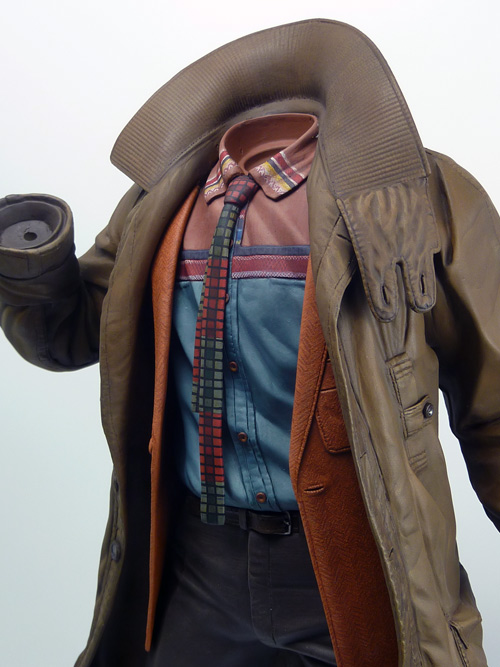
Other than that, just the head, hands and blaster to go…
_________________
I make friends. They're toys. My friends are toys. I make them. It's a hobby. |
|
| Back to top |
|
|
|
|
|
|
|
|
|
|
|
| Author |
Message |
joberg
Community Member
Joined: 06 Oct 2008
Posts: 9447
|
| Posted: Wed Jan 20, 2016 7:10 pm Post subject: |
|
|
Another home-run with that coat mate When I show those pics to other people, I have to remind them that it's a sculpted figure!
They cannot believe it is  If I buy one, I'll try to come up to your painting skill level...but you've put that bar wwaaayyy high! If I buy one, I'll try to come up to your painting skill level...but you've put that bar wwaaayyy high! |
|
| Back to top |
|
|
|
|
|
|
|
|
|
|
|
| Author |
Message |
Bwood
Community Member
Joined: 20 Sep 2009
Posts: 843
|
| Posted: Wed Jan 20, 2016 9:30 pm Post subject: |
|
|
I like the rain...  |
|
| Back to top |
|
|
|
|
|
|
|
|
|
|
|
| Author |
Message |
spinner 44
Community Member

Joined: 06 Nov 2006
Posts: 202
Location: Madrid, Spain
|
| Posted: Thu Jan 21, 2016 6:35 am Post subject: |
|
|
| Everything about this proyect touches perfection. Amazing and time again |
|
| Back to top |
|
|
|
|
|
|
|
|
|
|
|
| Author |
Message |
Buch
Community Member

Joined: 27 Feb 2014
Posts: 1184
Location: Copenhagen, Denmark
|
| Posted: Thu Jan 21, 2016 8:34 am Post subject: |
|
|
Perfect in every detail
_________________
Monsieur, azonnal kövessen engem bitte |
|
| Back to top |
|
|
|
|
|
|
|
|
|
|
|
| Author |
Message |
andy
Community Guide
Joined: 01 Nov 2006
Posts: 6237
Location: Rochester, NY
|
| Posted: Thu Jan 21, 2016 7:07 pm Post subject: |
|
|
Looking absolutely great. The rain will be a nice touch. I love weathering of all sorts. The details are what make it top level.
Andy |
|
| Back to top |
|
|
|
|
|
|
|
|
|
|
|
| Author |
Message |
tinylight
Community Member
Joined: 19 Aug 2015
Posts: 29
Location: UK
|
| Posted: Thu Jan 28, 2016 1:03 pm Post subject: |
|
|
Thanks once again for the comments.
joberg - don't let my painting put you off
Bwood and Andy - Thanks for the input and helping me take the plunge…
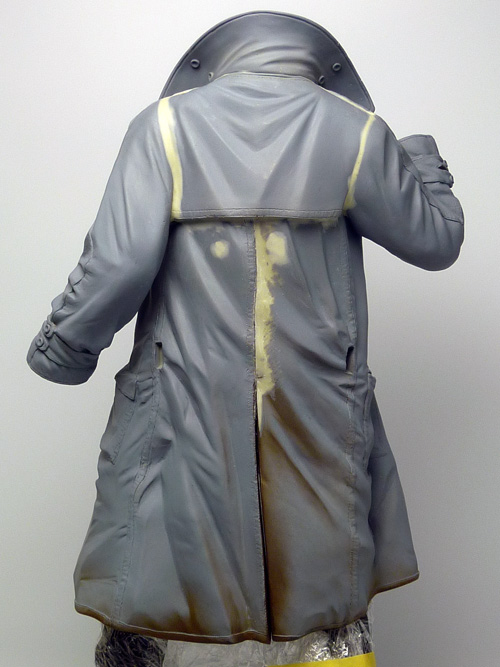
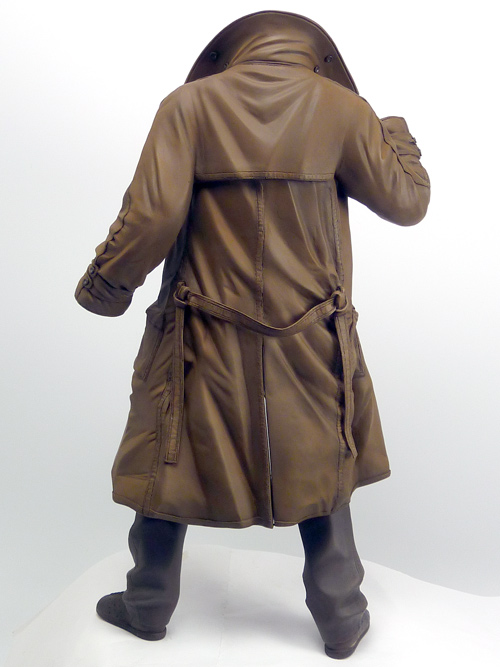
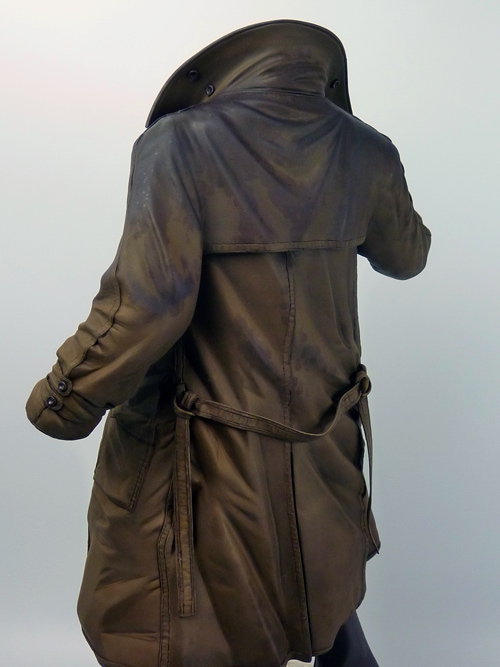
This might well have been the most challenging aspect of the painting so far for me. Not only is it an effect I've never attempted before but there was a good chance I could really mess-up the paintwork I had done on the coat, not something I would want to repeat. Rain, or the effects of rain are very tricky to reproduce especially at scale and I was keen not to go anywhere near copius amounts of gloss varnish. I wanted the figure to look as though it had been out in the rain but not currently stood in a deluge or completely soaked. I searched high and low for some decent reference pics but actually ended up standing out in a rain shower in a coat of similar fabric and then taking some photos of the way the rain patterned and soaked into the material!
Replicating the way water soaks into fabric was quite difficult as painted plastic is not porous, so I tried various methods on test pieces and found that oil paint highly diluted with mineral spirits seemed to 'soak' into the matt varnished surface of the coat. Once thinned down the pigment is quite weak and took many, many applications slowly building up the rain soaked areas. I nervously applied the staining following the reference from my own wet coat. Once I was ok with the 'soaked in' areas I airbrushed a darker tone over the higher points where the coat would have been in the rain longer. The final round of airbrushing was done sparingly with a little satin varnish just to reinforce the damp fabric. Finally I dotted a couple of areas with satin varnish to try and show a few raindrops lingering on the damp surface.
Unfortunately as this was a bit of a 'live' experiment I neglected to take any in-progress shots but here are some of the finished coat...
In case you thought I was slacking-off with all this painting, I'm almost there with the kits.
I had a little break in the resin supply chain which delayed some of the casting for a while. I'm nearly ready to start boxing up so they should be good-to-go soon...

_________________
I make friends. They're toys. My friends are toys. I make them. It's a hobby. |
|
| Back to top |
|
|
|
|
|
|
|
|
|
|
|
| Author |
Message |
joberg
Community Member
Joined: 06 Oct 2008
Posts: 9447
|
| Posted: Thu Jan 28, 2016 5:34 pm Post subject: |
|
|
That's it!! I quit  DUDE!! Amazing paint effects. It's going to be difficult to replicate all of your tricks (even with the tuto)...but I'll try DUDE!! Amazing paint effects. It's going to be difficult to replicate all of your tricks (even with the tuto)...but I'll try
Eager to see the rest coming to life! |
|
| Back to top |
|
|
|
|
|
|
|
|
|
|
|
|
You cannot post new topics in this forum
You cannot reply to topics in this forum
You cannot edit your posts in this forum
You cannot delete your posts in this forum
You cannot vote in polls in this forum
|
|
|
|
|
|
|
|


