 |
 |
|
 |
|
| Author |
Message |
8th_Passenger
Community Member

Joined: 28 Nov 2009
Posts: 443
Location: Hertfordshire, UK
|
 Posted: Sun Jun 05, 2016 3:41 pm Post subject: Posted: Sun Jun 05, 2016 3:41 pm Post subject: |
 |
|
Thank you Isnochys79 for your comments.
Colin
_________________
Ripley: What's it key on?
Ash: Micro changes in air density. |
|
| Back to top |
|
|
|
|
 |
|
 |
|
|
|
|
| Author |
Message |
clutch
Community Member

Joined: 12 Dec 2006
Posts: 548
|
| Posted: Tue Feb 07, 2017 4:51 pm Post subject: |
|
|
When can we expect kits?  |
|
| Back to top |
|
|
|
|
|
|
|
|
|
|
|
| Author |
Message |
Ki-Djowac
Community Member
Joined: 23 Feb 2012
Posts: 164
Location: Belgium
|
| Posted: Fri Feb 10, 2017 3:49 am Post subject: |
|
|
Masterpiece !!!
What an amazing job. Most excellent work sir. Well done !
_________________
 |
|
| Back to top |
|
|
|
|
|
|
|
|
|
|
|
| Author |
Message |
8th_Passenger
Community Member
Joined: 28 Nov 2009
Posts: 443
Location: Hertfordshire, UK
|
| Posted: Sat Feb 11, 2017 4:36 pm Post subject: |
|
|
ki-Djowac thanks for your comments. They are much appreciated.
Clutch, in answer to your question a kit had crossed my mind! (I will explain later my thought on such an idea).
I have actually been making three units since early on in the build.
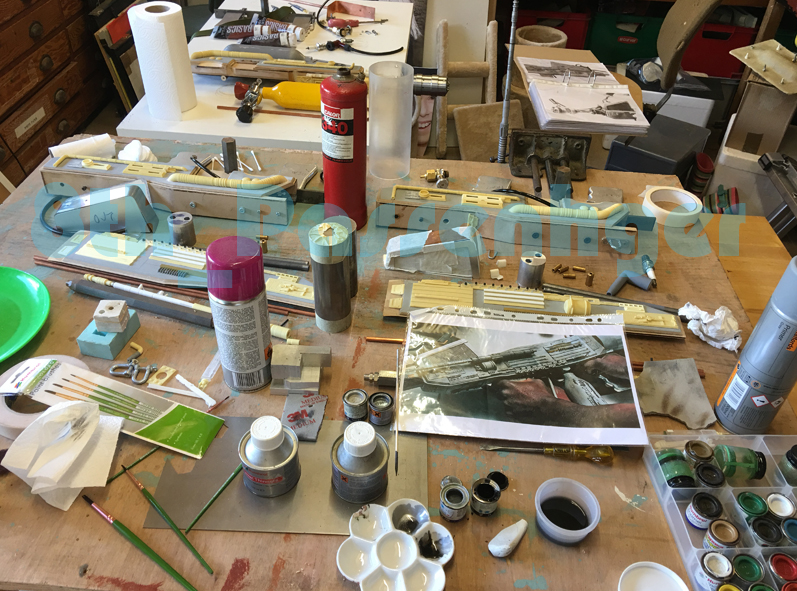
This is one of the main reasons it took me so long to finish the first one.
They have pretty much taken up all my free time over the last three years. There were long periods where I lost all motivation.
Two are now finished and the third I have put on hold. I need to make something else before I can return to it.
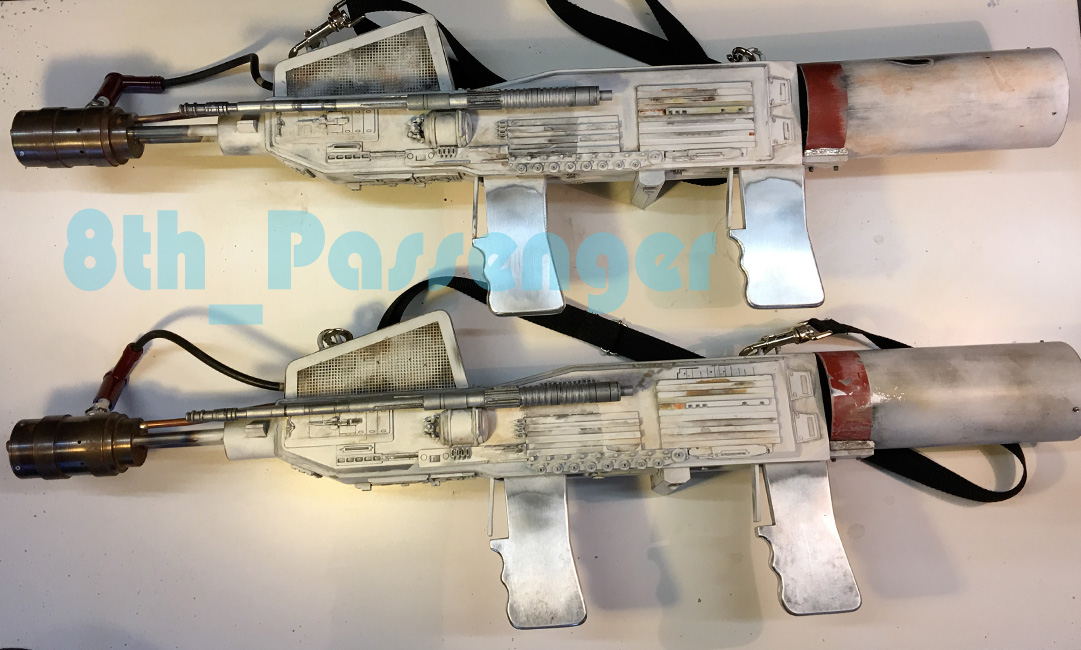
Just a note here about the red stripe on the rear tube. Why is there a red stripe? I put the red stripe on because back in 1987, that's what I saw. It just carried over to 2016. But now I think it's just a dirty mark left by the gaffer tape holding the rear propane canister in place. I have since reworked the paint job on one of the units to be more in keeping with that look.
Since I posted pictures of my first finished unit there has been other developments in the build (This kind of ties in with a potential kit).
Apologies as some of the images appear to be on the large side in this post.
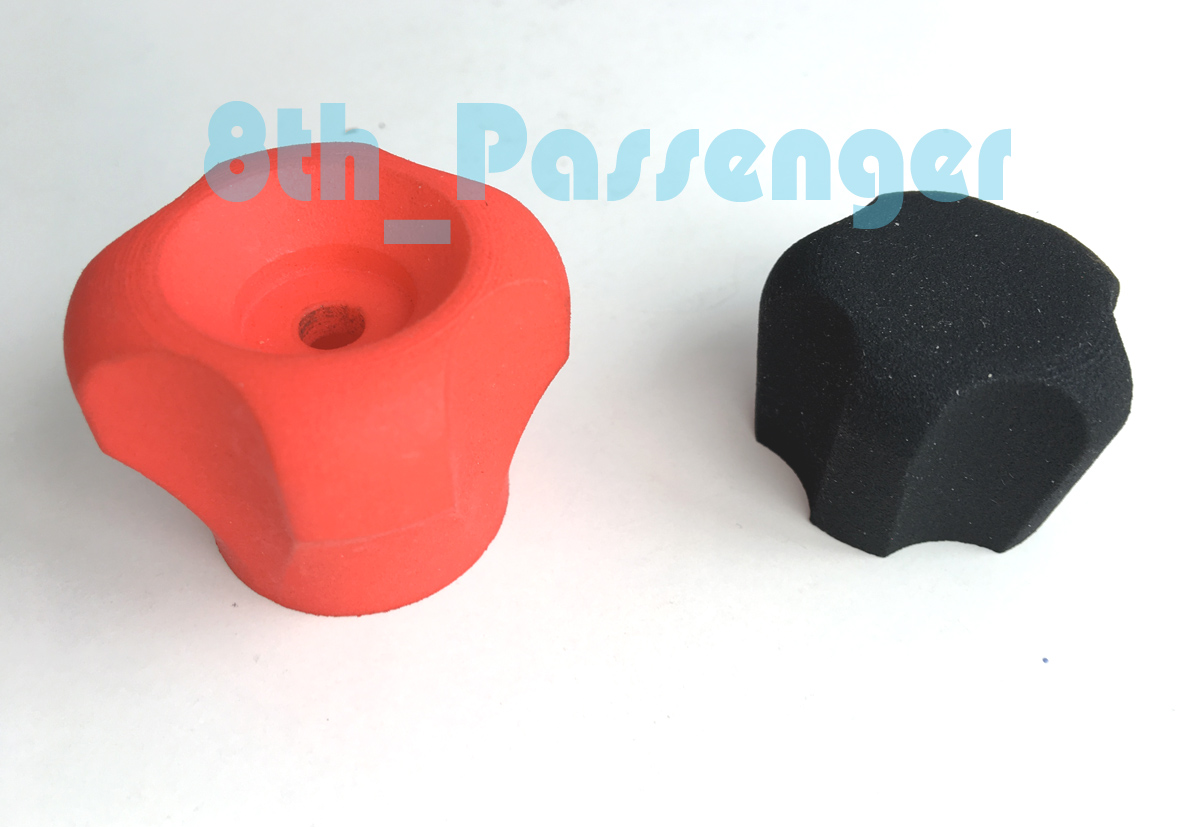
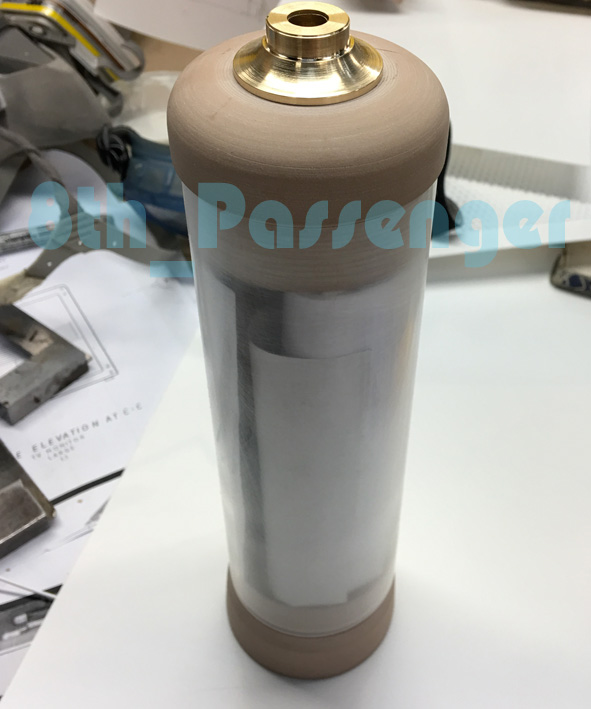
I was having problems finding another Scuba bottle and yoke for the second unit. So I decided to have a go at making one.
I started off by building a 3D model.
.jpg)
The main criteria of replicating this was that it be robust.
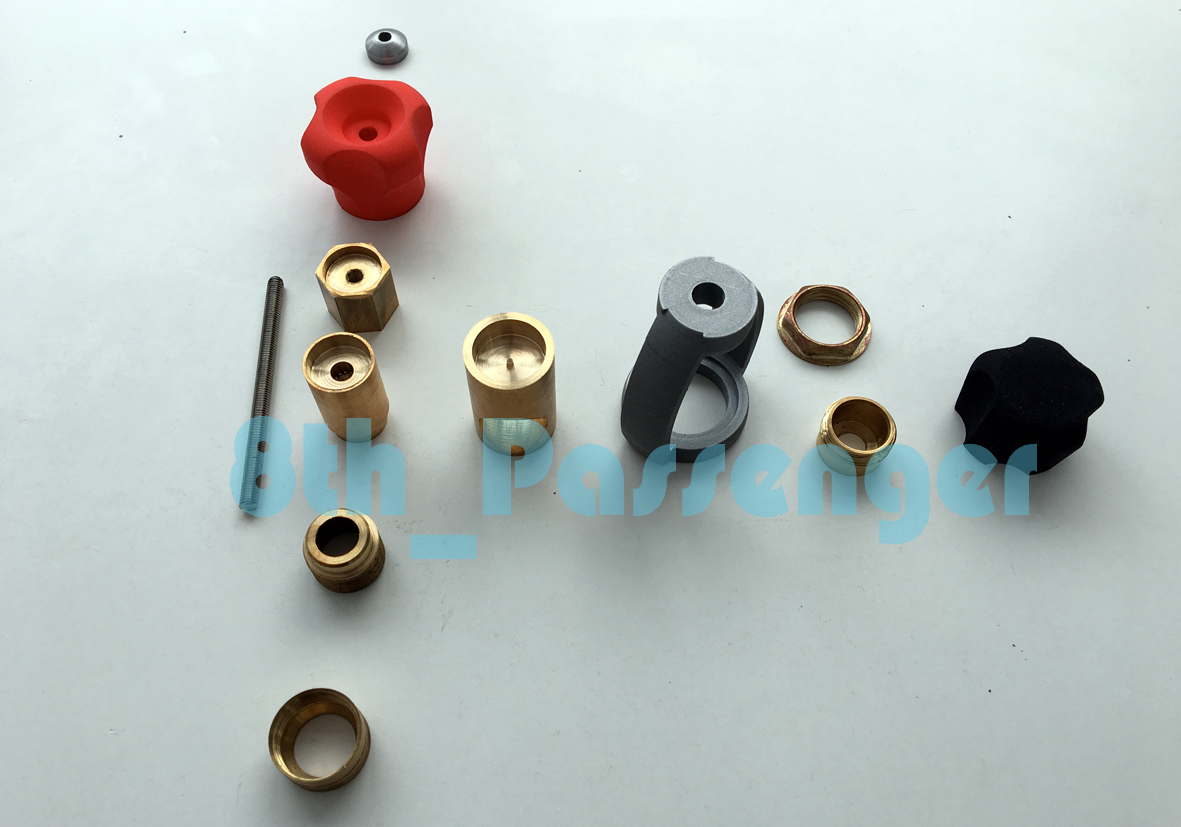
I uploaded the files I had created for the two knobs and had them printed at shapeways.
A friend printed me the clamp.
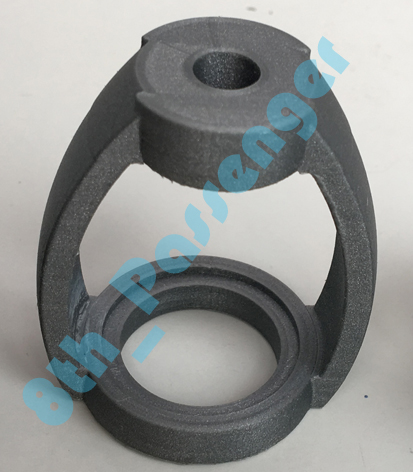
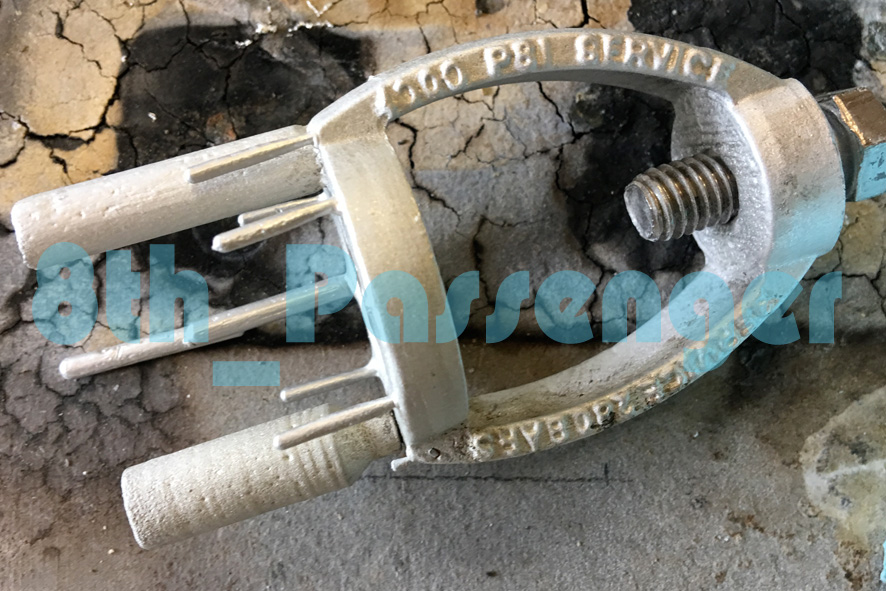
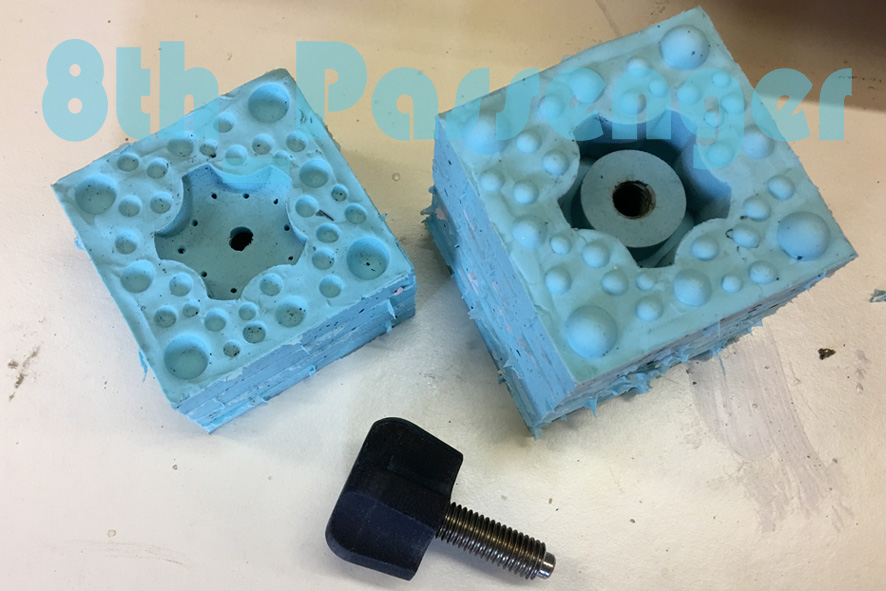
I then did a three part mould of the clamp.
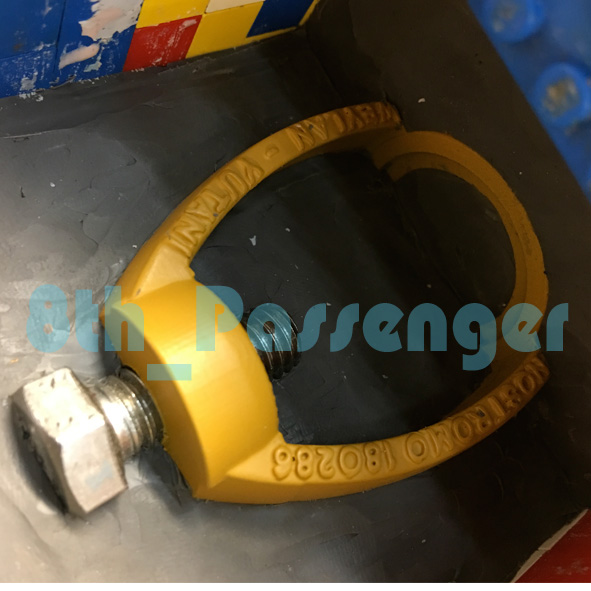
And cast it in white metal.
I cast the black knob with some studding in.
The main body of the valve I wanted to make in brass. I needed it to have threaded fittings, like the real item. To do this I found some plumbing fittings.
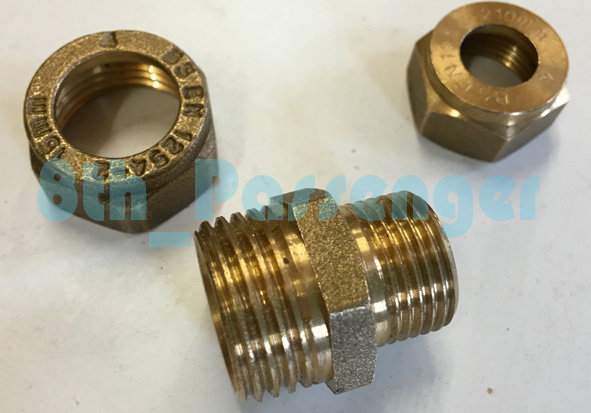
I turned these down to fit into the turned brass body pieces.
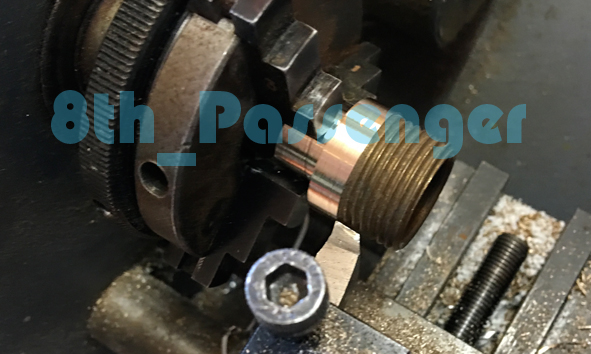
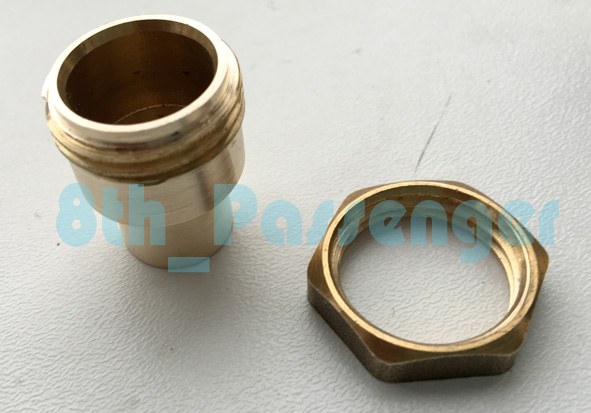
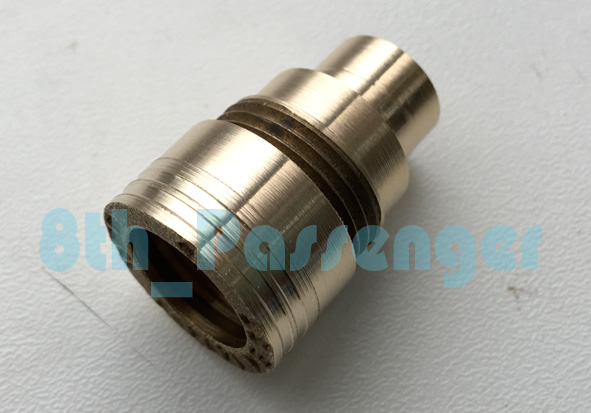
Here's and overview of the parts created.
The rear release valve I had to mill.
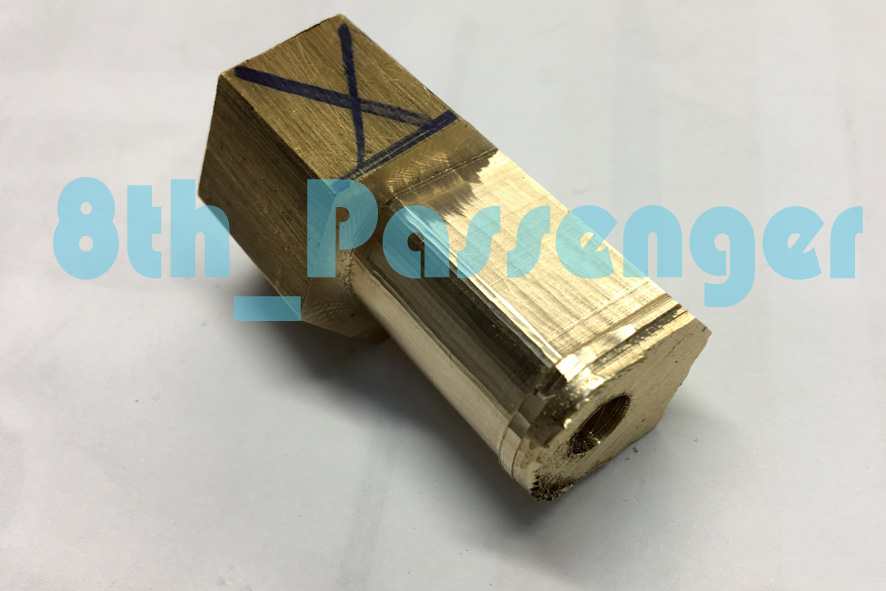
And then part off on the lathe.
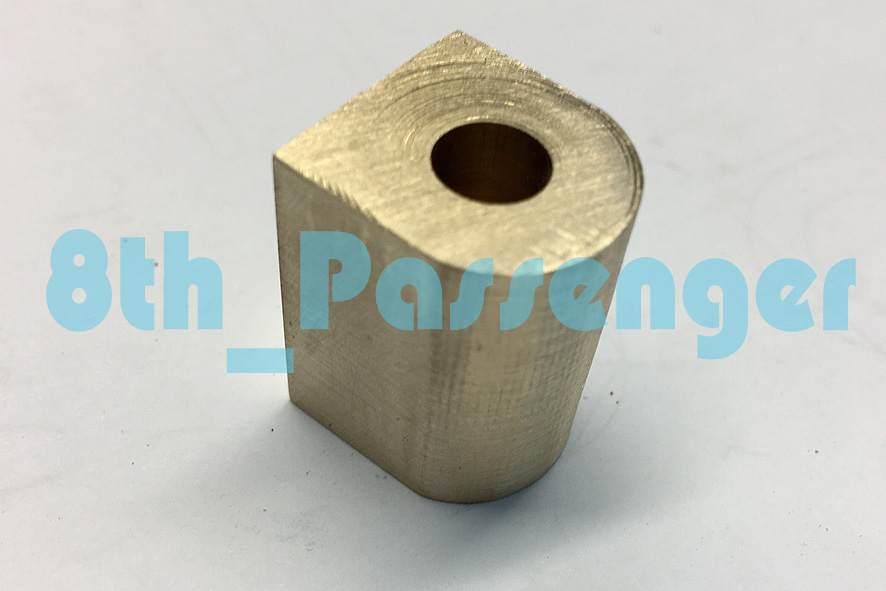
The main parts were solderd togehter.
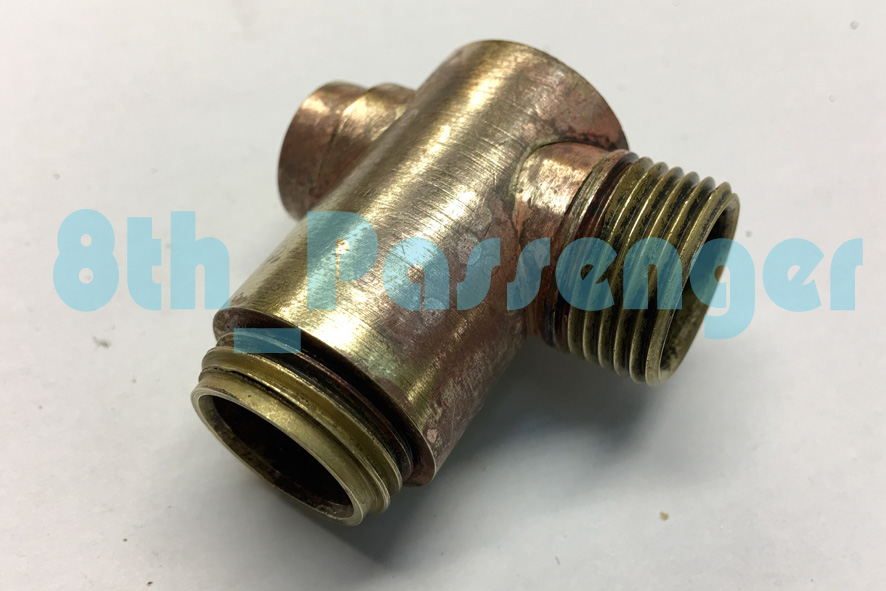
Ending up with this.
.jpg)
This is as far as I got as finally some real ones turned up on ebay and nothing is better than the real thing.
Interestingly I bought a larger capacity bottle as well. It's nicely aged.
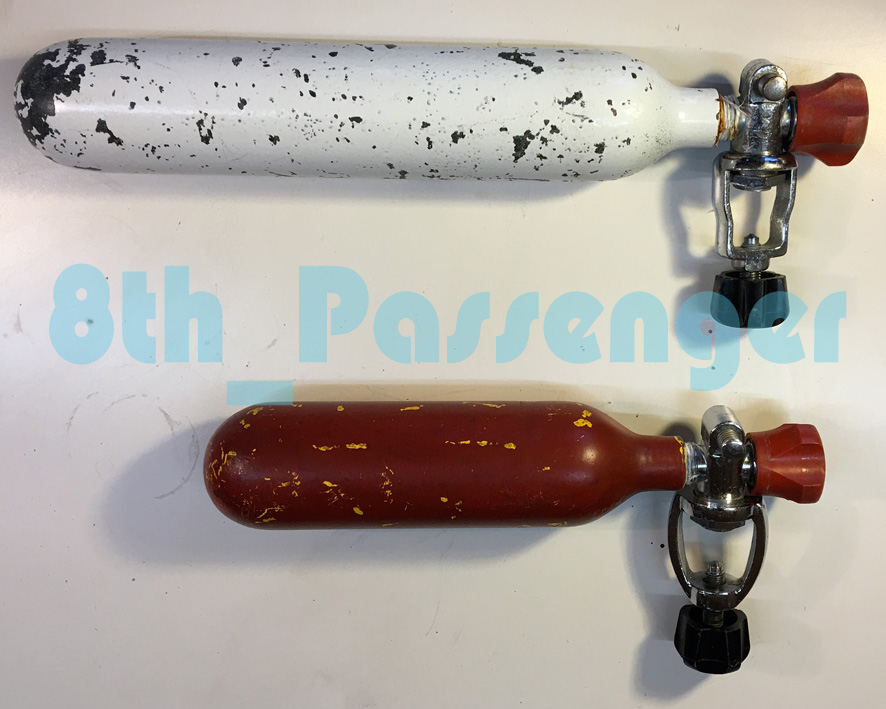
Even though you can still get the propane bottles I thought I would have a go at making a dummy version.
When I set out making this project I wanted to make a lighter version than my original 1987 version. What I ended up with is something even heavier.
So in my head I still have an idea to build a light weight version. I guess this would be the ideal kit version.
To do this I would need to eliminate a lot of the metal parts. Notably the emitter and grips would have to be fast cast and the internal frame be aluminum and not steel. In fact there would be many changes to make it easier to produce.
The overall look would be the same though.
I haven't had that many enquires about the flamethrower so I don't know what the demand would be if I offered one. I have been asked to sell the detailing, though tempted at the time I declined. I think it's an all or nothing scenario.
So I dont really know if I want to offer a kit. I can replicate it there is no question about that. But there is a lot of work involved and I'm not ready just yet. I think it may only come real if I decide to make the light weight version for myself.
So all I can say in watch this space.
As a foot note I identified another part.
On a recent trip to see the Star Wars identities exhibition in London I was looking at the ILM Slave One model and noticed this part.
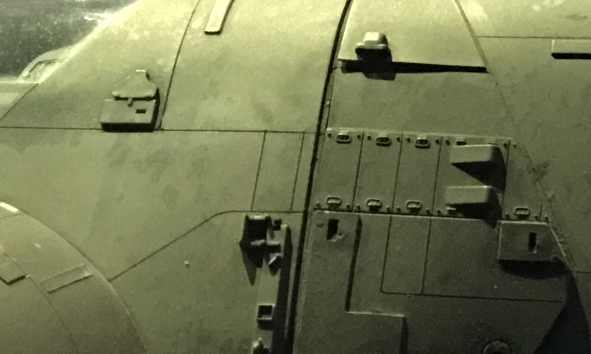
which on the flamethrower is here.
.jpg)
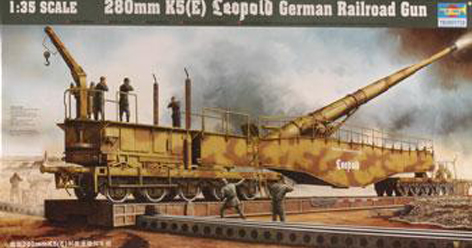
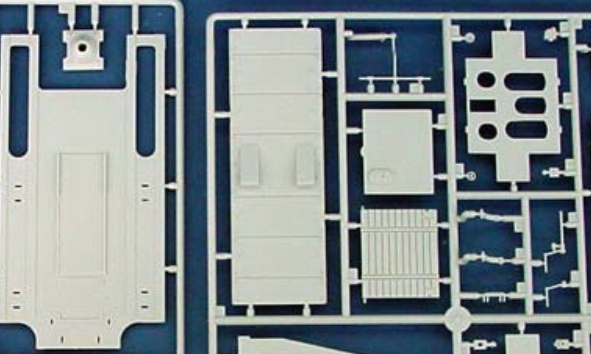
On a Slave One thread on the RPF I found out it was a part from this kit.
Colin
_________________
Ripley: What's it key on?
Ash: Micro changes in air density. |
|
| Back to top |
|
|
|
|
|
|
|
|
|
|
|
| Author |
Message |
joberg
Community Member
.jpg)
Joined: 06 Oct 2008
Posts: 9447
|
| Posted: Sun Feb 12, 2017 11:35 am Post subject: |
|
|
Great work Colin, as you know, I'm a fan  !! !!
Great find for that plastic piece (that Leopold kit was used extensively by ILM)
The other parts you've created/found are great also!
As for a kit, I'm sure you know better than me the challenges it'll give you...you're right though, it's all or nothing (no selling parts or greeblies).
Keep up the great work!! |
|
| Back to top |
|
|
|
|
|
|
|
|
|
|
|
| Author |
Message |
Pro Mod
Community Member
Joined: 13 Aug 2010
Posts: 108
Location: Manchester, England
|
| Posted: Mon Feb 13, 2017 8:17 am Post subject: |
|
|
For reference the part would be from the 1/72 Hasegawa Leopold kit and not the 1/35 scale kit which didn't exist at the time. So nobody rush out and buy a £95.00 kit you don’t need.
The Hasegawa kit is around £28.00 direct from Japan. I think I paid £4.99 when they originally came out. |
|
| Back to top |
|
|
|
|
|
|
|
|
|
|
|
| Author |
Message |
8th_Passenger
Community Member
Joined: 28 Nov 2009
Posts: 443
Location: Hertfordshire, UK
|
| Posted: Mon Feb 13, 2017 2:21 pm Post subject: |
|
|
Thanks Pro Mod.
Maybe that explains why the part I saw on the Slave One model is different to the picture on the sprue I posted. There are three equal segments and not two and a bit.
I can't seem to find a picture of the 1:72nd part.
Colin
_________________
Ripley: What's it key on?
Ash: Micro changes in air density. |
|
| Back to top |
|
|
|
|
|
|
|
|
|
|
|
| Author |
Message |
8th_Passenger
Community Member
Joined: 28 Nov 2009
Posts: 443
Location: Hertfordshire, UK
|
| Posted: Mon Feb 13, 2017 2:47 pm Post subject: |
|
|
Found it!
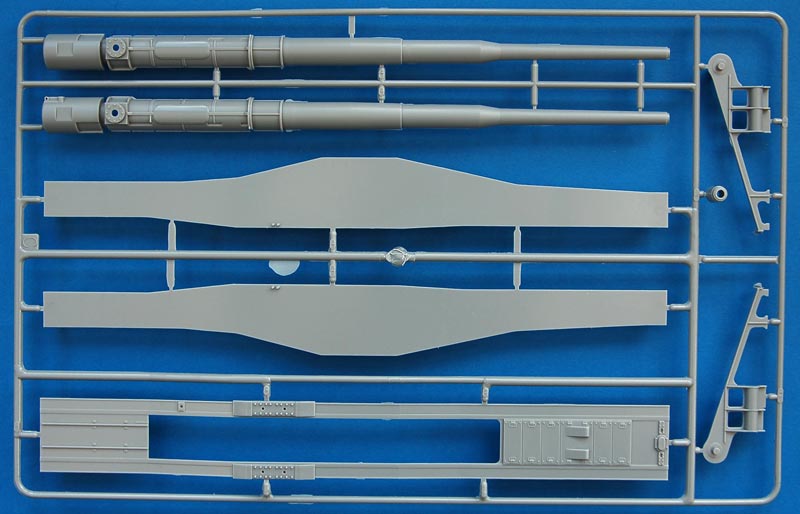
Anybody know how big the part is?
Colin
_________________
Ripley: What's it key on?
Ash: Micro changes in air density. |
|
| Back to top |
|
|
|
|
|
|
|
|
|
|
|
| Author |
Message |
kevdeo
Community Member
.jpg)
Joined: 02 Sep 2016
Posts: 87
Location: LV-426
|
| Posted: Mon Feb 13, 2017 5:46 pm Post subject: |
|
|
Excellent work. This build always blows me away.
_________________
KEVDEO's SCI-FI Collection + Custom Props
youtube.com/user/kevdeovideo
instagram.com/kevdeo |
|
| Back to top |
|
|
|
|
|
|
|
|
|
|
|
| Author |
Message |
Space Jockey
Community Member
Joined: 13 Apr 2009
Posts: 559
Location: East Tennessee
|
| Posted: Wed Feb 22, 2017 10:23 am Post subject: |
|
|
| Holy Fudge. That is one impressive build.... |
|
| Back to top |
|
|
|
|
|
|
|
|
|
|
|
|
You cannot post new topics in this forum
You cannot reply to topics in this forum
You cannot edit your posts in this forum
You cannot delete your posts in this forum
You cannot vote in polls in this forum
|
|
|
|
|
|
|
|


