 |
 |
|
 |
|
| Author |
Message |
joberg
Community Member
.jpg)
Joined: 06 Oct 2008
Posts: 9447
|
 Posted: Tue Mar 26, 2019 3:58 pm Post subject: Moebius EVA Pod Posted: Tue Mar 26, 2019 3:58 pm Post subject: Moebius EVA Pod |
 |
|
I know, I know...couldn't help myself: bought the new 1/8 scale EVA Pod from Moebius. I'd built a 1/6 studio model of one Pod already; but this one has a fully detailed interior 
Here's a side by side pic of the two scales.
 |
|
| Back to top |
|
|
|
|
 |
|
 |
|
|
|
|
| Author |
Message |
Bwood
Community Member
Joined: 20 Sep 2009
Posts: 843
|
| Posted: Wed Mar 27, 2019 11:20 am Post subject: |
|
|
Would appreciate photos of the assembly ...  |
|
| Back to top |
|
|
|
|
|
|
|
|
|
|
|
| Author |
Message |
joberg
Community Member
Joined: 06 Oct 2008
Posts: 9447
|
| Posted: Wed Mar 27, 2019 4:09 pm Post subject: |
|
|
I'll do that for sure Bwood; a play by play  |
|
| Back to top |
|
|
|
|
|
|
|
|
|
|
|
| Author |
Message |
Pro Mod
Community Member
Joined: 13 Aug 2010
Posts: 108
Location: Manchester, England
|
| Posted: Fri Mar 29, 2019 8:01 am Post subject: |
|
|
Nice to see the size comparison joberg.
Mine is due to arrive in about a week. |
|
| Back to top |
|
|
|
|
|
|
|
|
|
|
|
| Author |
Message |
joberg
Community Member
Joined: 06 Oct 2008
Posts: 9447
|
| Posted: Sun Mar 31, 2019 8:36 am Post subject: |
|
|
Great news Pro Mod  I think that a few will be build, here as well as on the RPF I will share any trick that will make this model easier to build/paint. I think that a few will be build, here as well as on the RPF I will share any trick that will make this model easier to build/paint. |
|
| Back to top |
|
|
|
|
|
|
|
|
|
|
|
| Author |
Message |
joberg
Community Member
Joined: 06 Oct 2008
Posts: 9447
|
| Posted: Mon Apr 01, 2019 4:14 pm Post subject: |
|
|
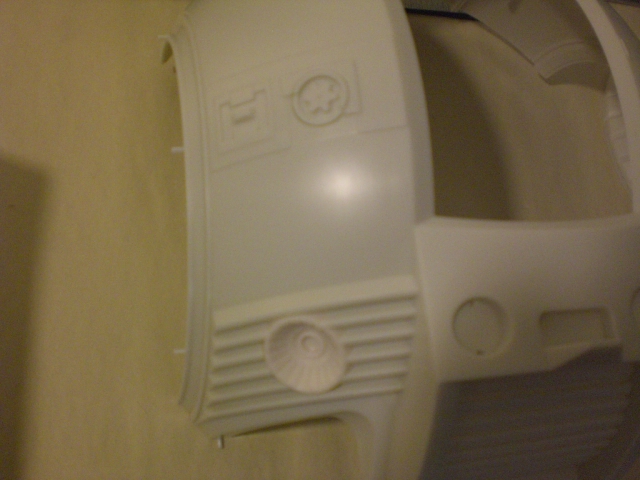
As promised, a little play by play into the construction/quality of the Moebius kit.
First: I thought that the pieces were crisp and fitted well. You'll have to be careful with certain holes in the main body (specially where the thrusters are placed) You'll have to find a dowel a little bit thinner than the hole and wrap it with sand paper to make sure it's round. Beside that, I've prepped the two halves and blocked the half moons (grab handles) with silicone.
Next: I'll spray a thick coat of silver to avoid any light bleed from the interior controls.
http://propsummit.com/upload/502/cimg2598.jpg
[/img]

 |
|
| Back to top |
|
|
|
|
|
|
|
|
|
|
|
| Author |
Message |
joberg
Community Member
Joined: 06 Oct 2008
Posts: 9447
|
| Posted: Mon Apr 01, 2019 4:15 pm Post subject: |
|
|
Another:
 |
|
| Back to top |
|
|
|
|
|
|
|
|
|
|
|
| Author |
Message |
joberg
Community Member
Joined: 06 Oct 2008
Posts: 9447
|
| Posted: Tue Apr 09, 2019 5:50 pm Post subject: |
|
|
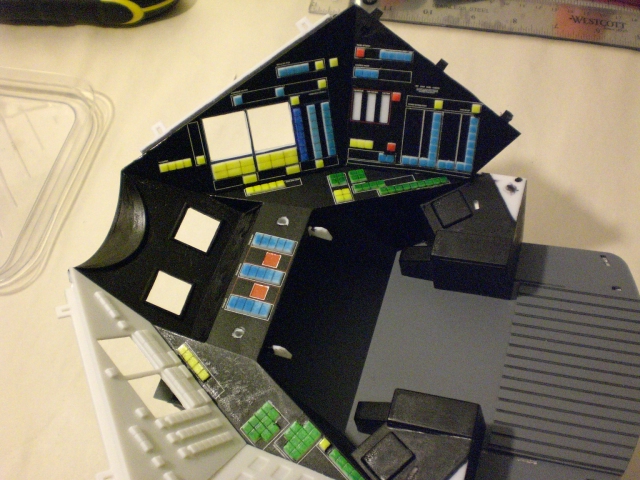
Here's the inside being build...careful with the decals on the instrument panels: the holes for the buttons are too tight  I ended up cutting those by hand to make sure that the decals fit I ended up cutting those by hand to make sure that the decals fit 

 |
|
| Back to top |
|
|
|
|
|
|
|
|
|
|
|
| Author |
Message |
Pro Mod
Community Member
Joined: 13 Aug 2010
Posts: 108
Location: Manchester, England
|
| Posted: Wed Apr 10, 2019 6:36 am Post subject: |
|
|
| Looking great joberg. |
|
| Back to top |
|
|
|
|
|
|
|
|
|
|
|
| Author |
Message |
joberg
Community Member
Joined: 06 Oct 2008
Posts: 9447
|
| Posted: Wed Apr 10, 2019 8:02 am Post subject: |
|
|
Thanks Pro Mod...I have to respray the control panels; the clear coat made the black decals cloudy First time I have that type of prob with that manufacturer  |
|
| Back to top |
|
|
|
|
|
|
|
|
|
|
|
| Author |
Message |
joberg
Community Member
Joined: 06 Oct 2008
Posts: 9447
|
| Posted: Tue Apr 30, 2019 4:30 pm Post subject: |
|
|
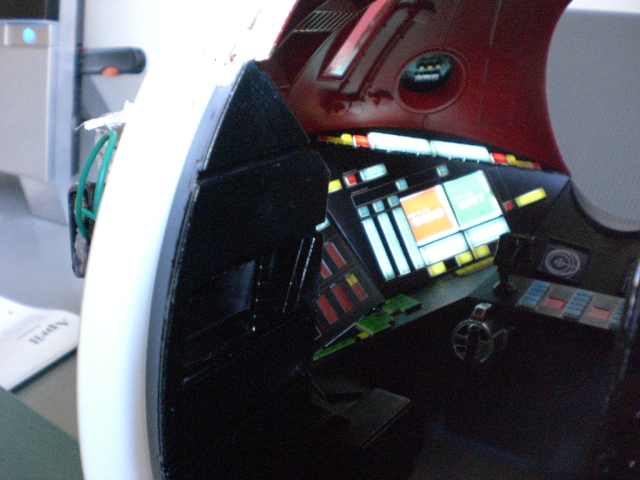
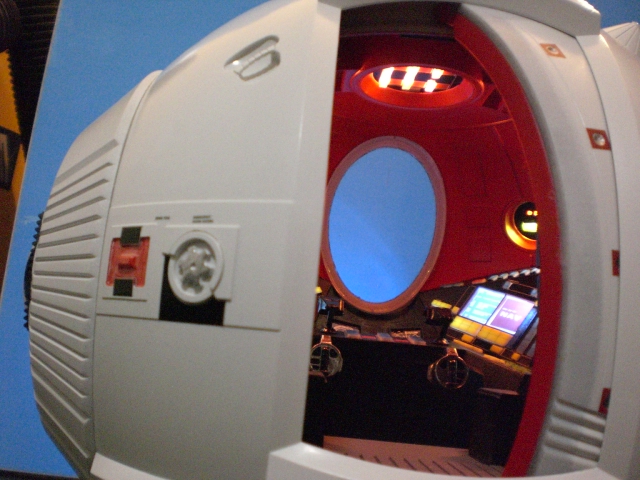
So, the interior is done; did some add-on box lights on one side only (there's a lot of space to add all kind of lights/batteries, etc.


 |
|
| Back to top |
|
|
|
|
|
|
|
|
|
|
|
| Author |
Message |
joberg
Community Member
Joined: 06 Oct 2008
Posts: 9447
|
| Posted: Wed Sep 18, 2019 6:33 pm Post subject: |
|
|
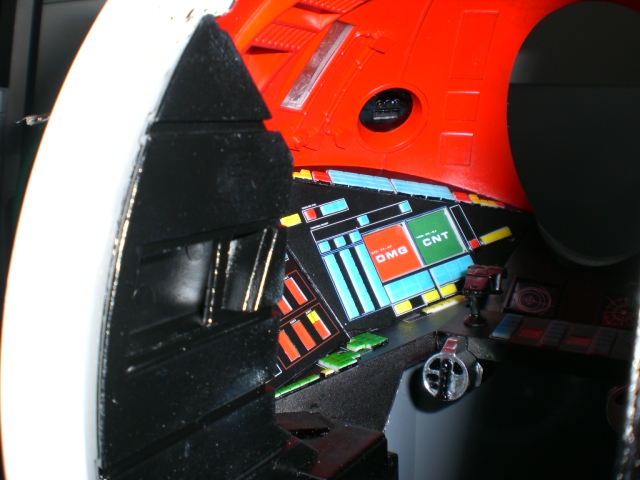
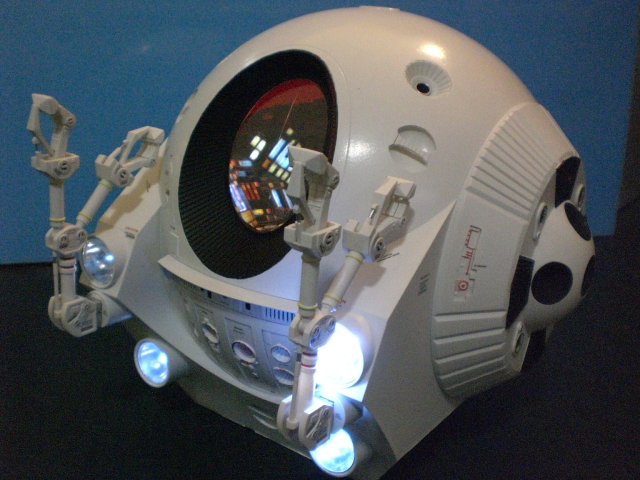
Done and done...lights and interior finished, decals (a tonne of them) and exterior paint and details.

 |
|
| Back to top |
|
|
|
|
|
|
|
|
|
|
|
| Author |
Message |
Pro Mod
Community Member
Joined: 13 Aug 2010
Posts: 108
Location: Manchester, England
|
| Posted: Thu Sep 19, 2019 8:12 am Post subject: |
|
|
| Another triumph joberg! |
|
| Back to top |
|
|
|
|
|
|
|
|
|
|
|
| Author |
Message |
Bwood
Community Member
Joined: 20 Sep 2009
Posts: 843
|
| Posted: Thu Sep 19, 2019 11:02 am Post subject: |
|
|
Magnifico! 
How was the fit and finish of the kit? |
|
| Back to top |
|
|
|
|
|
|
|
|
|
|
|
| Author |
Message |
joberg
Community Member
Joined: 06 Oct 2008
Posts: 9447
|
| Posted: Sat Sep 21, 2019 3:50 pm Post subject: |
|
|
Thanks guys The kit was very easy to put together; the parts were fitting well and it's engineered to make your life easy. The only minus were the decals: not fitting well over the buttons and the decals for the screens were too small (the edges are showing).
Apart from that, a kit to buy for sure! |
|
| Back to top |
|
|
|
|
|
|
|
|
|
|
|
|
You cannot post new topics in this forum
You cannot reply to topics in this forum
You cannot edit your posts in this forum
You cannot delete your posts in this forum
You cannot vote in polls in this forum
|
|
|
|
|
|
|
|


