 |
 |
|
 |
|
| Author |
Message |
joberg
Community Member
.jpg)
Joined: 06 Oct 2008
Posts: 9447
|
 Posted: Thu Feb 14, 2013 5:22 pm Post subject: Posted: Thu Feb 14, 2013 5:22 pm Post subject: |
 |
|
Niiiice!  |
|
| Back to top |
|
|
|
|
 |
|
 |
|
|
|
|
| Author |
Message |
jargonking
Community Member
Joined: 08 Mar 2011
Posts: 65
|
| Posted: Sun Feb 17, 2013 3:15 pm Post subject: |
|
|
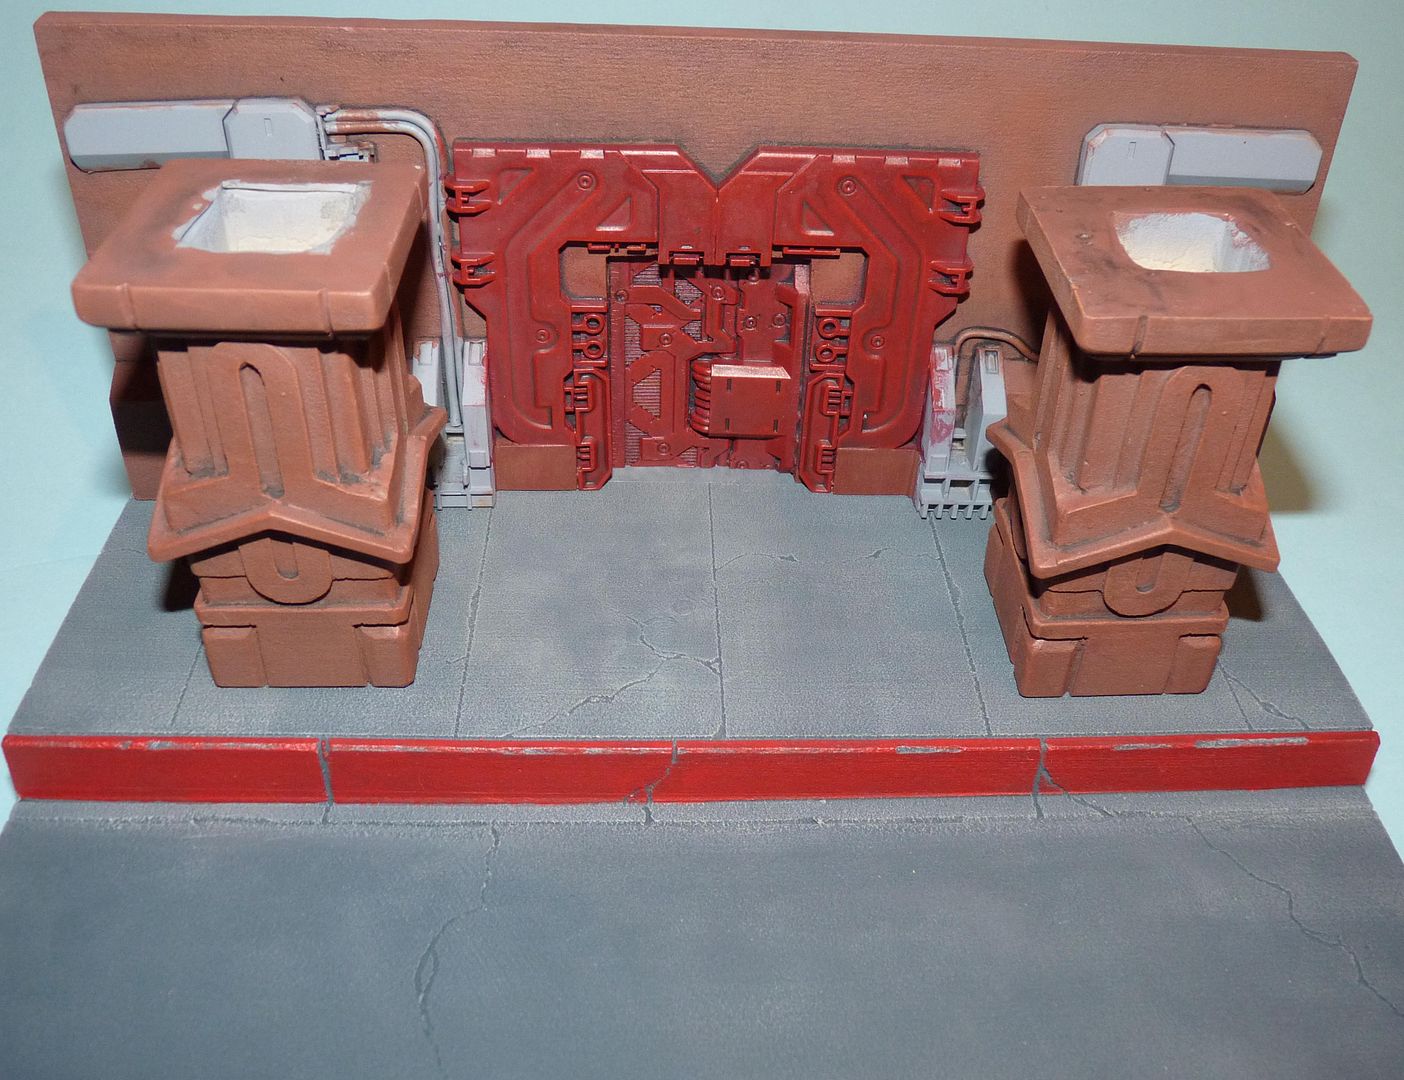
The diorama base as it comes is great but I wanted to make some minor adjustments...
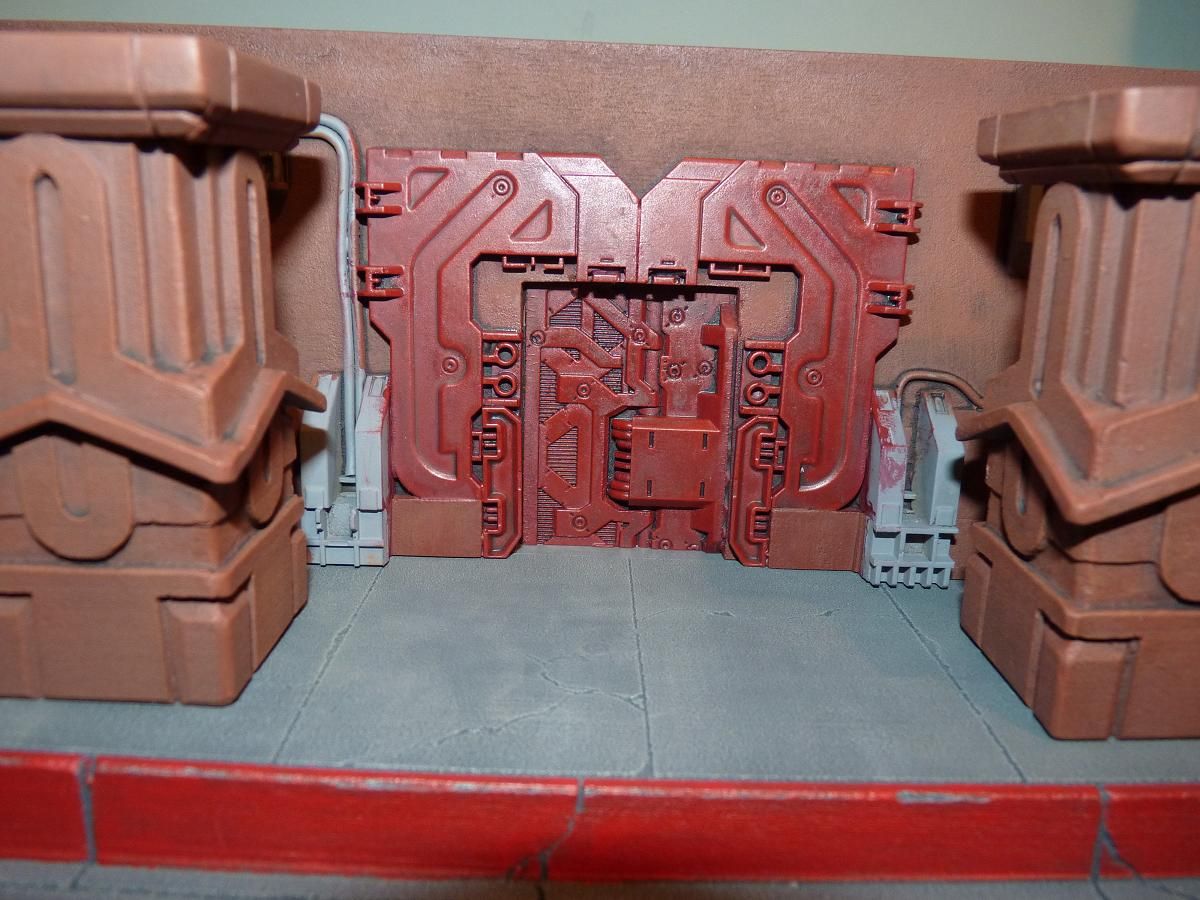
Firstly, the pillars were too close to the door for my taste...
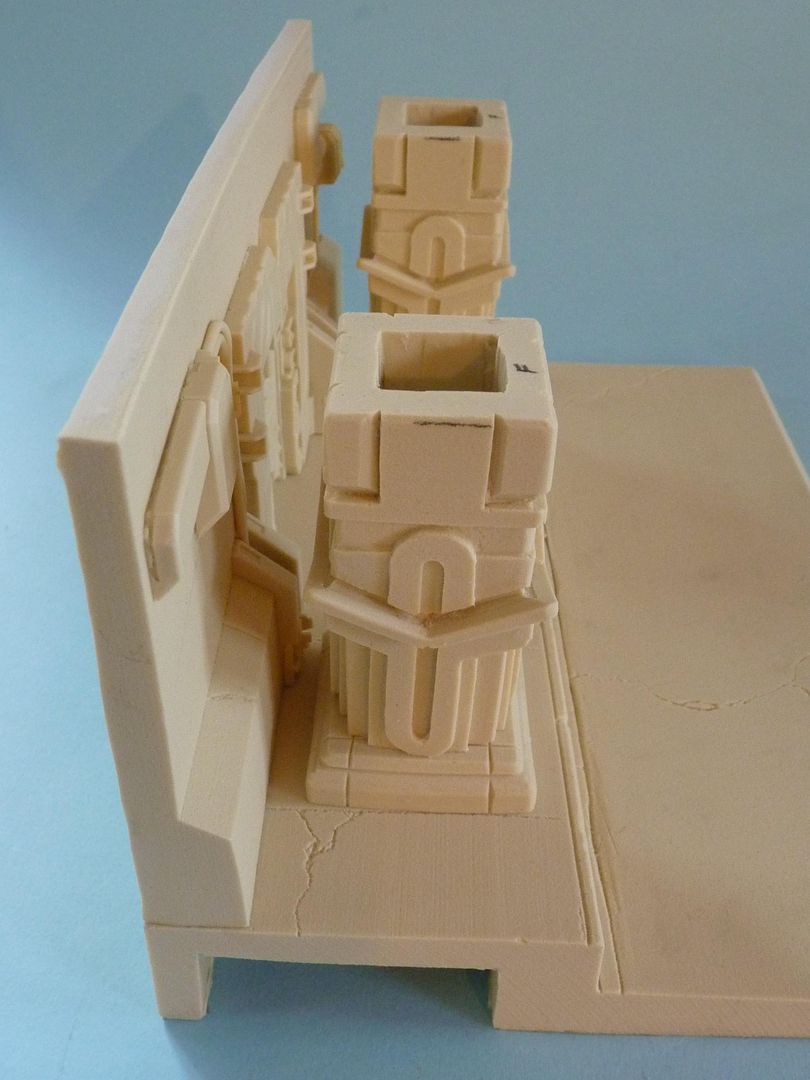
I built a small section of additional flooring from sheet styrene to allow the rear wall to move back....
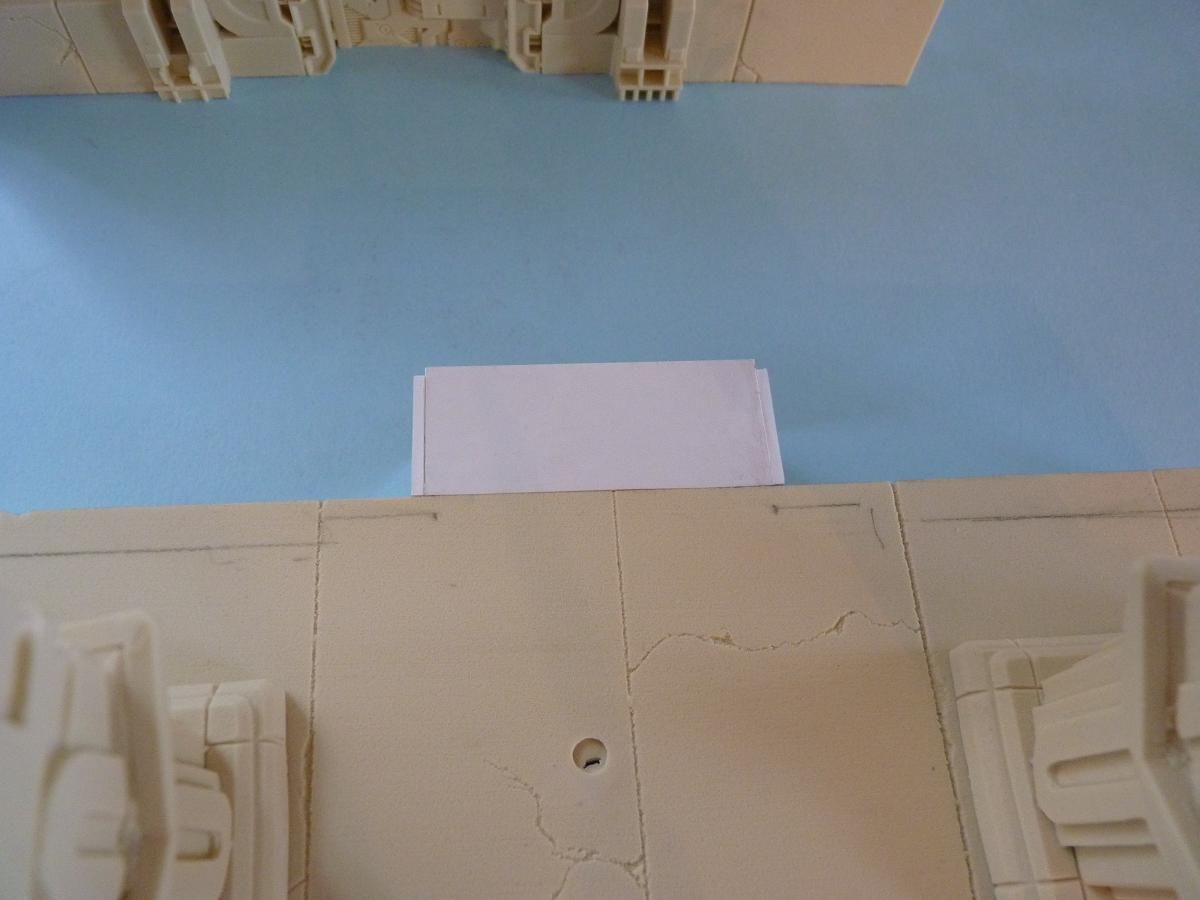
This gives a greater gap from the wall to the pillars....
I also wanted to add downlights to the underside of the canopy to illuminate the entrance. I had a slight issue with the canopy piece as the thickness wasn't constant along it's length. If I was building the kit stock then this would be virtually unnoticeable but it was a problem with the lighting in mind....
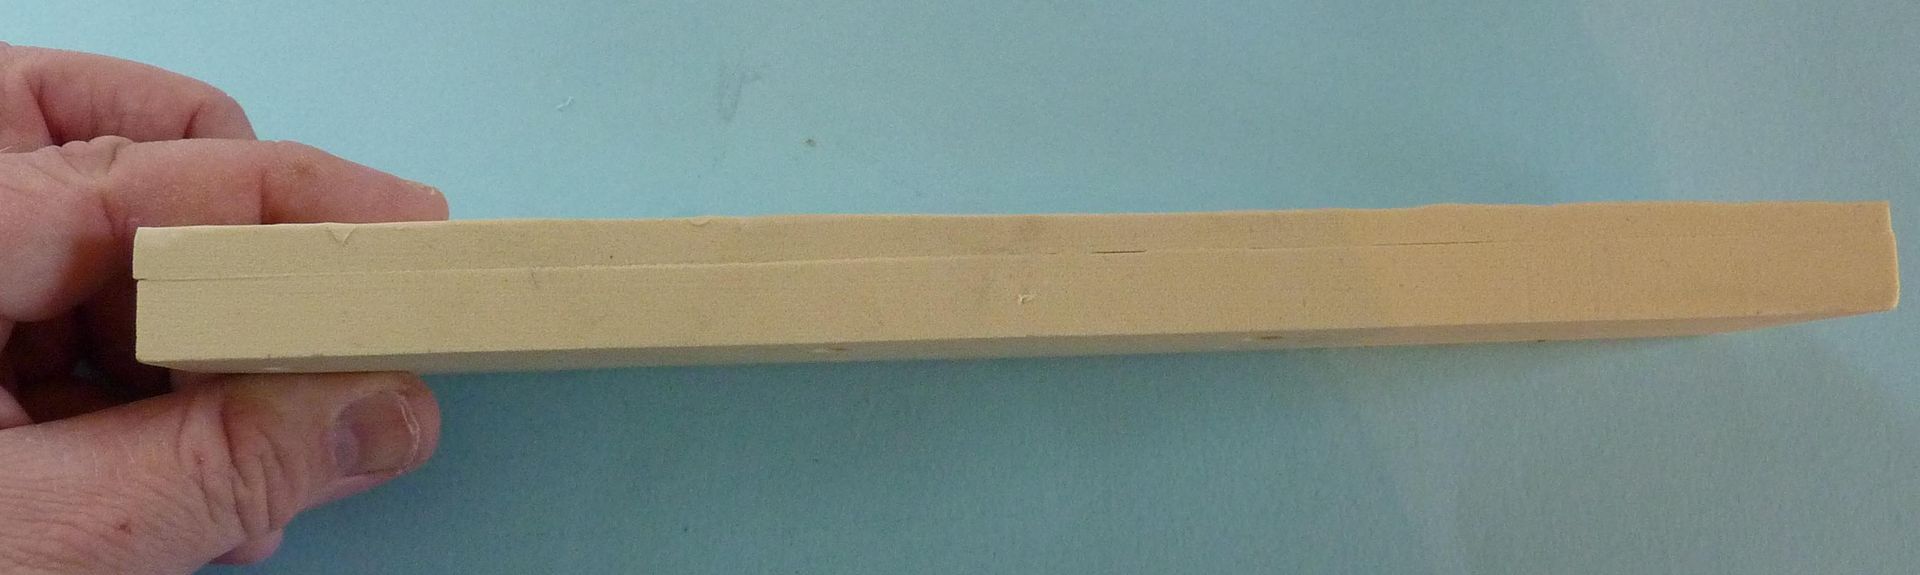
I overcame it by glueing a strip of styrene along the underside of the front edge....
I then built up the underside with strips of increasing thickness...
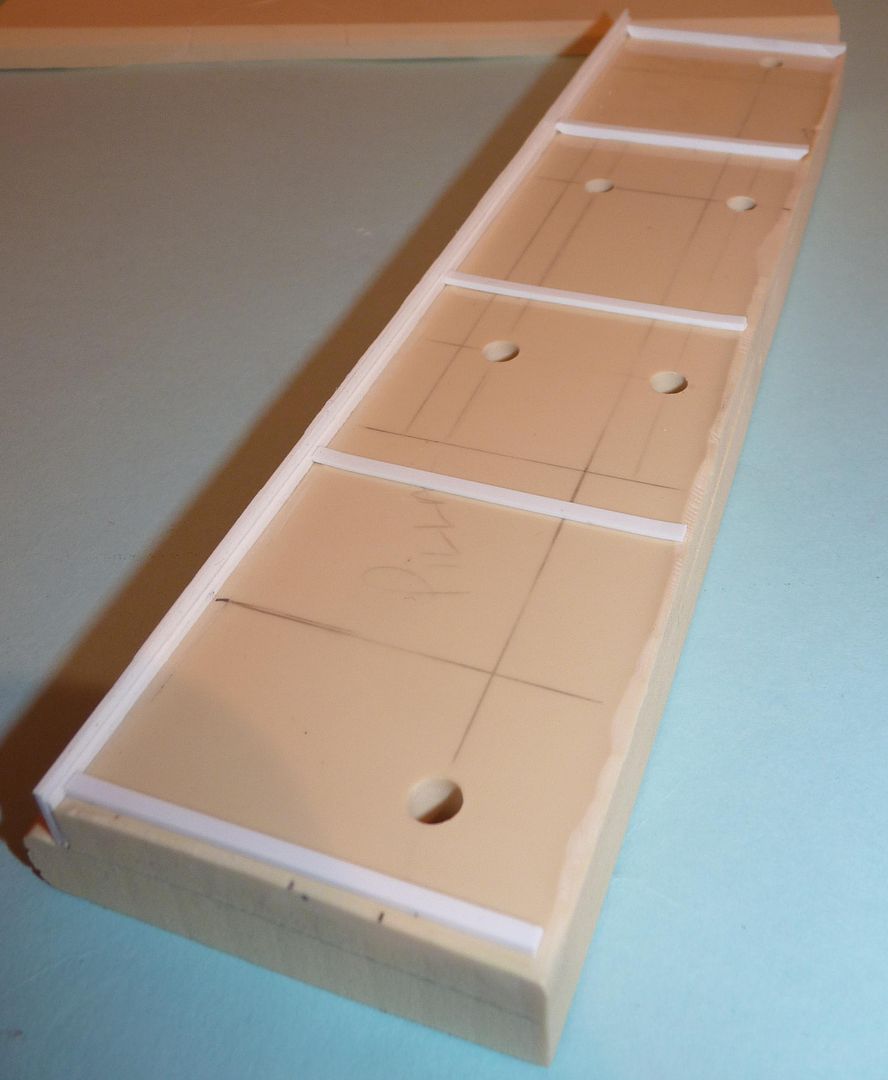
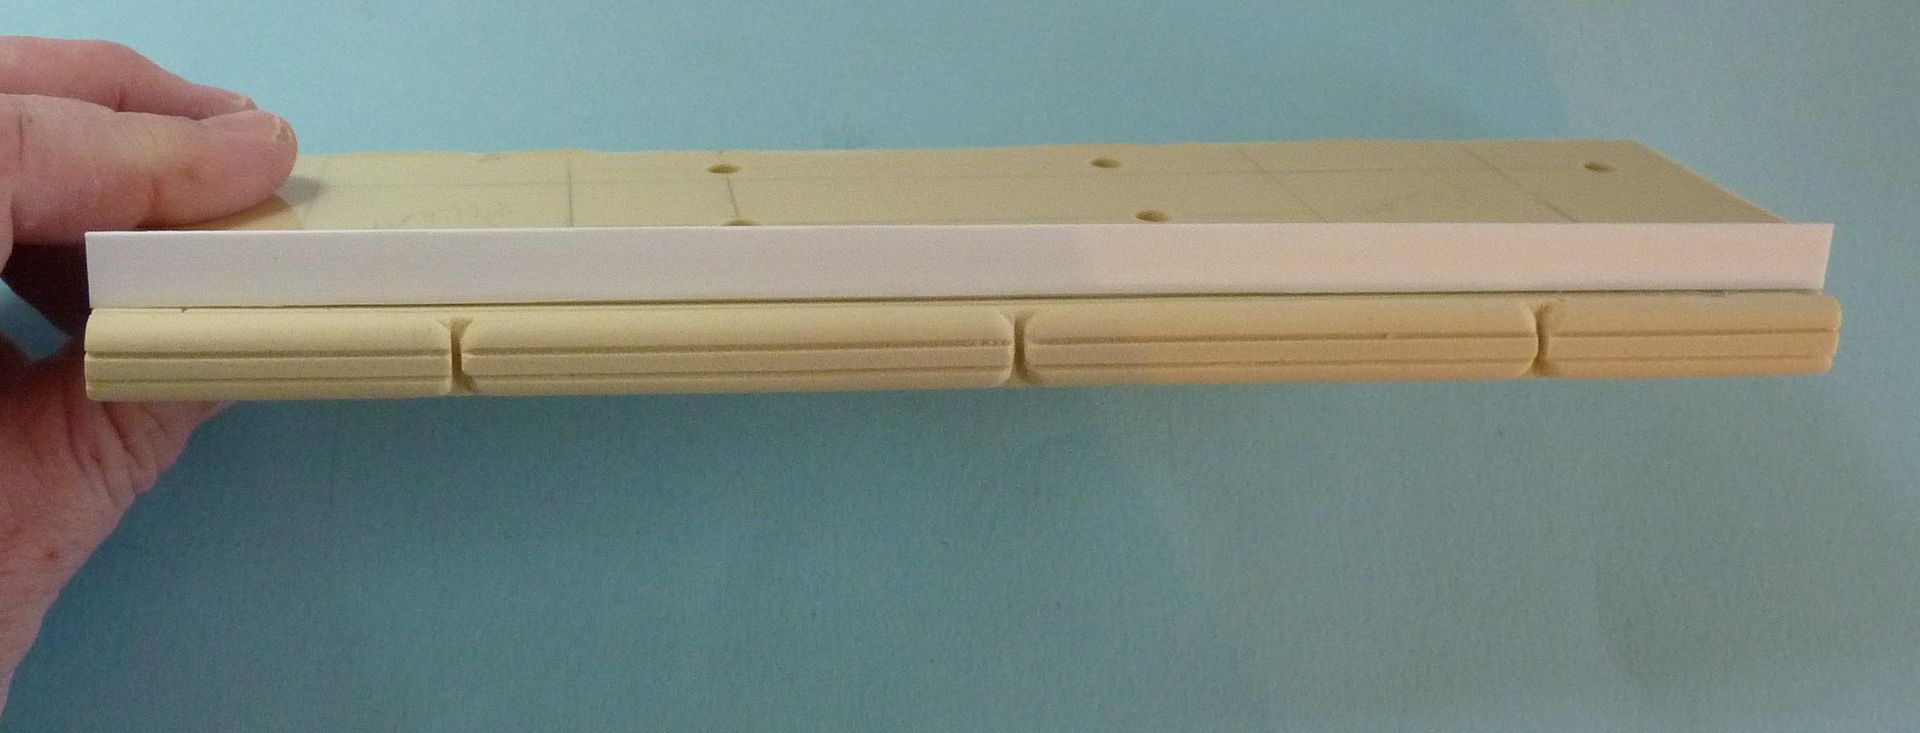
Holes were carefully drilled through the canopy to house the LED downlights....
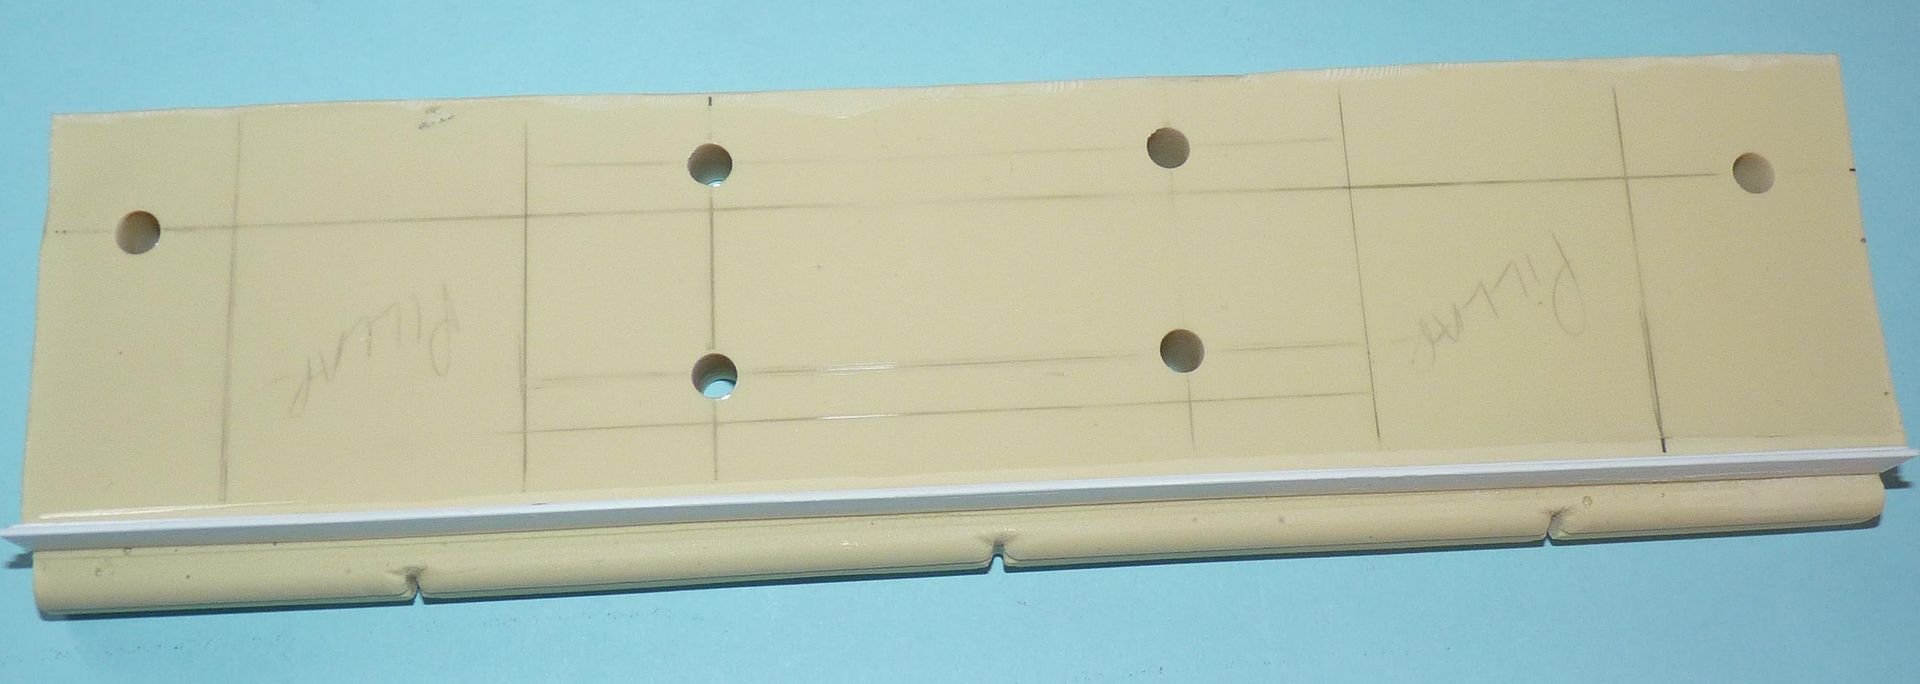
A piece of styrene sheet forms the new underside of the canopy...this is deeper than the original piece to allow for the rear wall being pushed back.
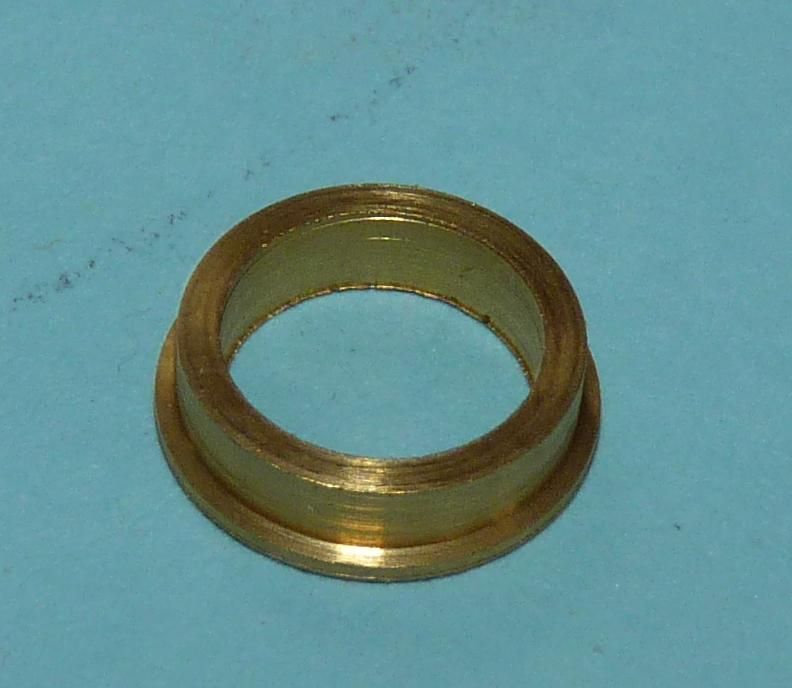
I obtained these brass portholes from my local model shop....
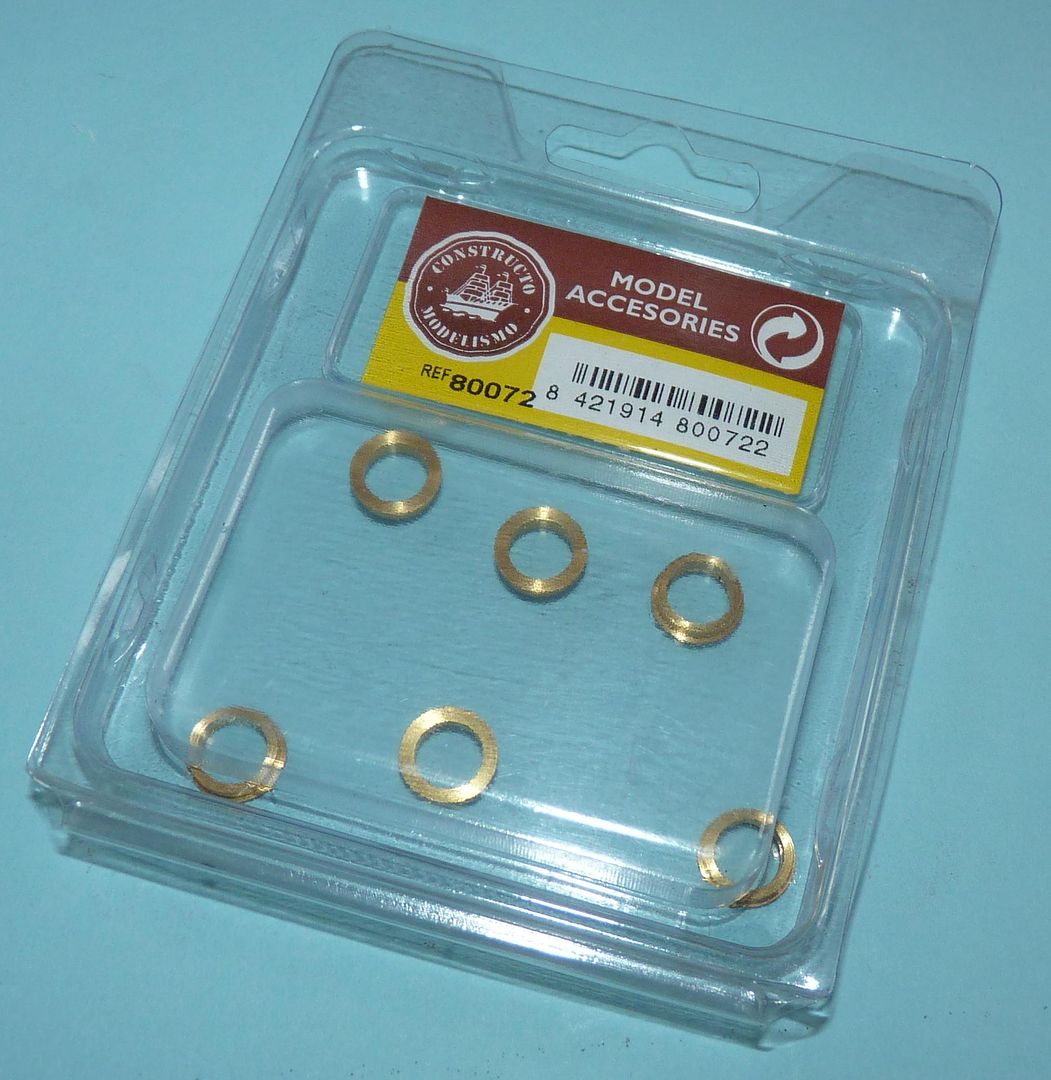
They are rebated on the back to allow them to drop into a pre-drilled hole...
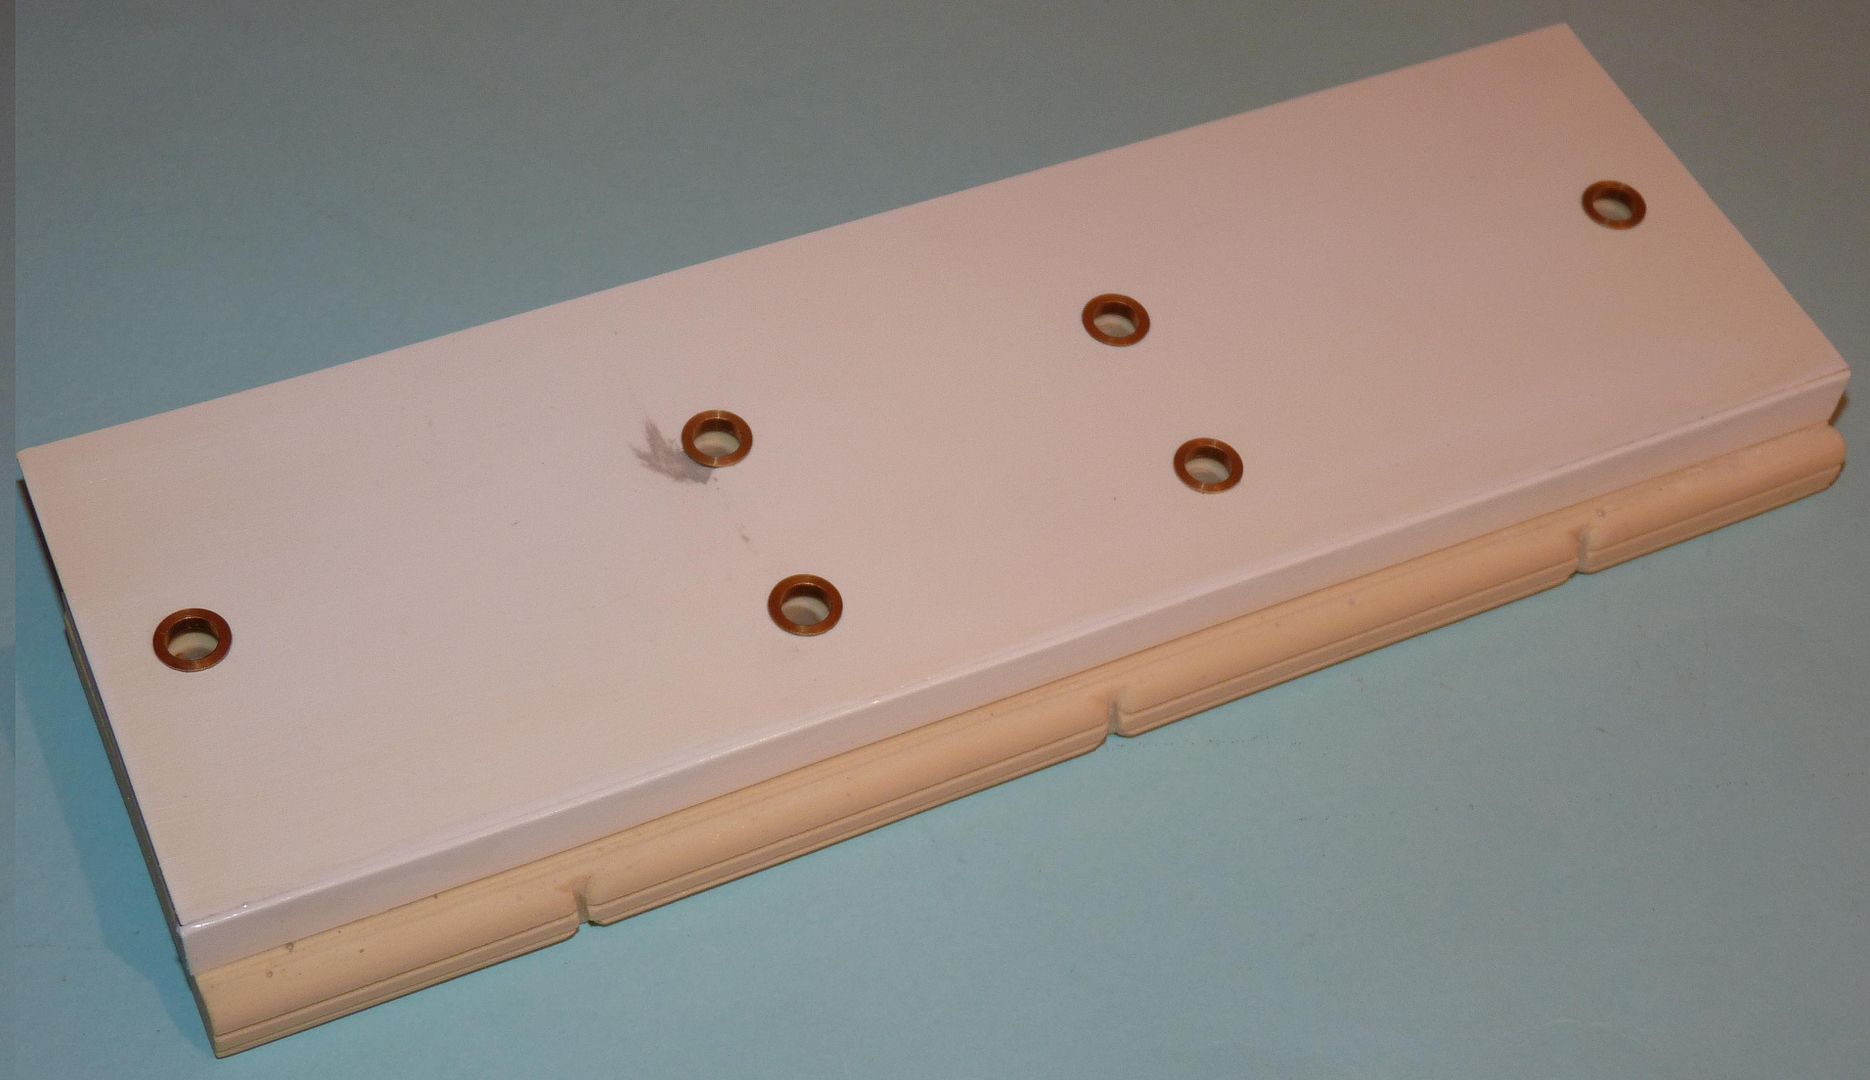
And here they are fitted....
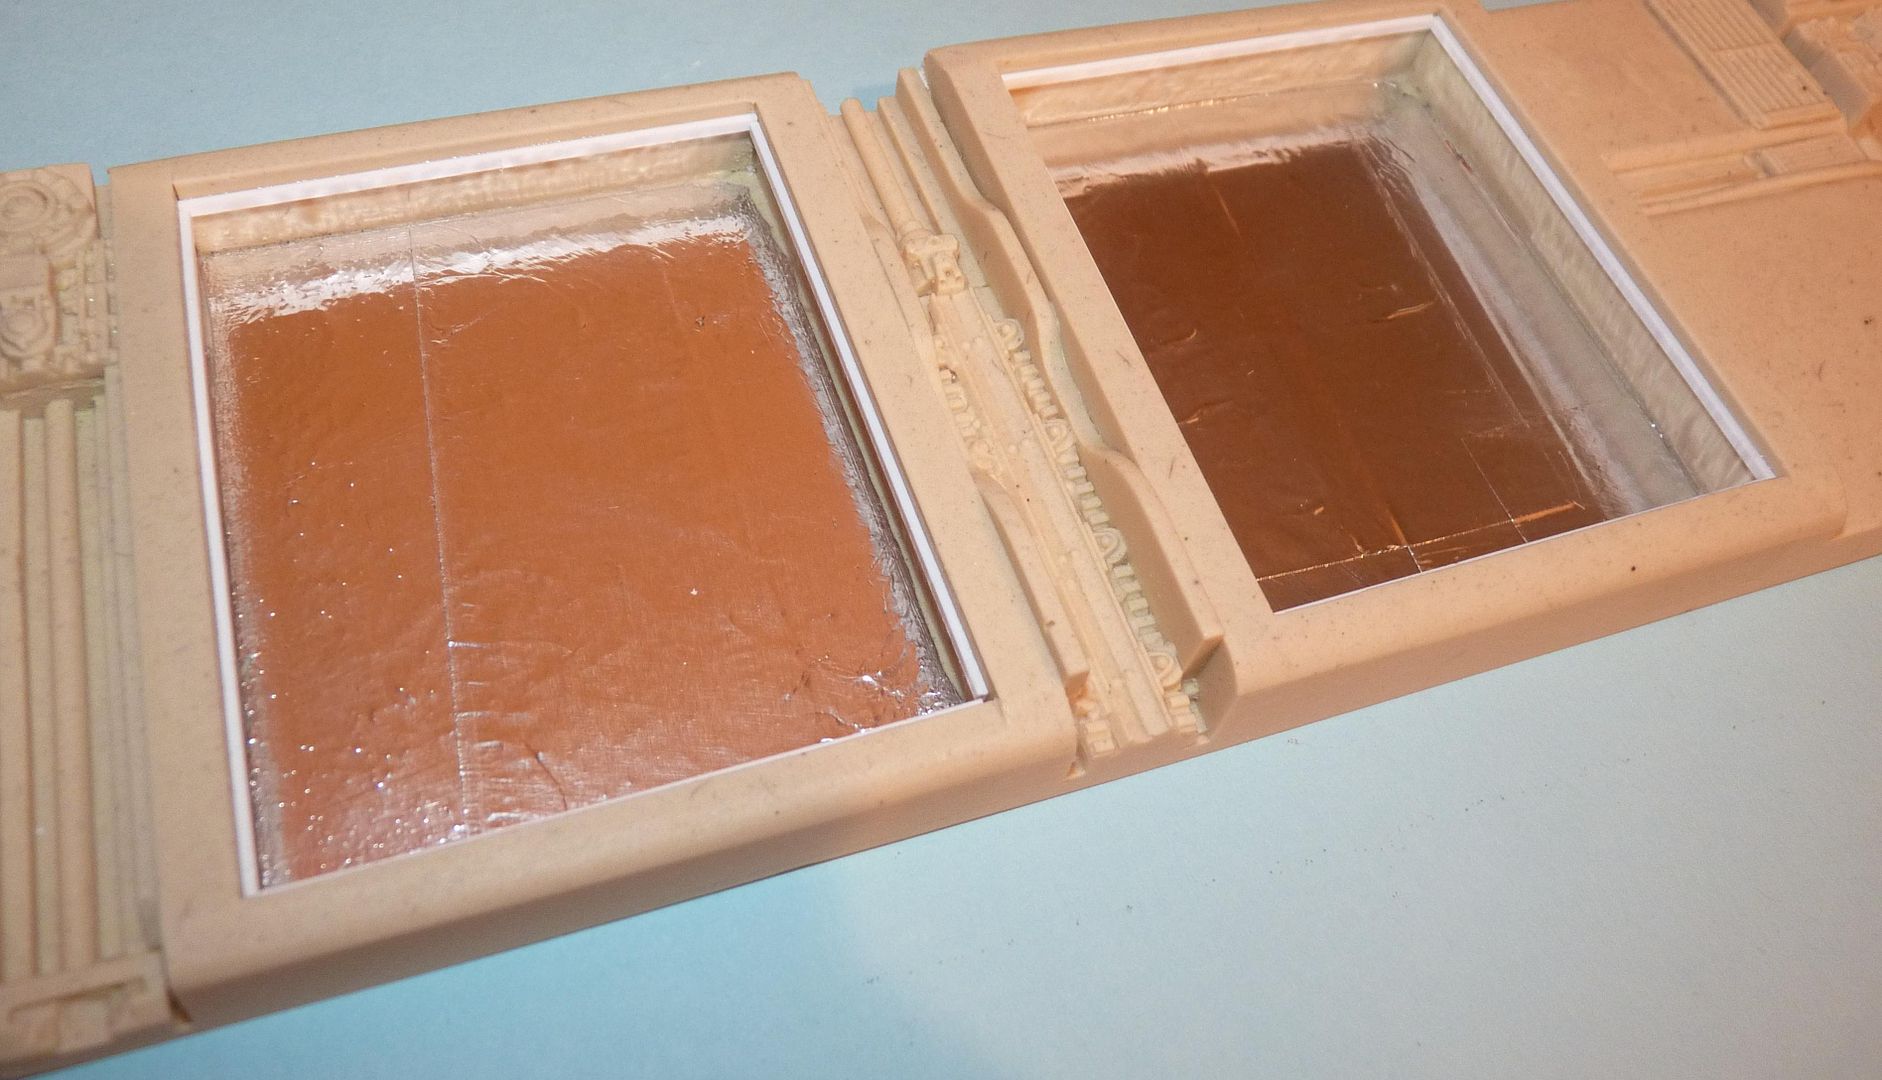
I've also started fitting out the two roof-mounted advertising signs for lighting. I attached a strip of styrene around the inside edges to allow a transparent sign to be dropped in....note also the foil backing to reflect the light forwards...
 |
|
| Back to top |
|
|
|
|
|
|
|
|
|
|
|
| Author |
Message |
joberg
Community Member
Joined: 06 Oct 2008
Posts: 9447
|
| Posted: Sun Feb 17, 2013 7:37 pm Post subject: |
|
|
| How come I'm jumping up and down with glee? 'Cause I'm waaayyy impatient to see it all lit-up |
|
| Back to top |
|
|
|
|
|
|
|
|
|
|
|
| Author |
Message |
jargonking
Community Member
Joined: 08 Mar 2011
Posts: 65
|
| Posted: Wed Feb 20, 2013 6:26 pm Post subject: |
|
|
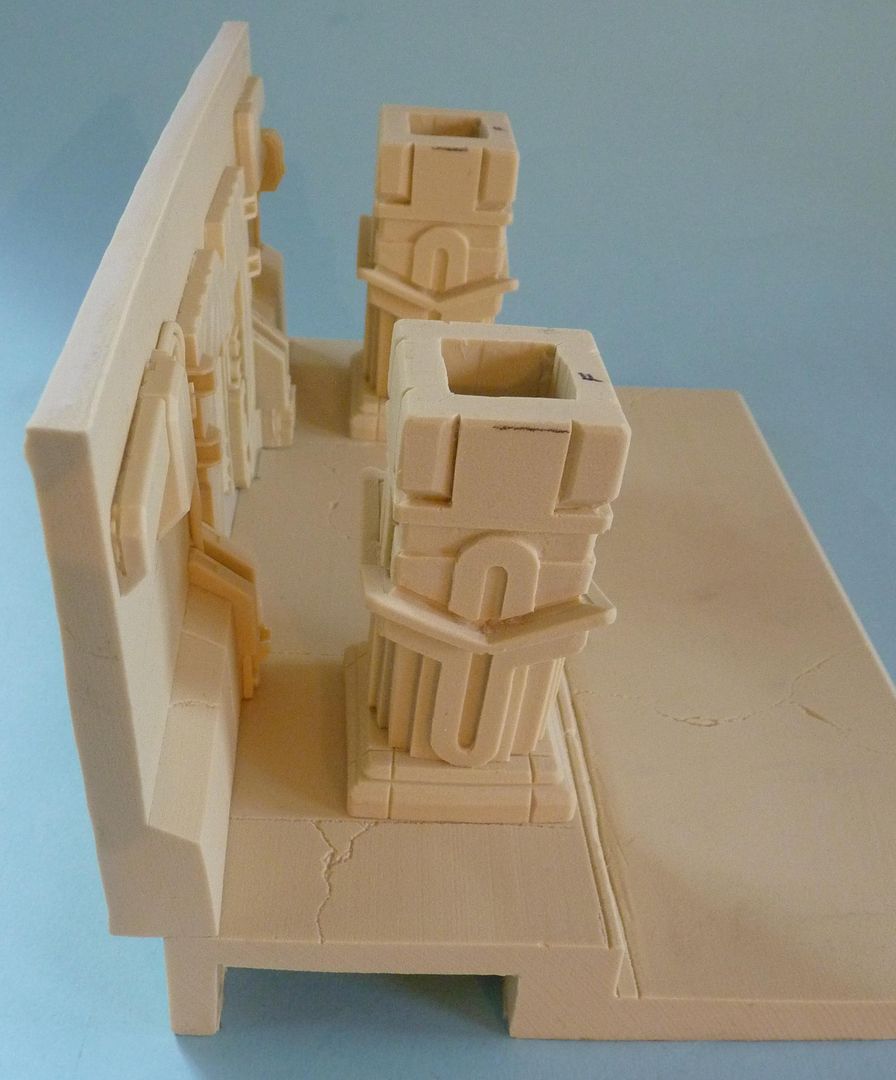
Ha, just realised I've been placing the pillars upside down which explains the fit problems....D'oh!
I need to start following instructions even though the kit only has six parts! |
|
| Back to top |
|
|
|
|
|
|
|
|
|
|
|
| Author |
Message |
joberg
Community Member
Joined: 06 Oct 2008
Posts: 9447
|
| Posted: Thu Feb 21, 2013 8:15 am Post subject: |
|
|
Are you like Ridley who wanted the pillars in Tyrell's office to be turned upside down?  |
|
| Back to top |
|
|
|
|
|
|
|
|
|
|
|
| Author |
Message |
jargonking
Community Member
Joined: 08 Mar 2011
Posts: 65
|
| Posted: Mon Mar 04, 2013 6:40 pm Post subject: |
|
|
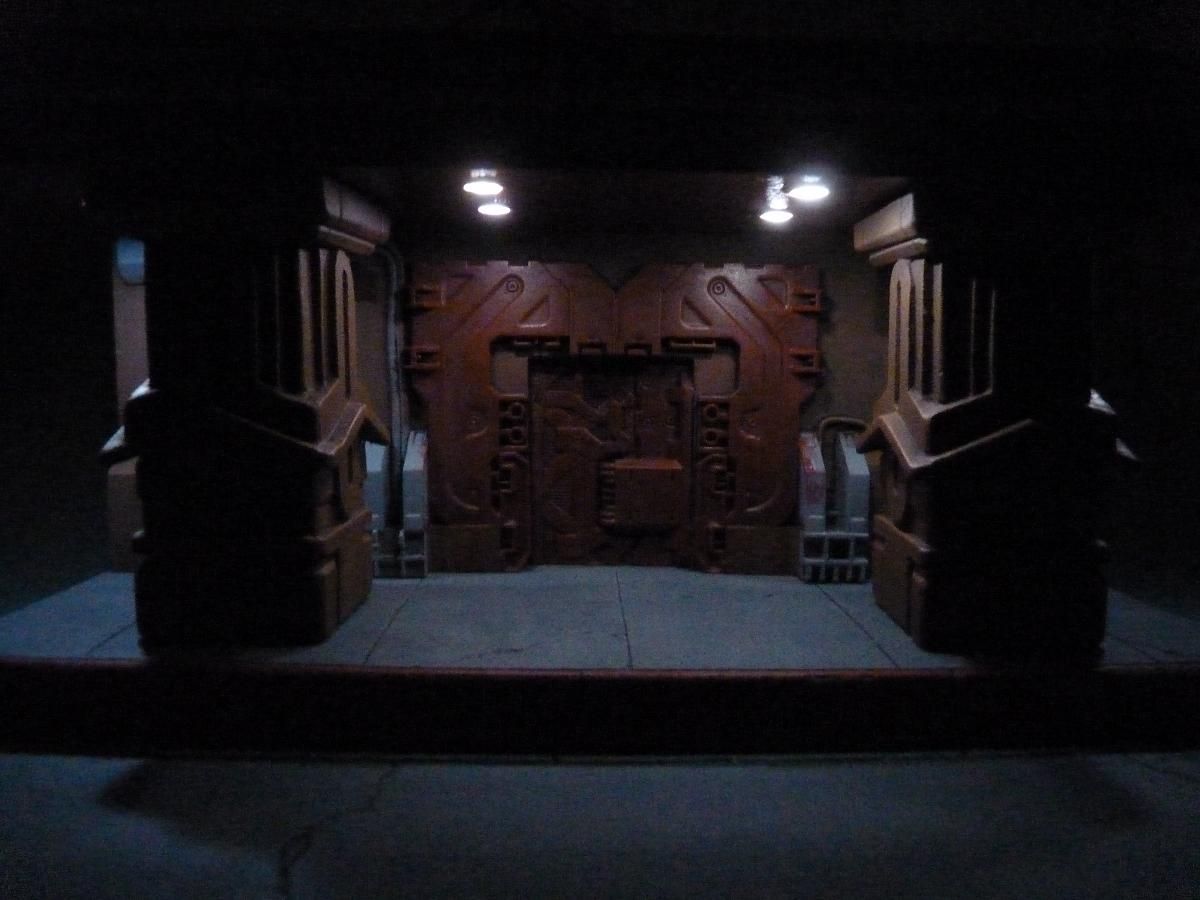
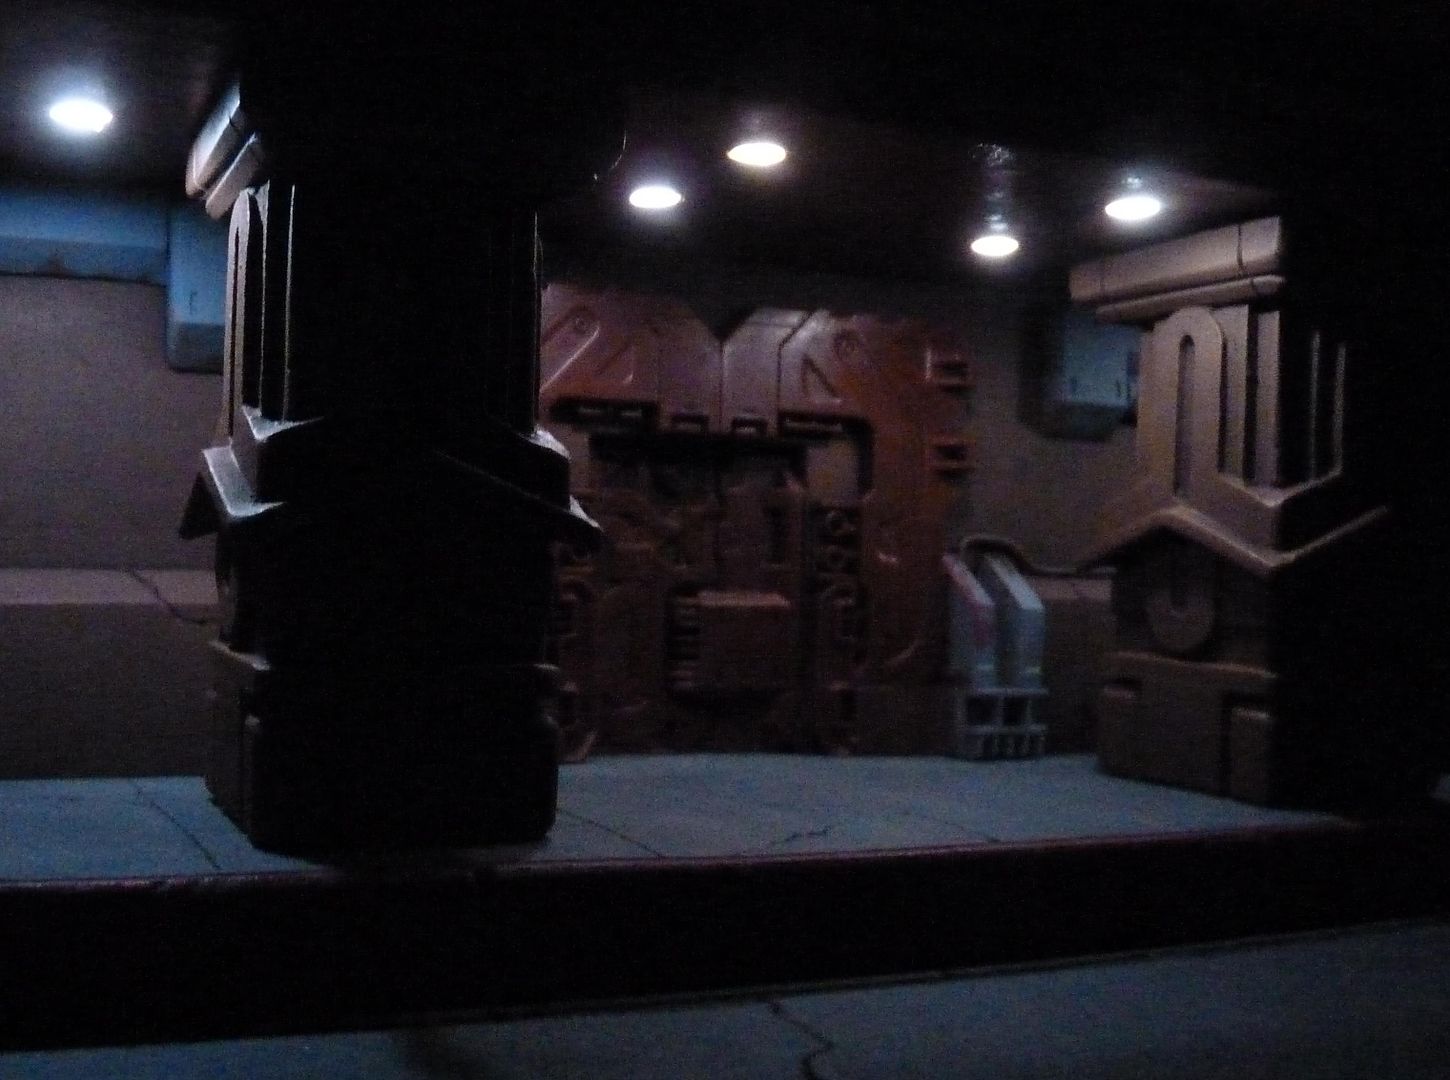
A little more progress with the diorama....
The main elements are painted and partially weathered...still some detail painting to do around the door and the various bits of ducting....
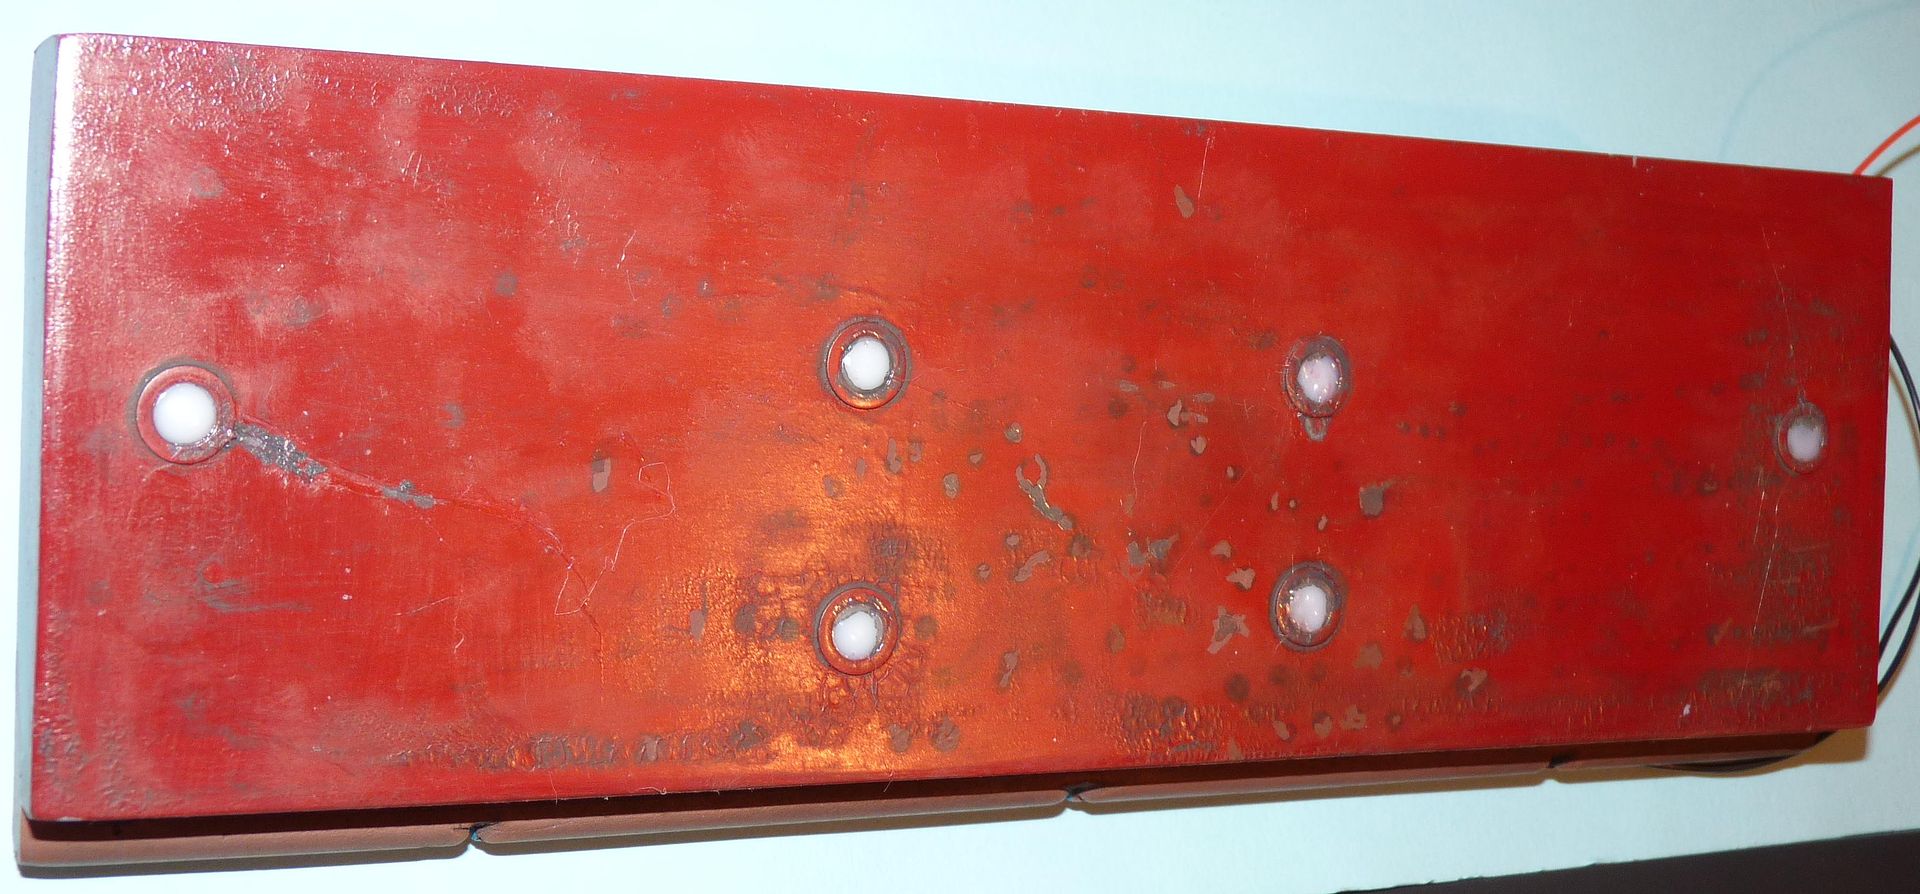
The underside of the canopy....I painted this with a rust red enamel and as soon as it was dry oversprayed it with an acrylic red which reacted with the first coat to give a crackled, distressed look...just what I was after.
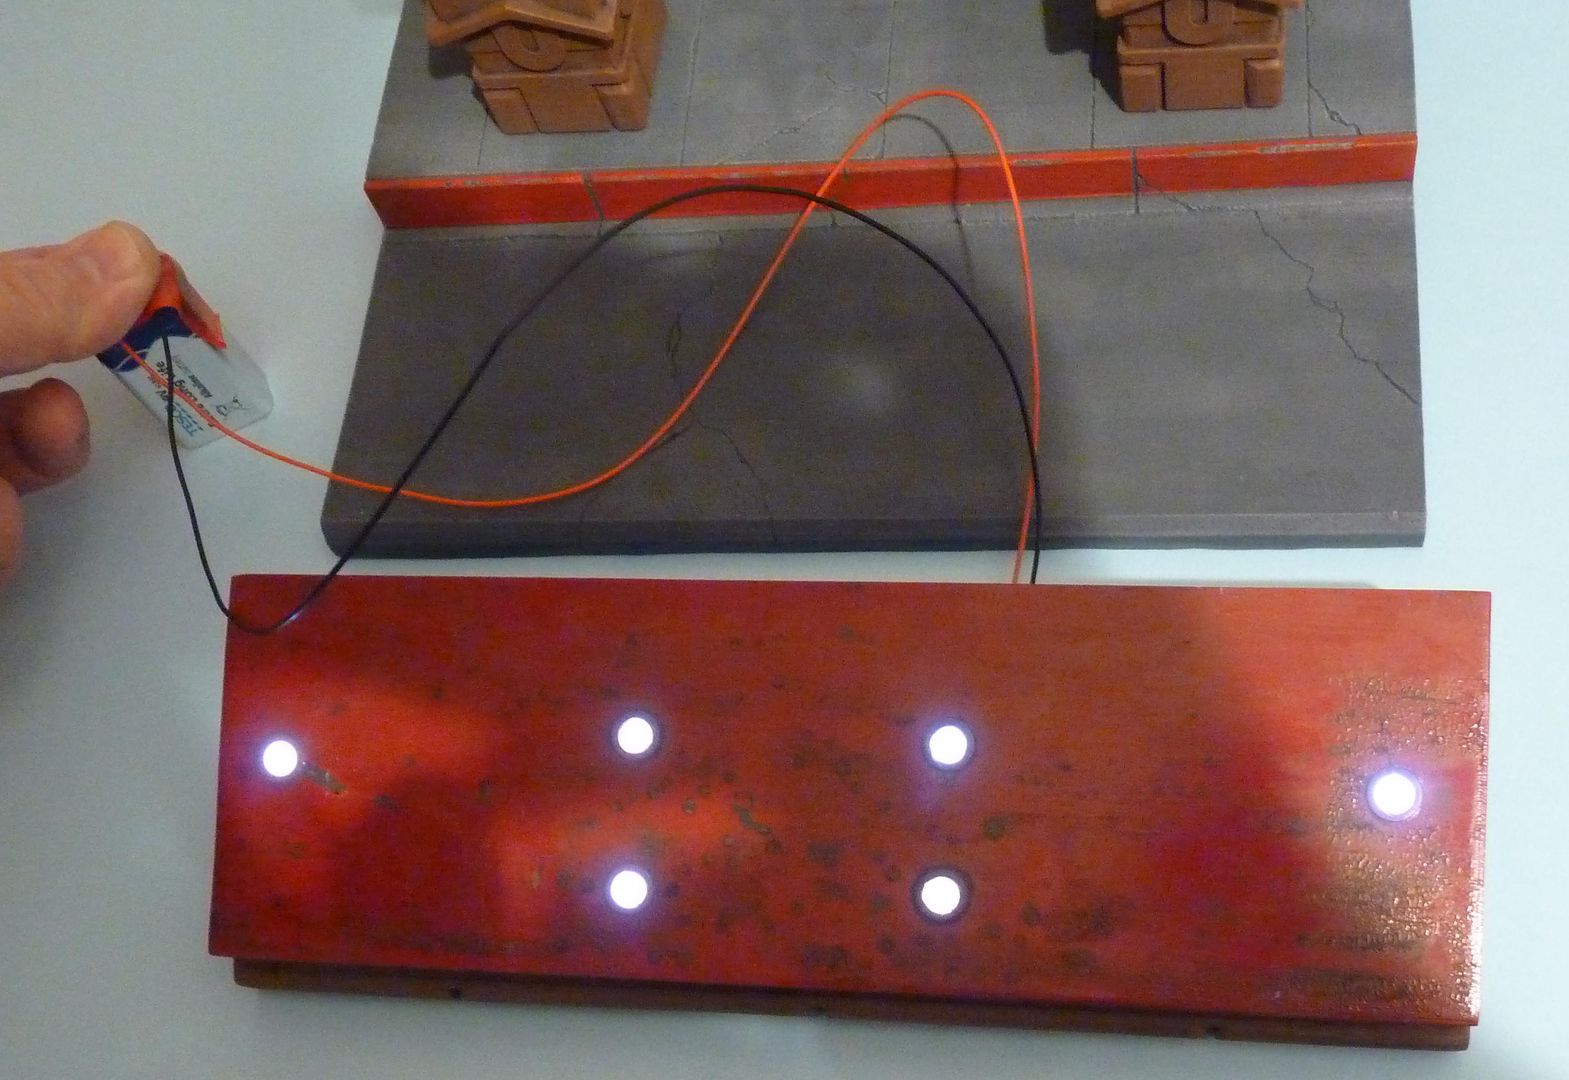
I inserted six 5mm white LED's into the downlights then filled up the rest of the hole with epoxy resin that dried a milky white...
Here they are lit....
And placed in situ....

Here's a couple of moody night shots in the dark....
 |
|
| Back to top |
|
|
|
|
|
|
|
|
|
|
|
| Author |
Message |
joberg
Community Member
Joined: 06 Oct 2008
Posts: 9447
|
| Posted: Mon Mar 04, 2013 8:45 pm Post subject: |
|
|
Love it! Now all you need is the rain and the smoke + the car of course.
Keep up posted as I'm eager to see it all finished asap  |
|
| Back to top |
|
|
|
|
|
|
|
|
|
|
|
| Author |
Message |
Bendzhamin1967
Community Member
Joined: 08 Nov 2009
Posts: 654
Location: Cinco Ranch, TEXAS
|
| Posted: Tue Mar 05, 2013 12:32 pm Post subject: |
|
|
saw this on FB and thought THAT would be an AWESOME greenscreen image for some test animation... if its ok with YOU
_________________
I've had people walk out on me before, but never when i was being so charming |
|
| Back to top |
|
|
|
|
|
|
|
|
|
|
|
| Author |
Message |
jargonking
Community Member
Joined: 08 Mar 2011
Posts: 65
|
| Posted: Sat Mar 09, 2013 9:28 pm Post subject: |
|
|
Nearly there with the diorama....problem is I keep thinking of things to add...
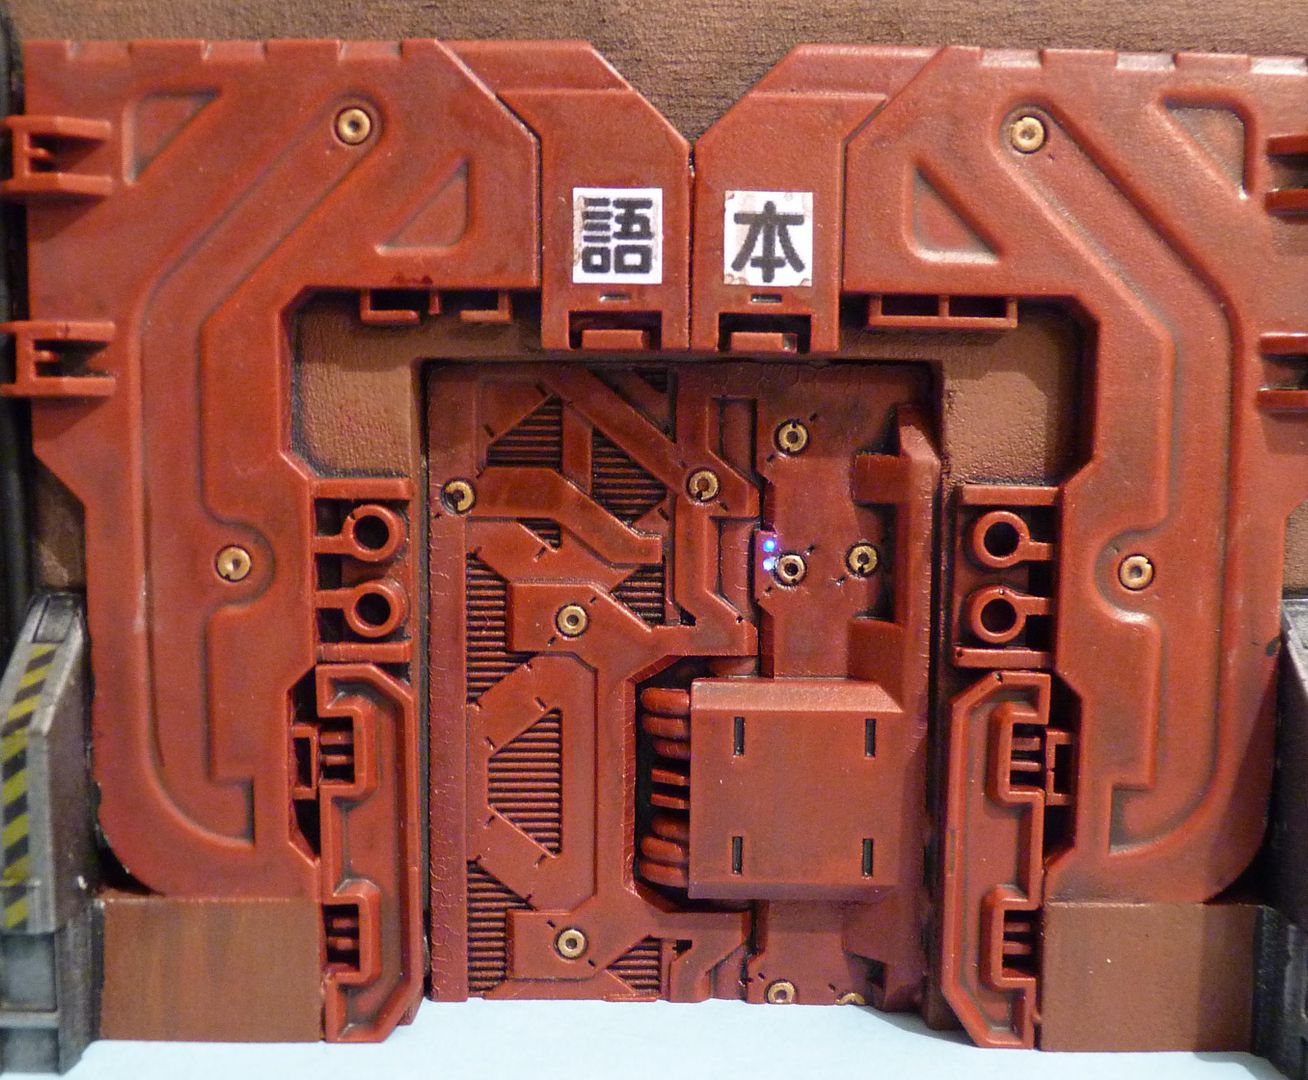
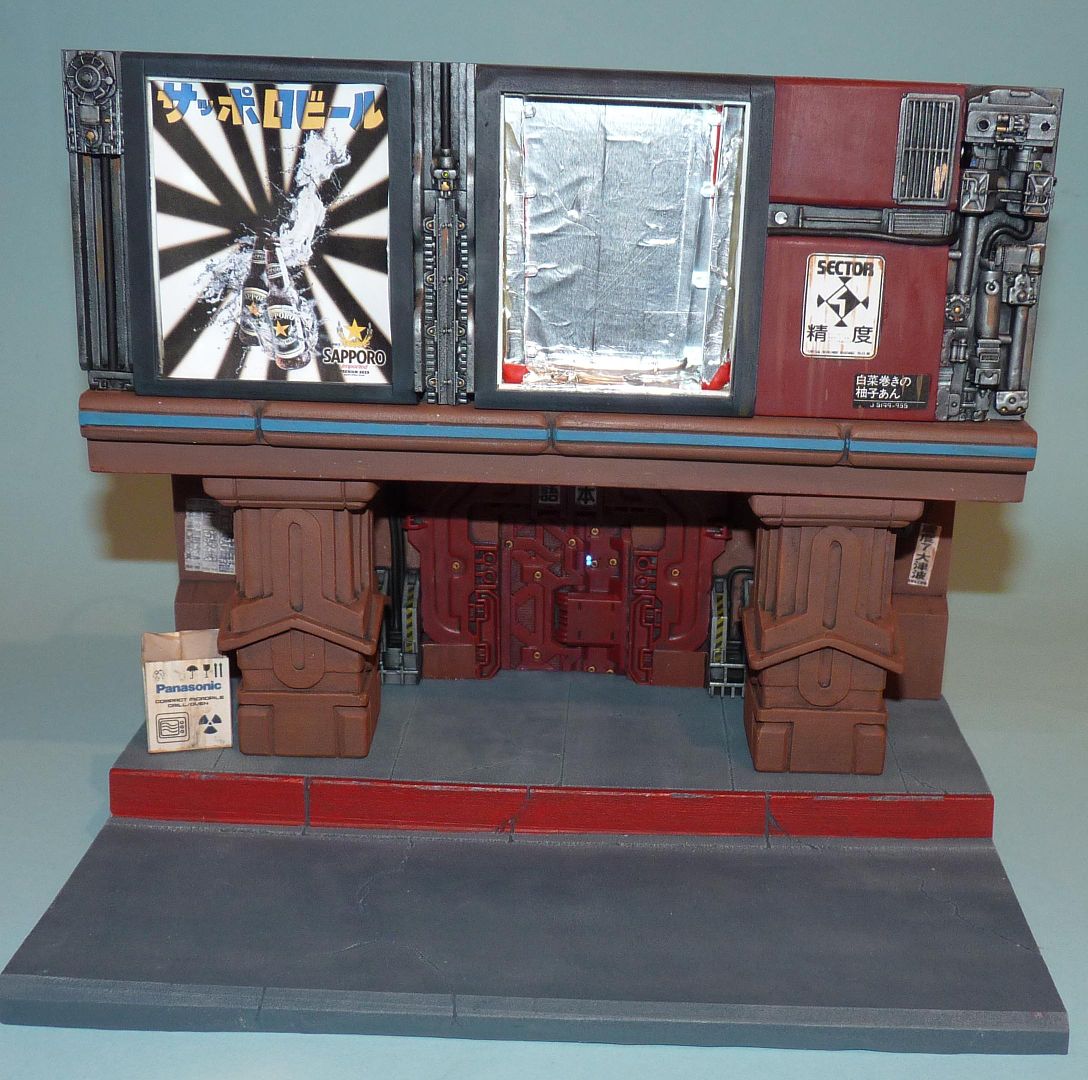
I've more or less finished the door piece after a lot of painting...remember this is a single piece of resin....
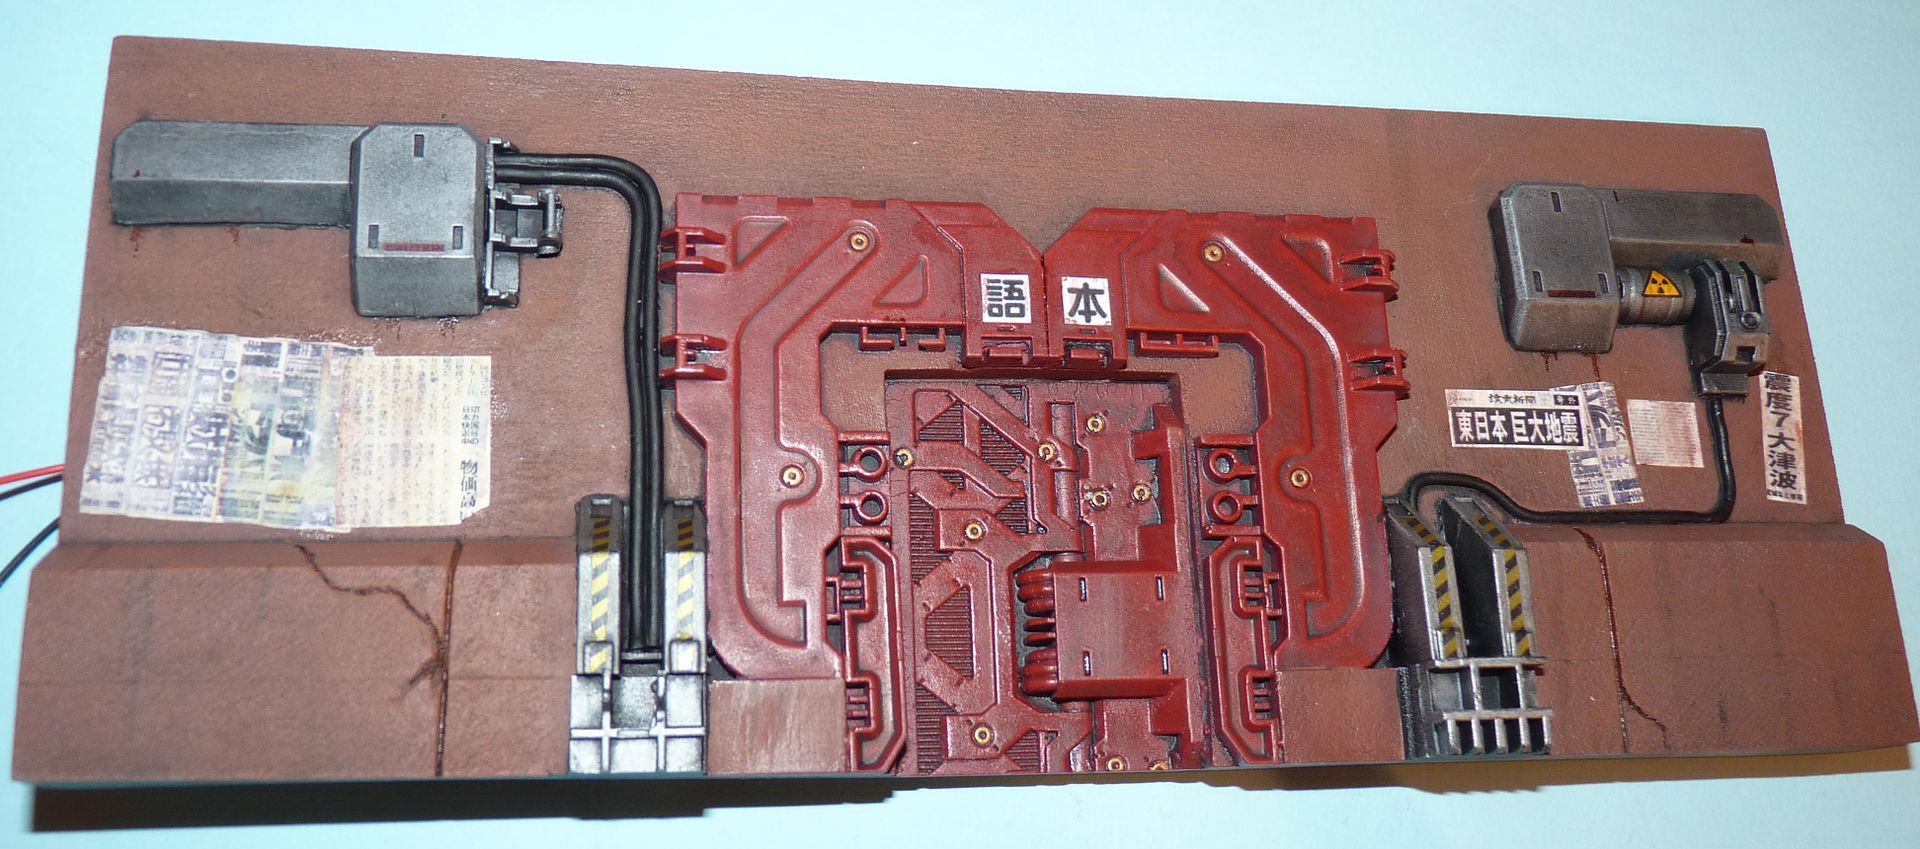
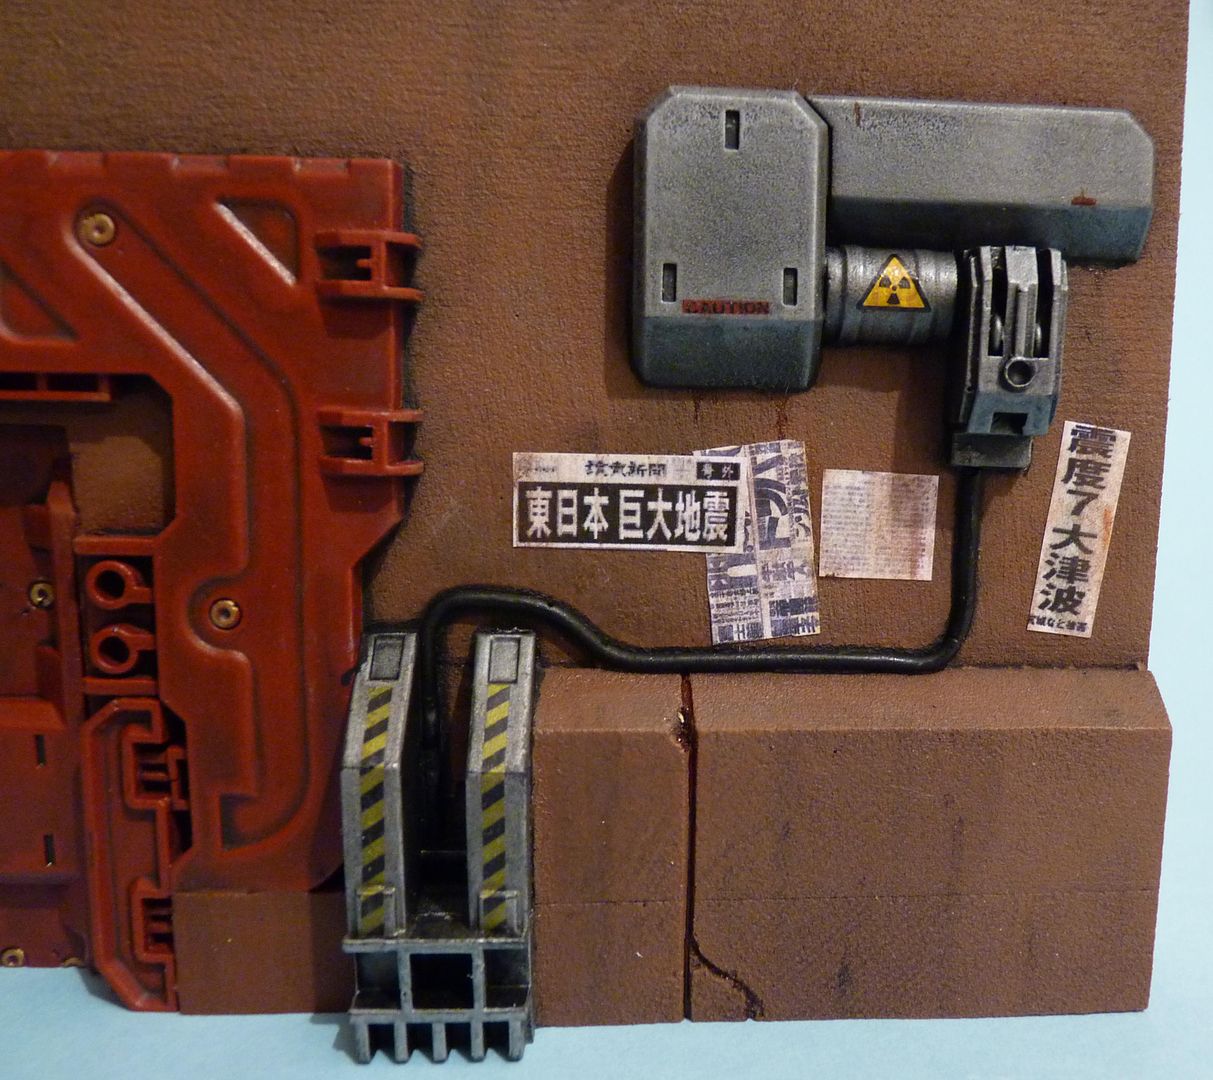
I found some Japanese posters and newspapers on Google and shrunk them to scale before printing them off...they were then glued to the wall using white glue and weathered...
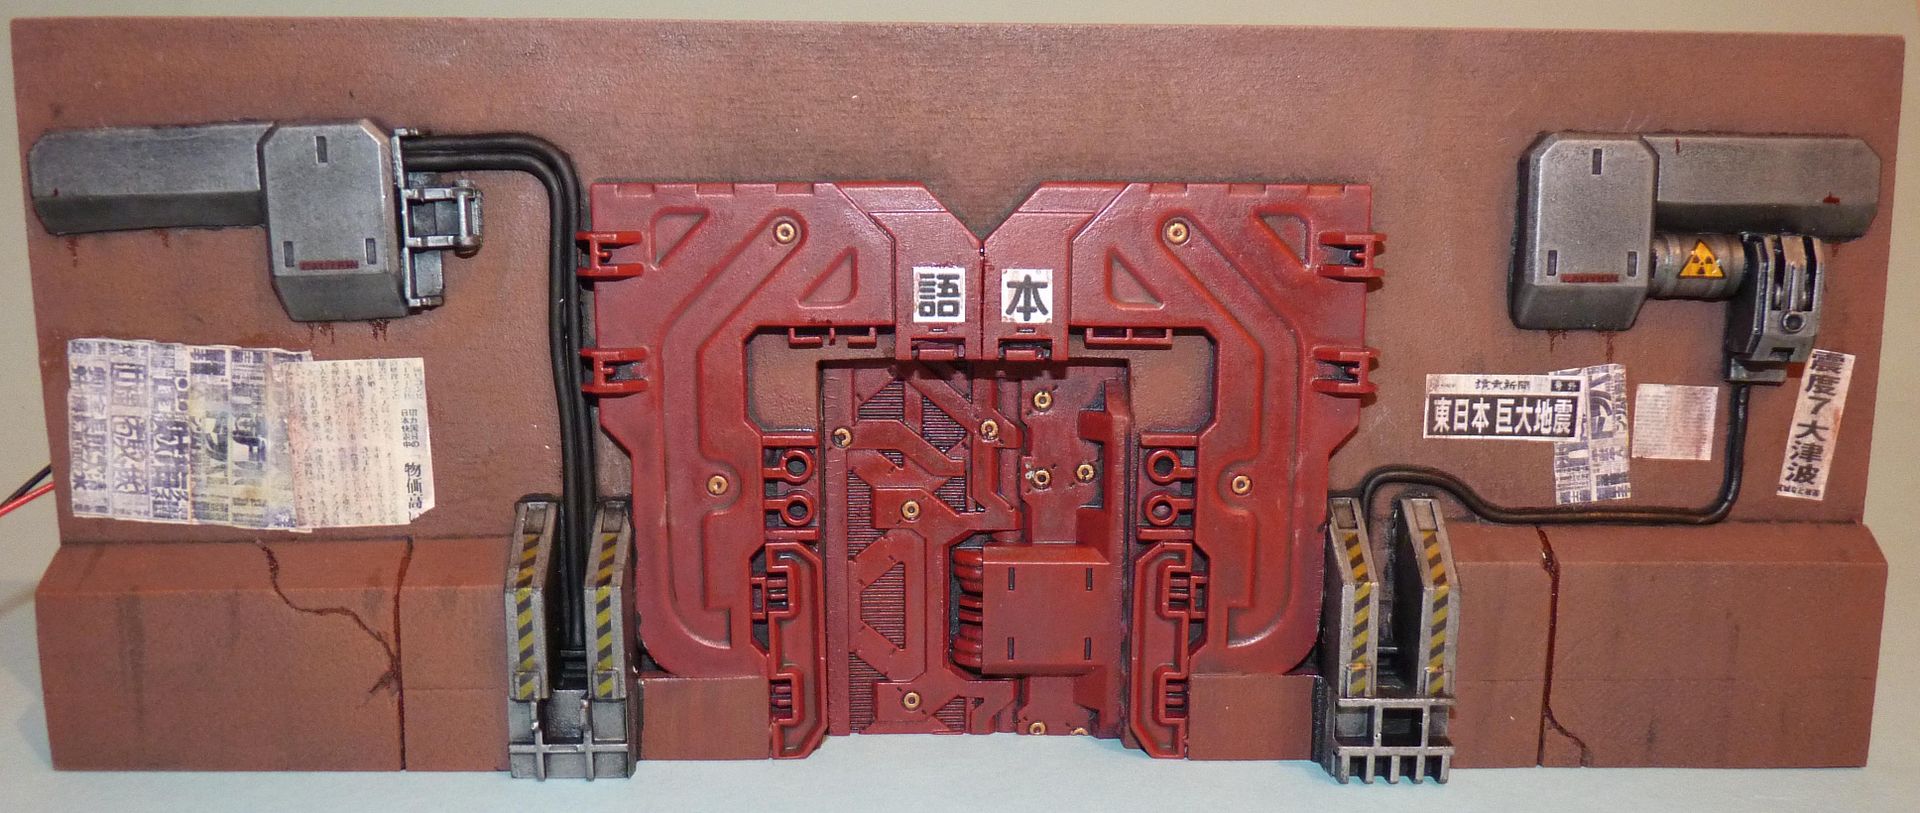
Close up of the posters....
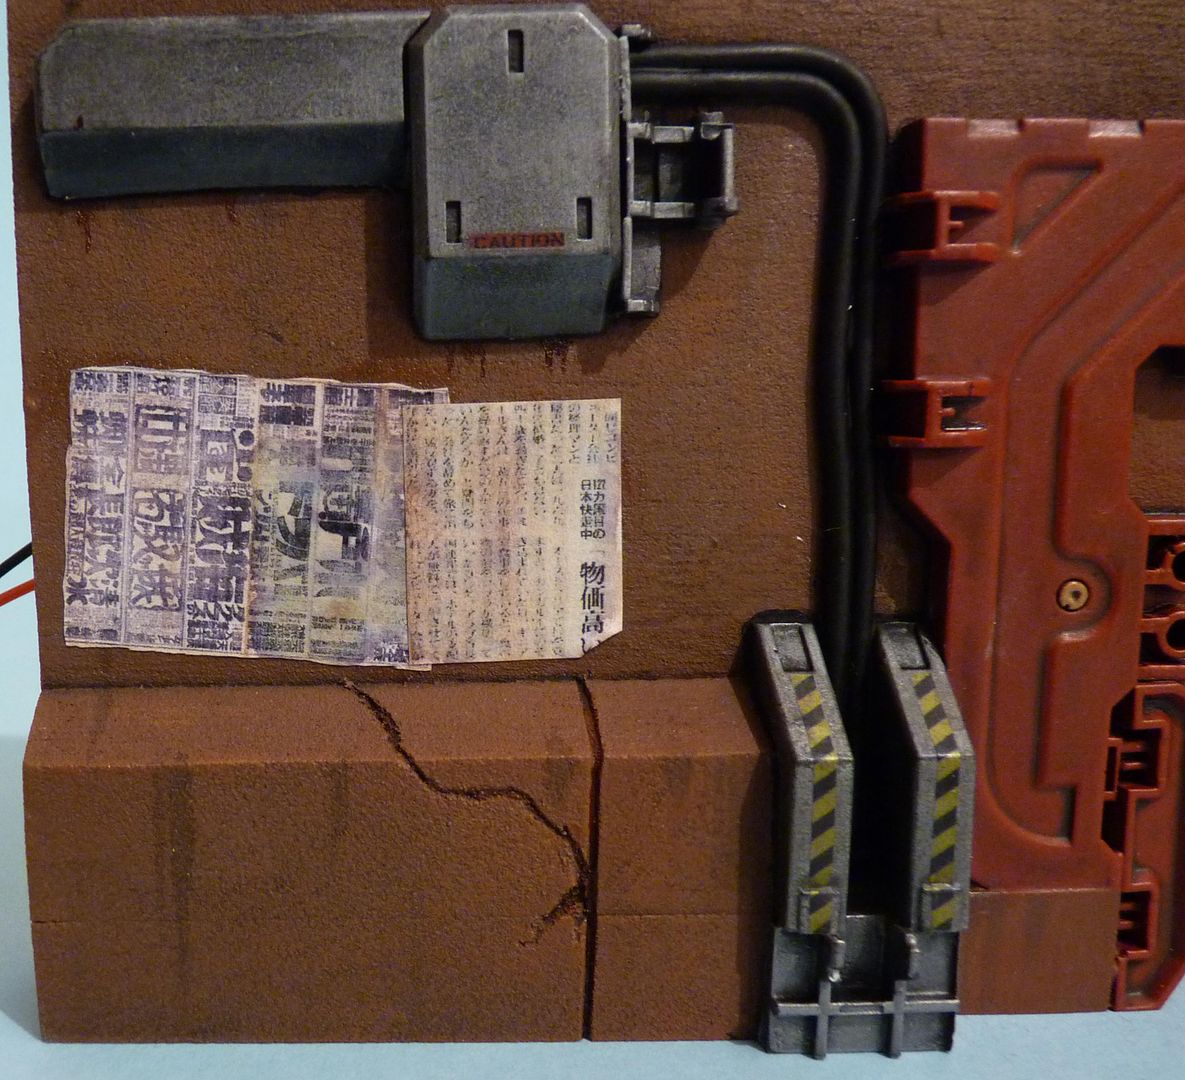
I can't read Japanese so apologies if they are upside down
The door received two Japanese characters at the top and some fibre optics at the centre...hard to see in this pic but quite bright in reality...
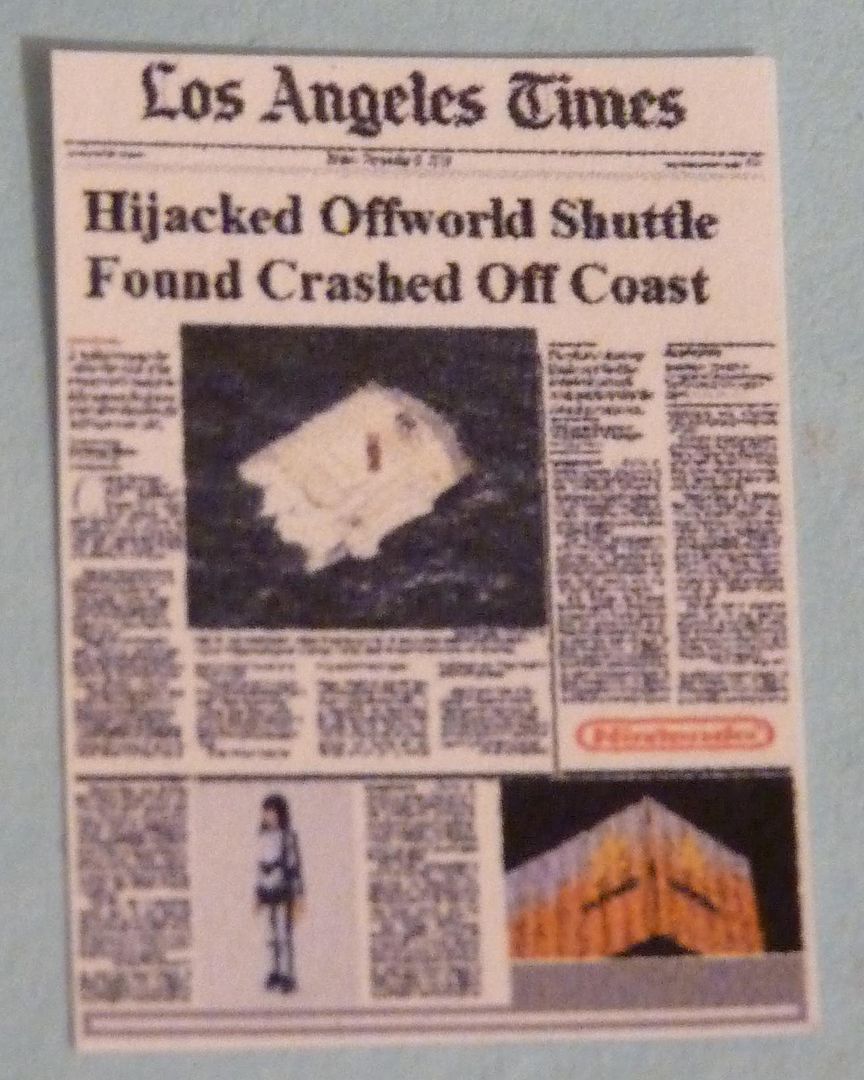
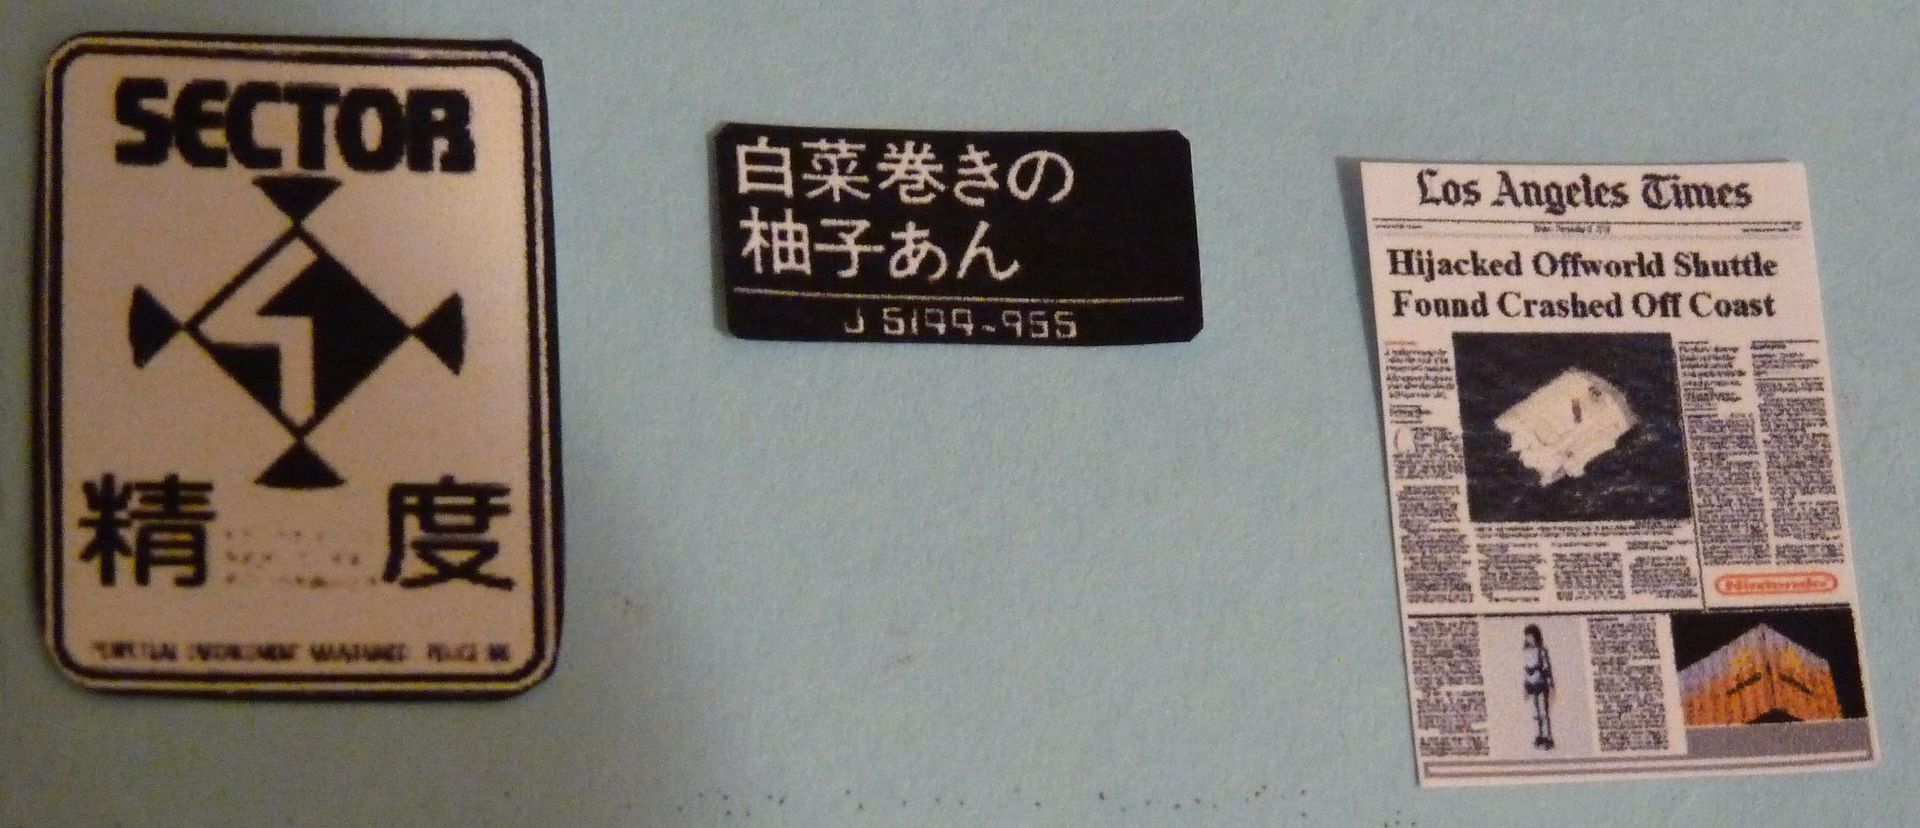
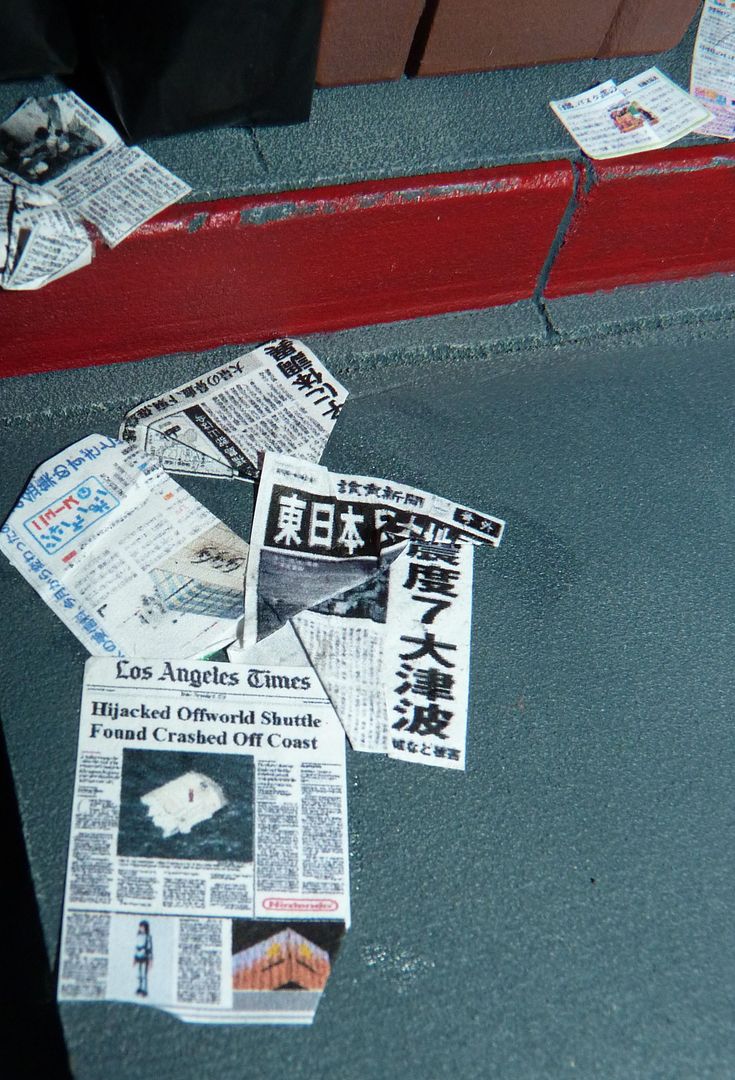
I also made my own copy of the Los Angeles Times ( it's dated 3rd November 2019) with a suitable headline from just prior to the events in the movie....
Also printed are some actual signs from the movie....
More soon.... |
|
| Back to top |
|
|
|
|
|
|
|
|
|
|
|
| Author |
Message |
Ki-Djowac
Community Member
Joined: 23 Feb 2012
Posts: 164
Location: Belgium
|
| Posted: Sun Mar 10, 2013 1:39 pm Post subject: |
|
|
Awesome, the detail on this masterpiece is amazing !! 
_________________
 |
|
| Back to top |
|
|
|
|
|
|
|
|
|
|
|
| Author |
Message |
jargonking
Community Member
Joined: 08 Mar 2011
Posts: 65
|
| Posted: Sun Mar 10, 2013 3:36 pm Post subject: |
|
|
An hour in front of the computer produced this cut out appliance box....
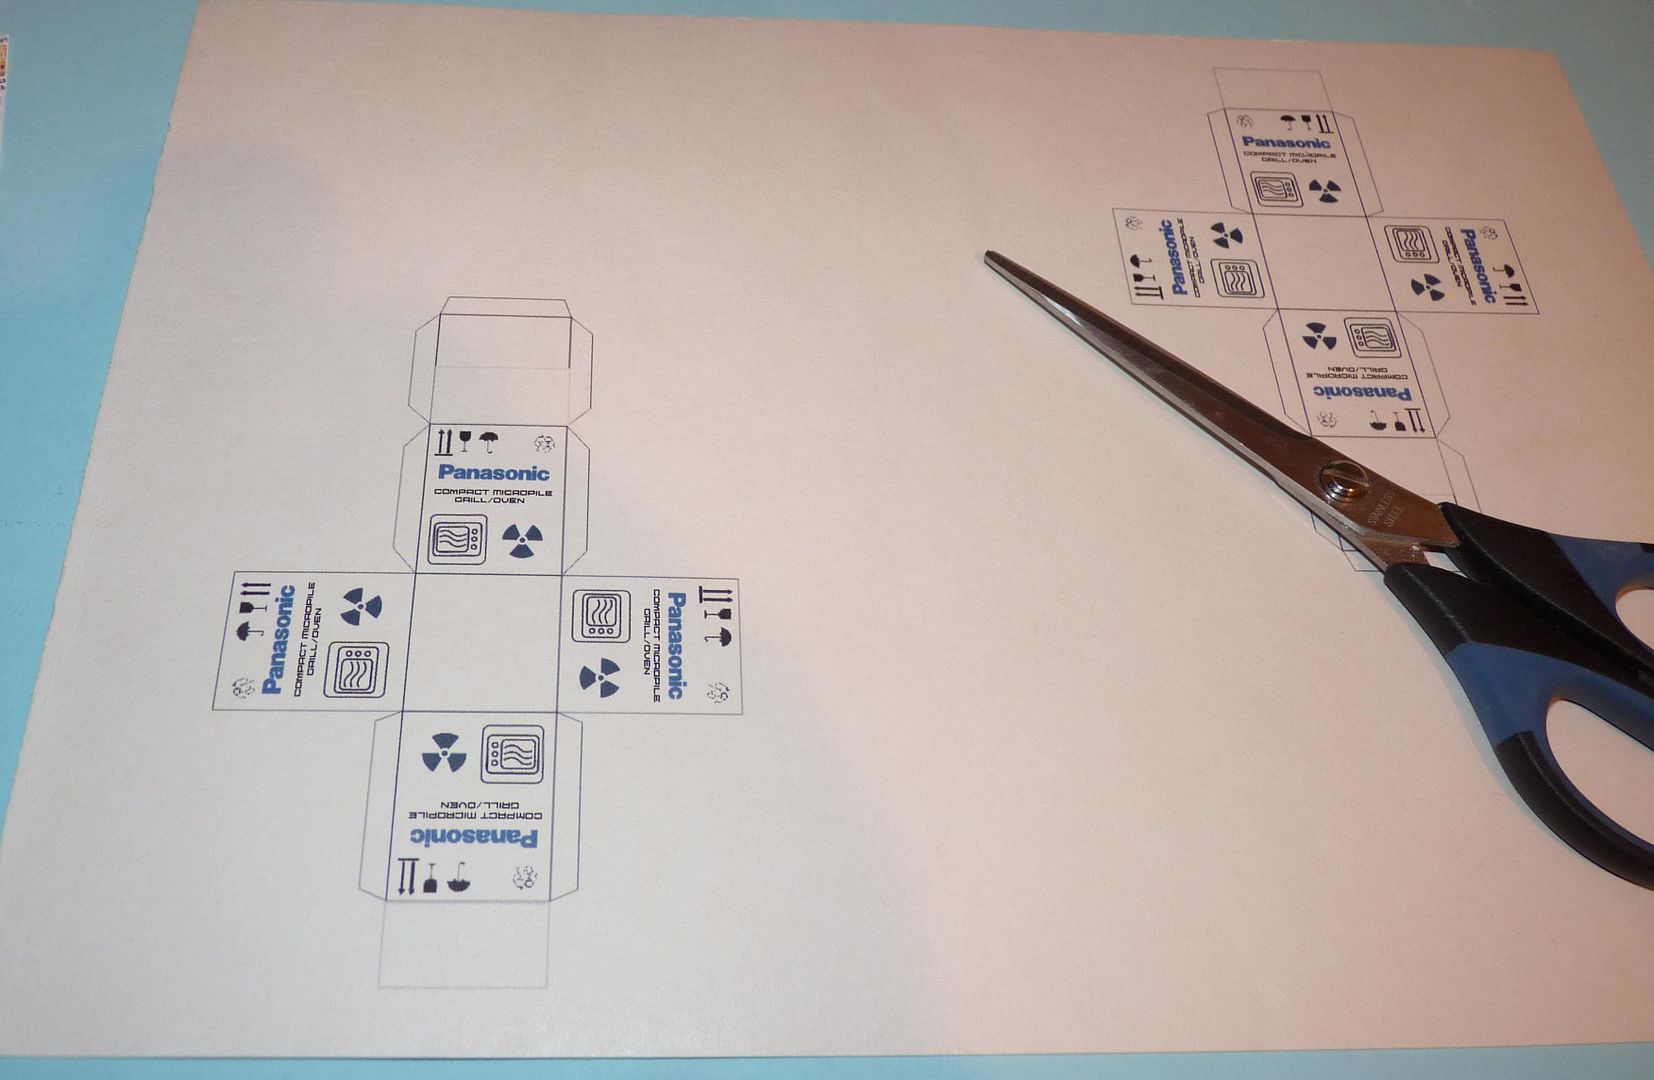
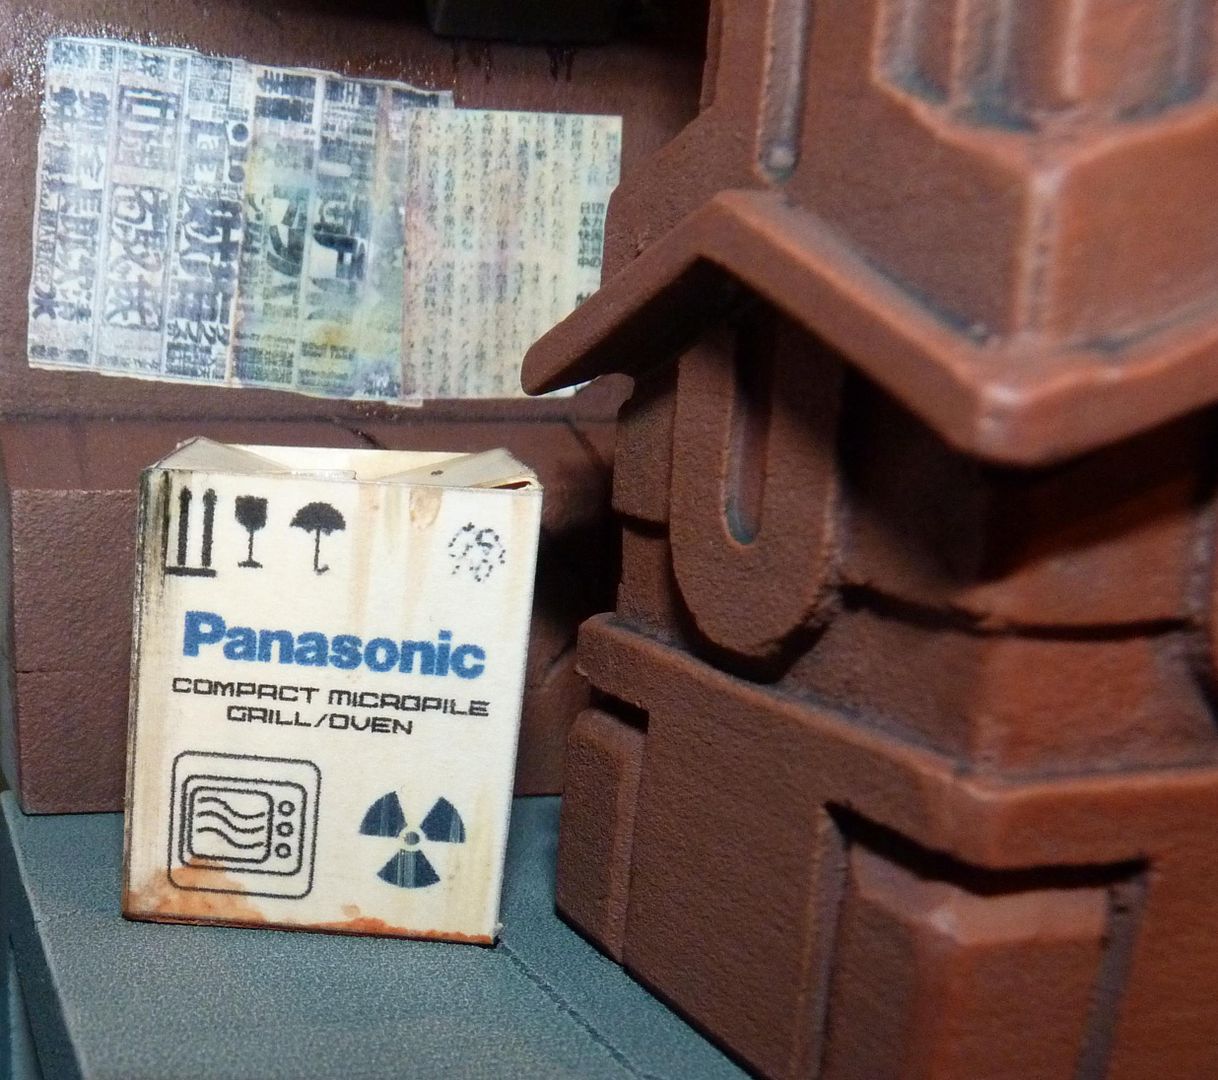
Assembled and weathered....note the product description, they've moved on from microwaves....

In situ on the pavement....
 |
|
| Back to top |
|
|
|
|
|
|
|
|
|
|
|
| Author |
Message |
joberg
Community Member
Joined: 06 Oct 2008
Posts: 9447
|
| Posted: Sun Mar 10, 2013 8:21 pm Post subject: |
|
|
| Excellent detailing on that one for sure; eager to see it all come alive |
|
| Back to top |
|
|
|
|
|
|
|
|
|
|
|
| Author |
Message |
jargonking
Community Member
Joined: 08 Mar 2011
Posts: 65
|
| Posted: Sun Mar 17, 2013 3:58 pm Post subject: |
|
|
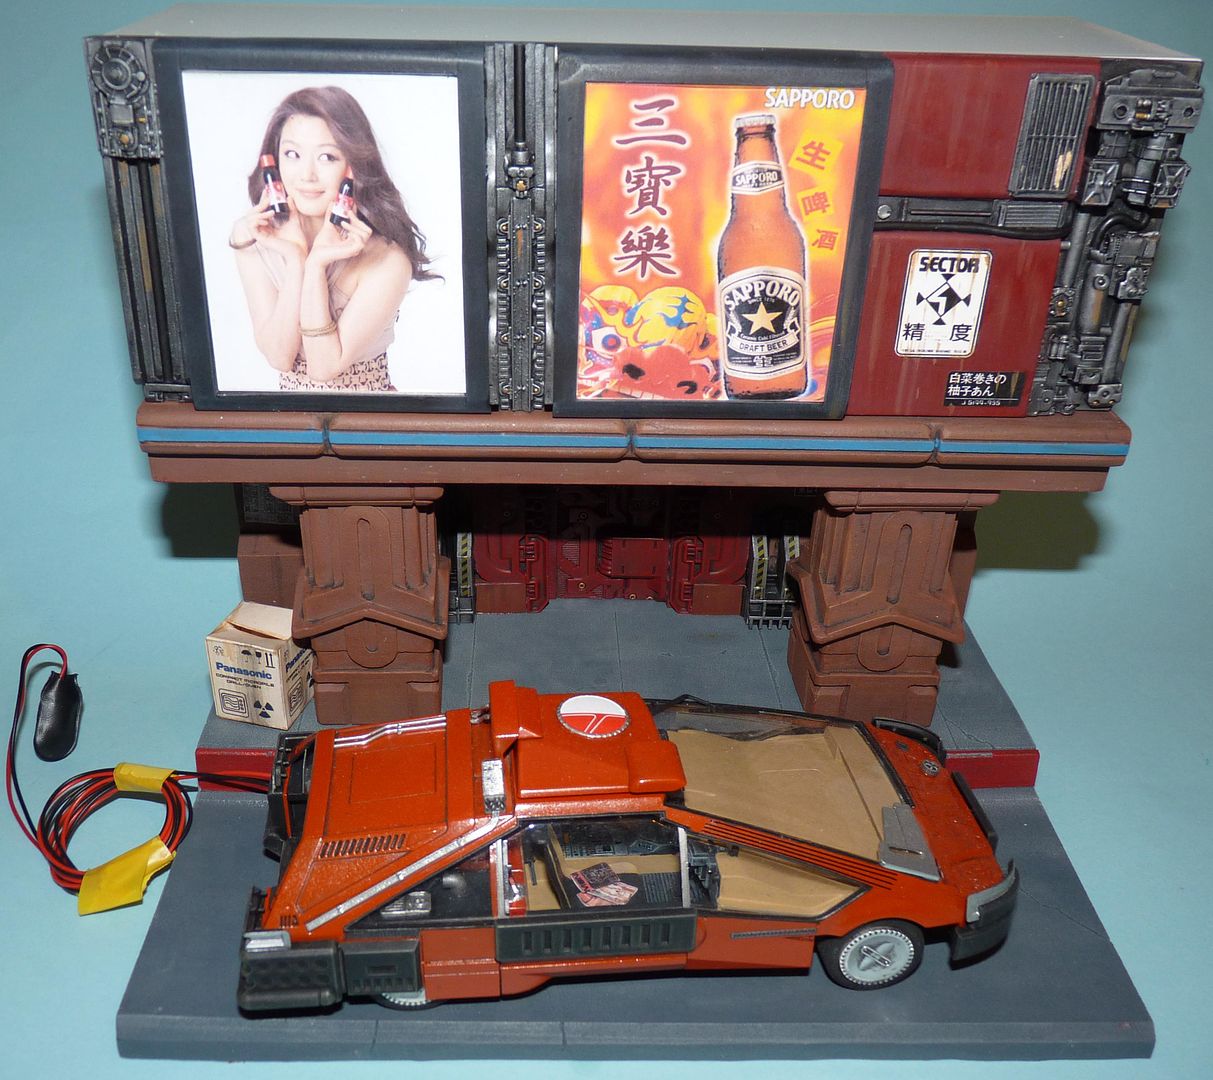
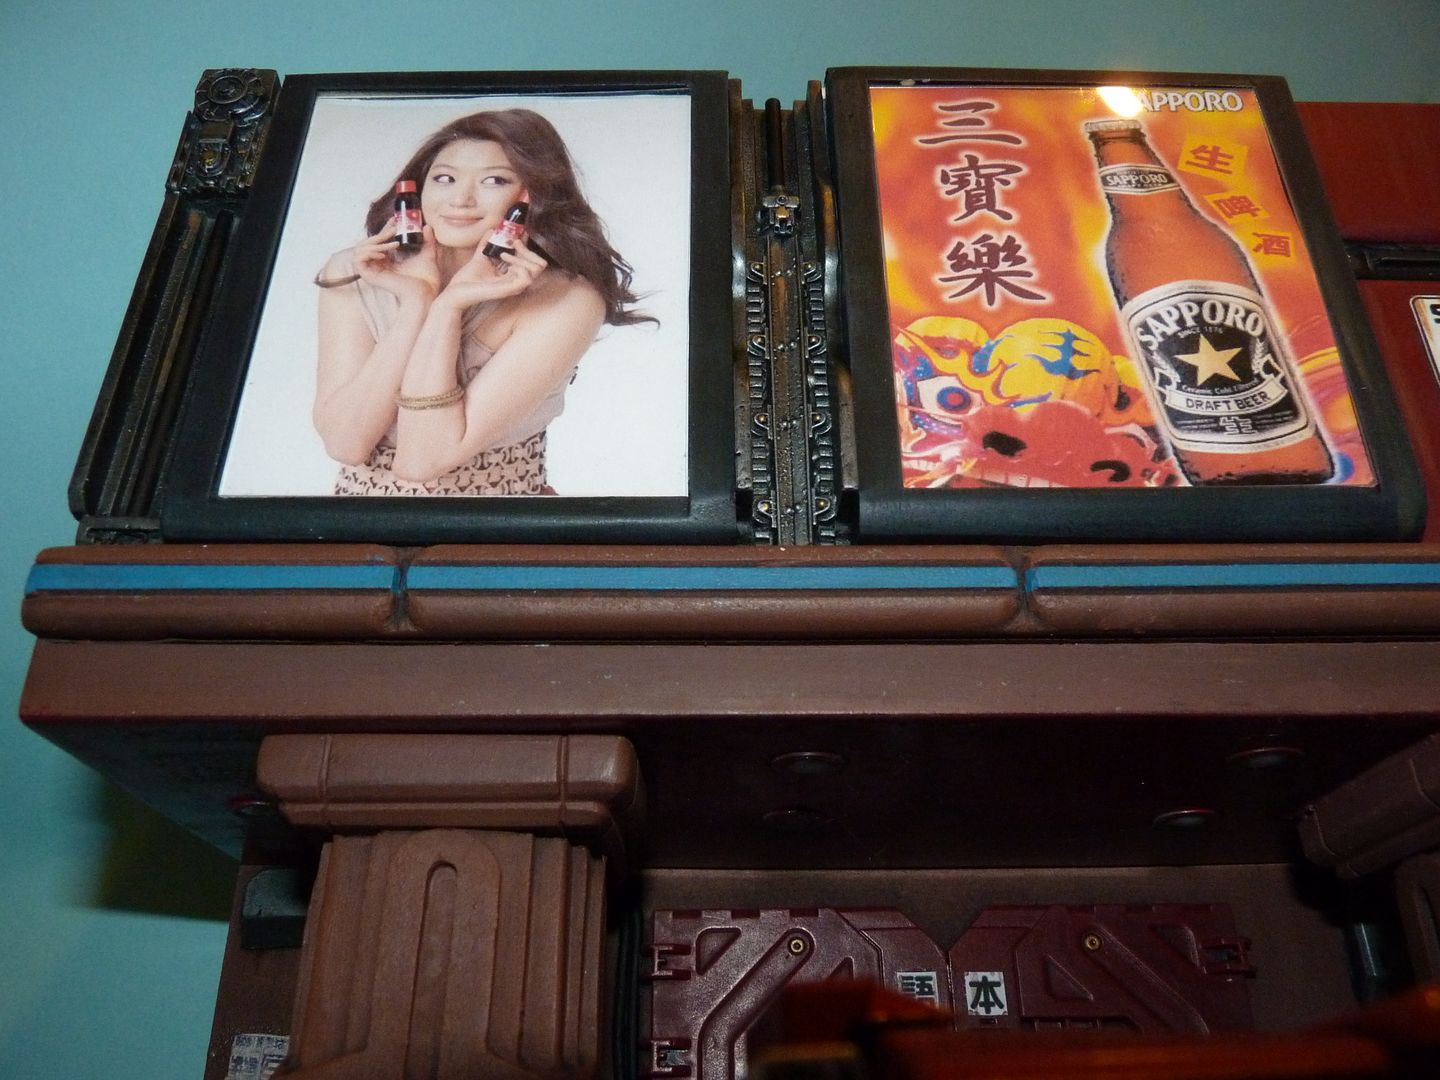
Finally got the top wall in place with the screens....I've been playing around with japanese adverts downloaded from Google and shrunk to fit the screens...here's a Sapporo beer one....
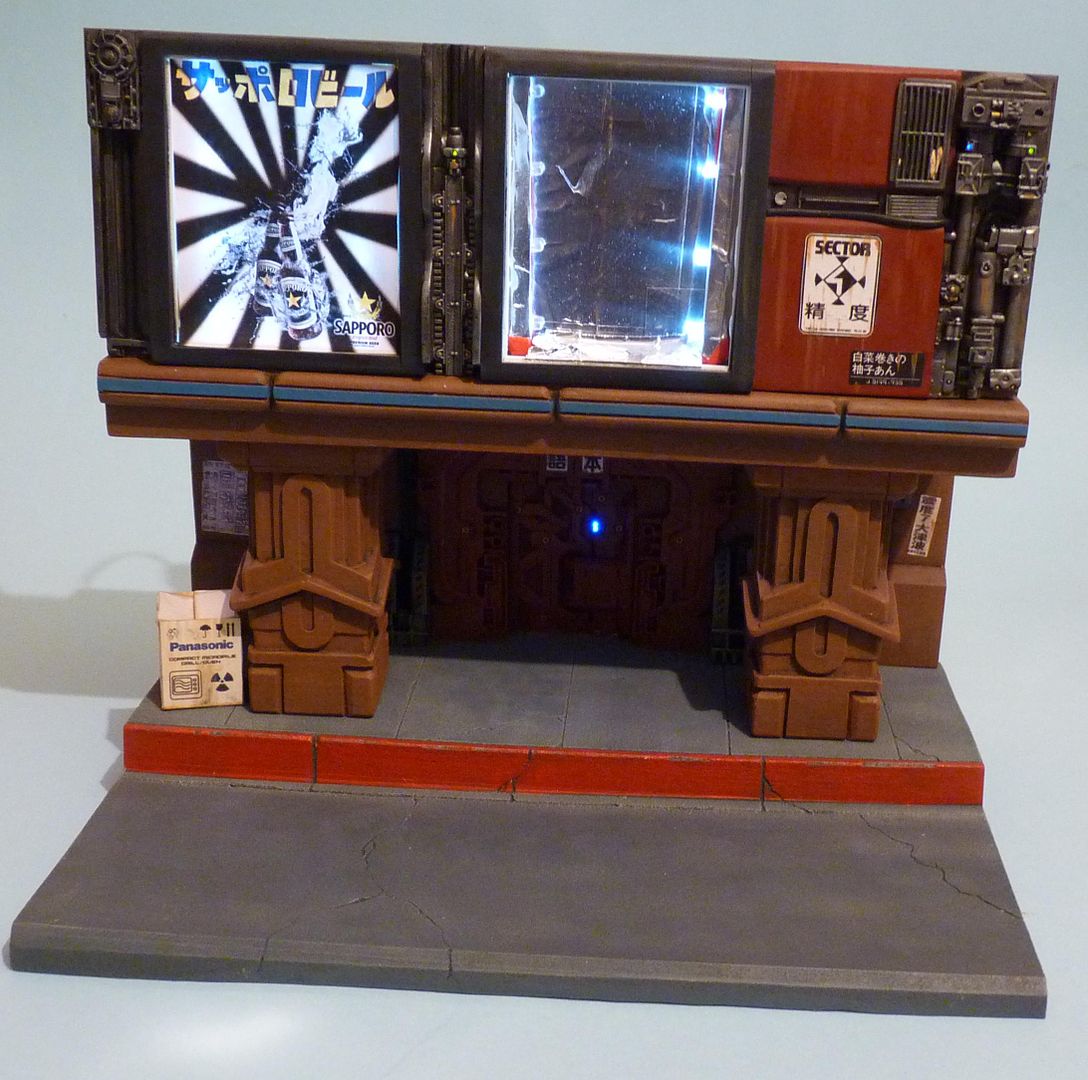
The flash washes out a lot of the effect...here's a shot in natural light...
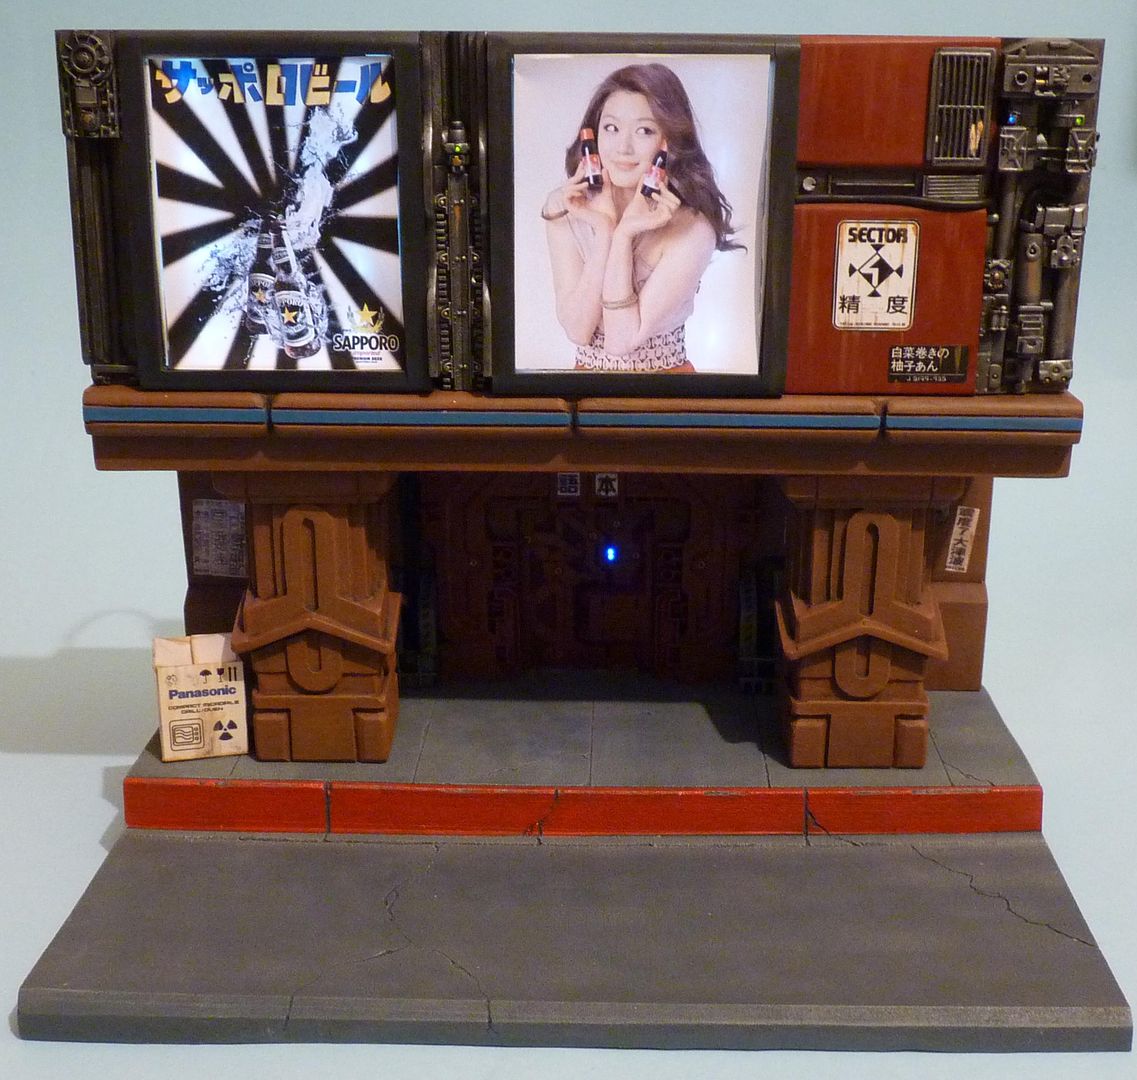
Here's the other screen with a girl advertising a herbal drink...
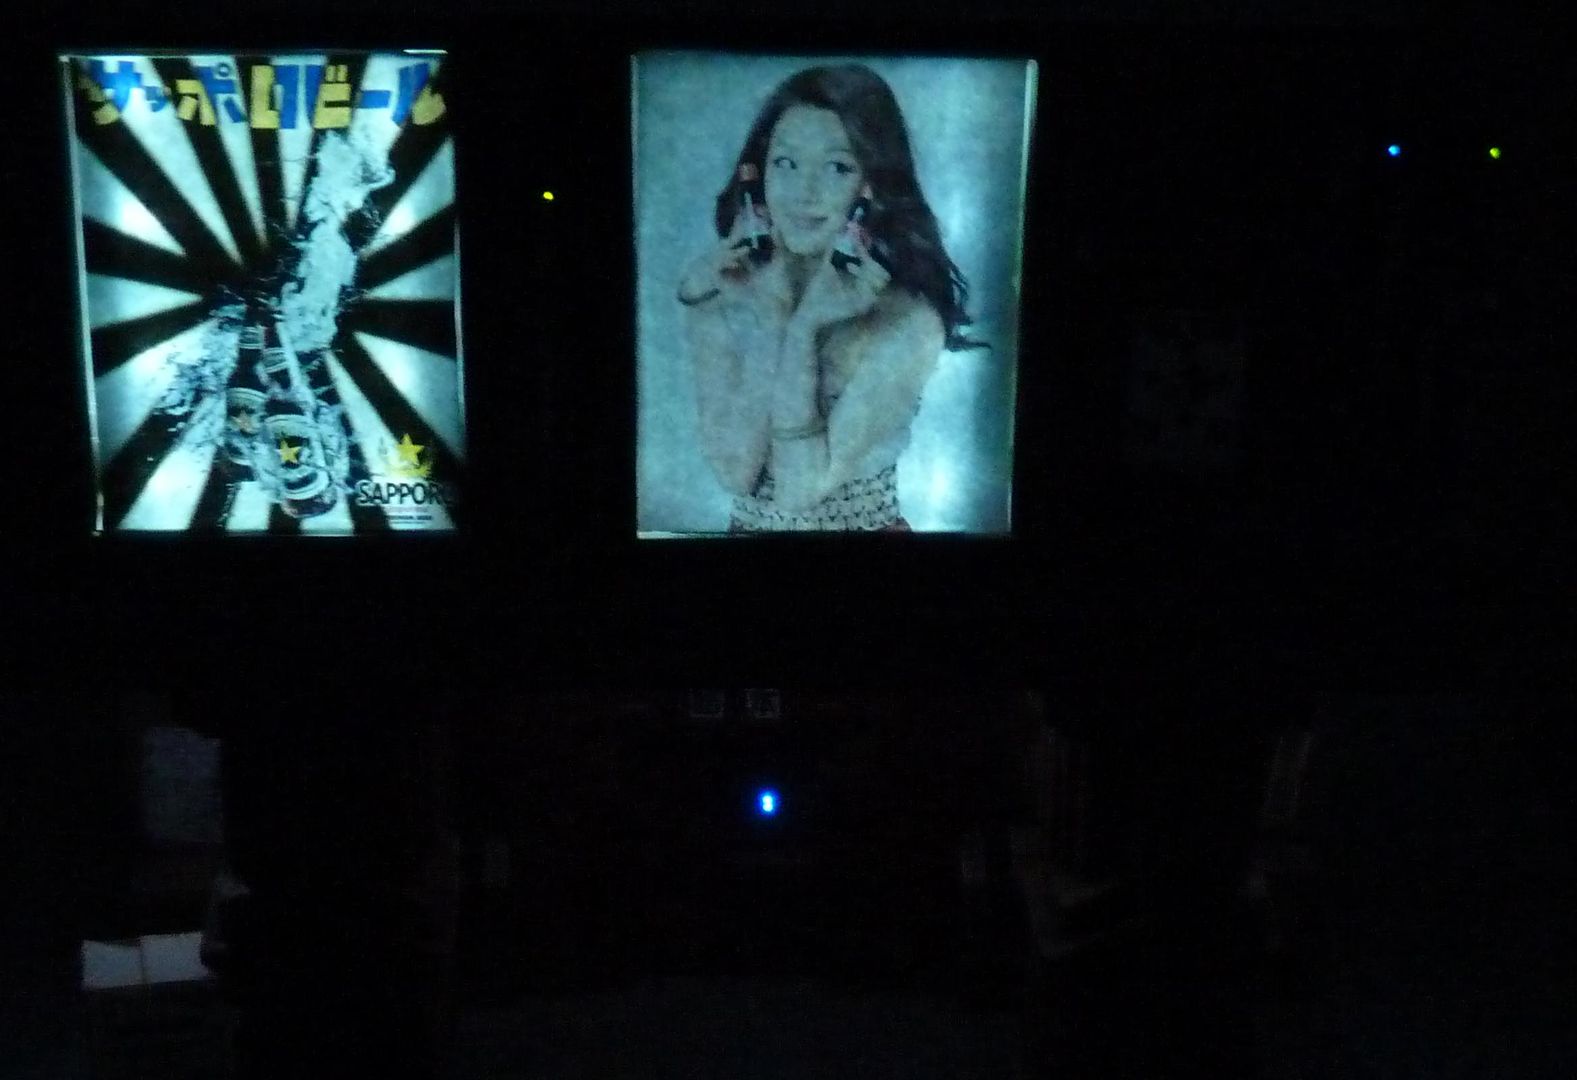
And in the dark....note that the images are only printed on paper...I'm going to experiment printing onto drafting film which I believe is what ParaGrafix use for their film inserts...I might also try backing them with EL sheet rather than LED's....
 |
|
| Back to top |
|
|
|
|
|
|
|
|
|
|
|
| Author |
Message |
Skin-Job
Community Member

Joined: 05 Mar 2007
Posts: 900
Location: London, England
|
| Posted: Sun Mar 17, 2013 4:09 pm Post subject: |
|
|
Lovely work and great attention to detail.
Congrats on a great job.
Karl |
|
| Back to top |
|
|
|
|
|
|
|
|
|
|
|
| Author |
Message |
joberg
Community Member
Joined: 06 Oct 2008
Posts: 9447
|
| Posted: Sun Mar 17, 2013 4:49 pm Post subject: |
|
|
Great stuff once again For the dirt on the street, I usually used ground coffee, specially near the curb of the sidewalk  |
|
| Back to top |
|
|
|
|
|
|
|
|
|
|
|
| Author |
Message |
jargonking
Community Member
Joined: 08 Mar 2011
Posts: 65
|
| Posted: Fri Apr 19, 2013 2:09 pm Post subject: |
|
|
Back to it.....
Finally installed the screens....they are printed on plain paper, the experiments with the translucent paper didn't work, but I've sandwiched them between clear acetate (front) and very thin styrene sheet (behind) and I'm pleased with the results....
Just need to finish off the piles of garbage and run the wire feeds for the car through the base and I'm done... |
|
| Back to top |
|
|
|
|
|
|
|
|
|
|
|
| Author |
Message |
joberg
Community Member
Joined: 06 Oct 2008
Posts: 9447
|
| Posted: Fri Apr 19, 2013 5:36 pm Post subject: |
|
|
| Looking cool and eager to see the final comp Btw, maybe you know that trick: I find that when you put a drop of glue on top of your LED (with the hot glue gun) that the light is more evenly distributed. |
|
| Back to top |
|
|
|
|
|
|
|
|
|
|
|
| Author |
Message |
jargonking
Community Member
Joined: 08 Mar 2011
Posts: 65
|
| Posted: Sun Apr 21, 2013 5:21 pm Post subject: |
|
|
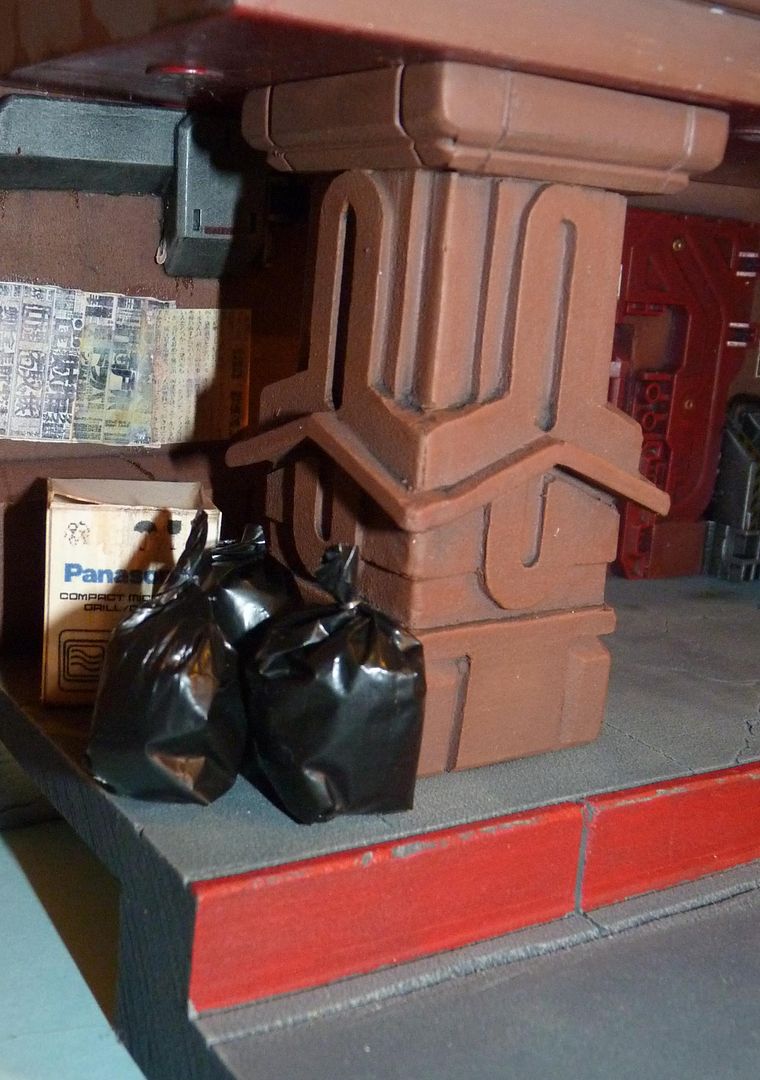
Made some miniature garbage bags from actual bin liners....
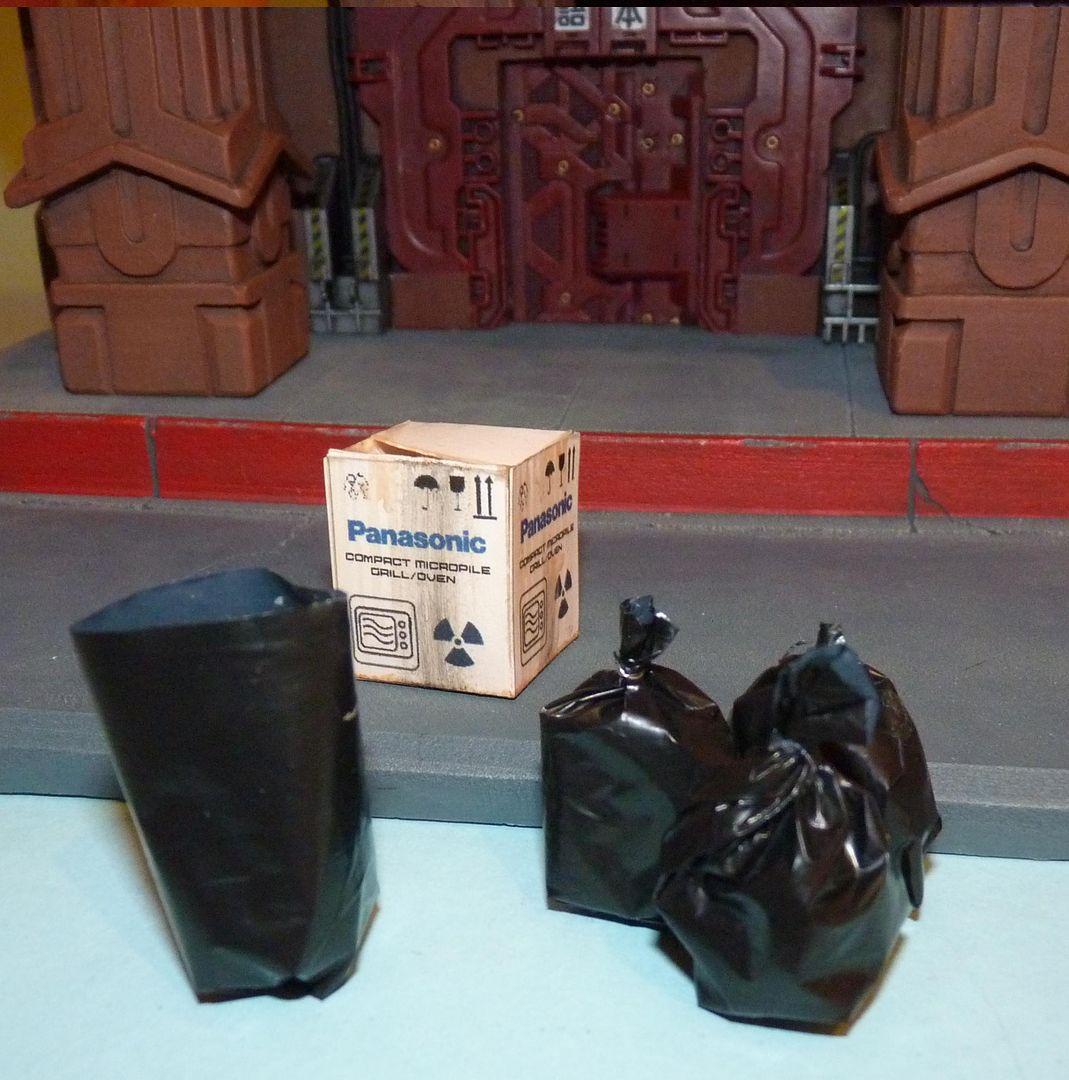
Here they are placed in the corner.....
 |
|
| Back to top |
|
|
|
|
|
|
|
|
|
|
|
| Author |
Message |
joberg
Community Member
Joined: 06 Oct 2008
Posts: 9447
|
| Posted: Mon Apr 22, 2013 6:44 am Post subject: |
|
|
| Good stuff, keep adding the layers |
|
| Back to top |
|
|
|
|
|
|
|
|
|
|
|
| Author |
Message |
jargonking
Community Member
Joined: 08 Mar 2011
Posts: 65
|
| Posted: Wed Apr 24, 2013 6:37 pm Post subject: |
|
|
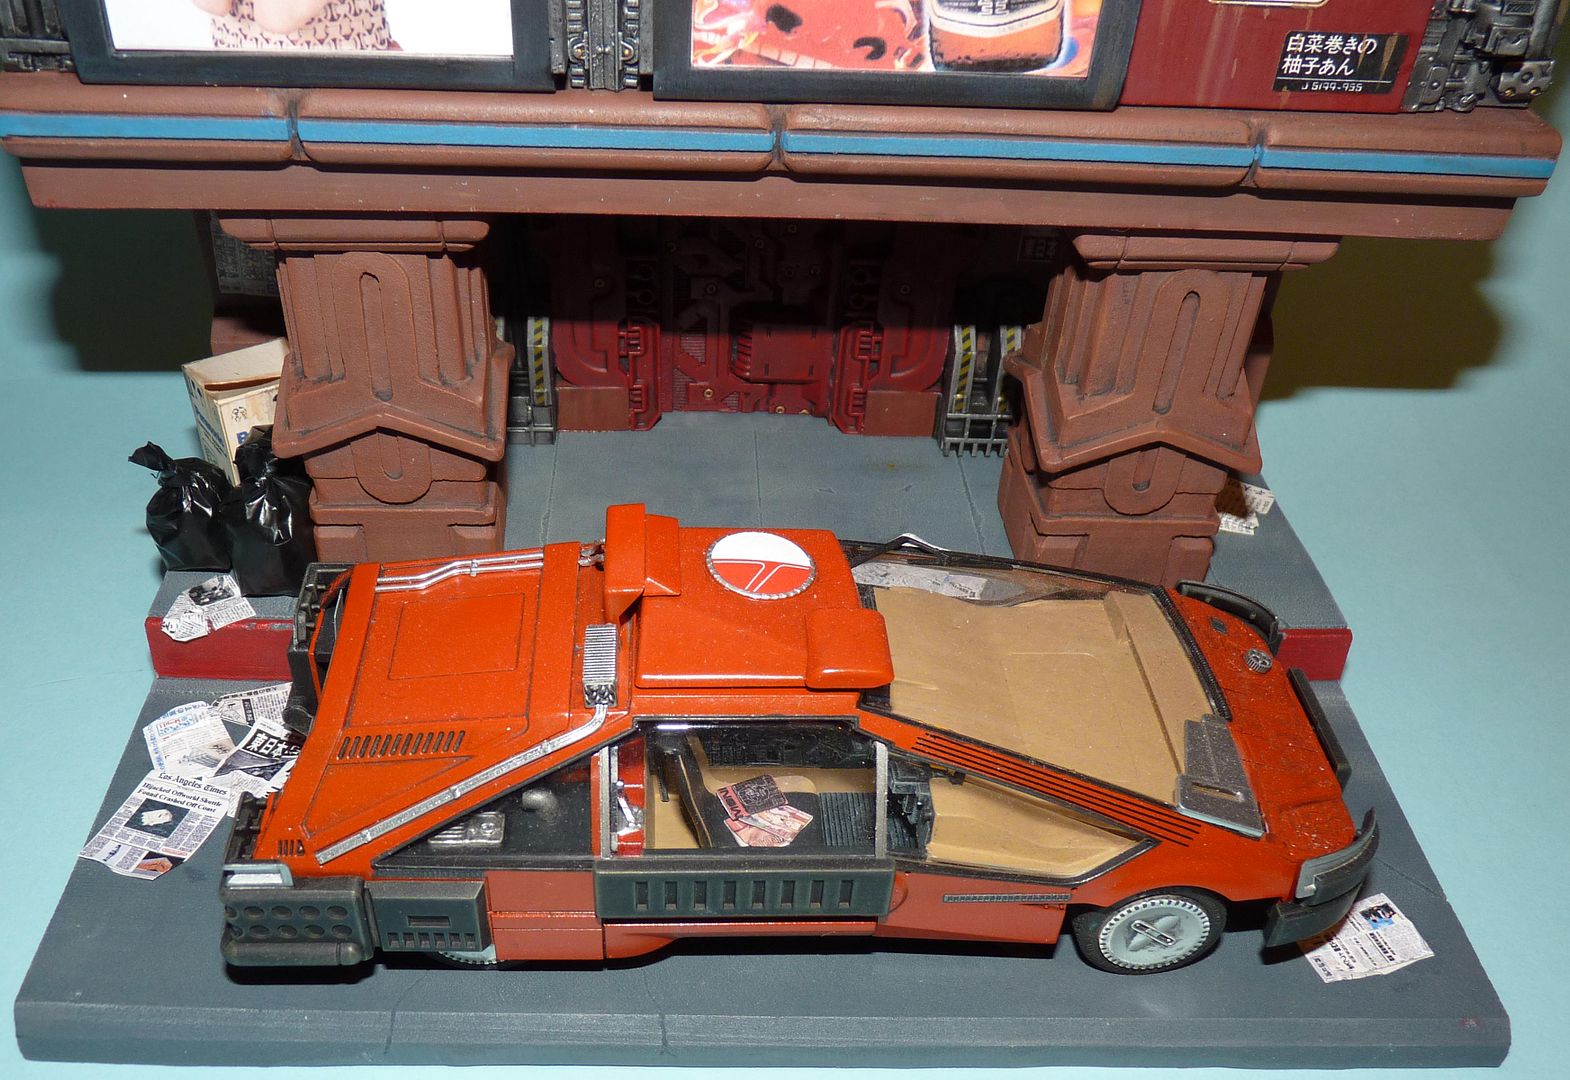
Some final touches.....
Miniature newspapers scattered across the street....
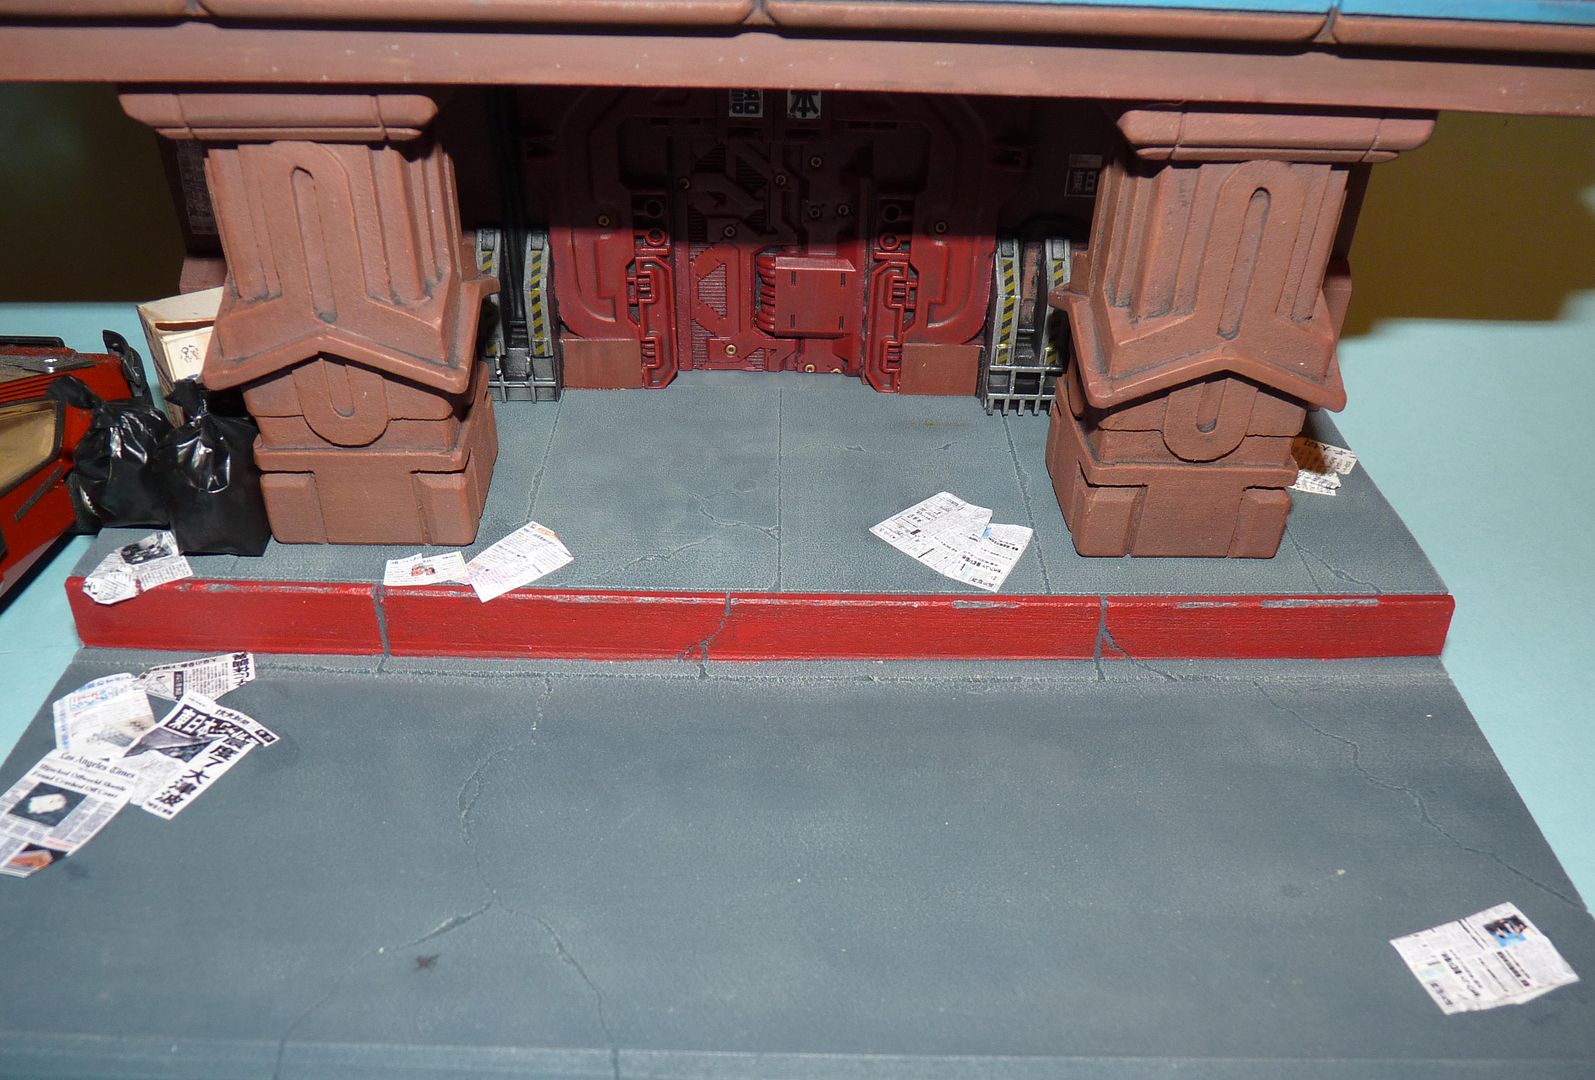
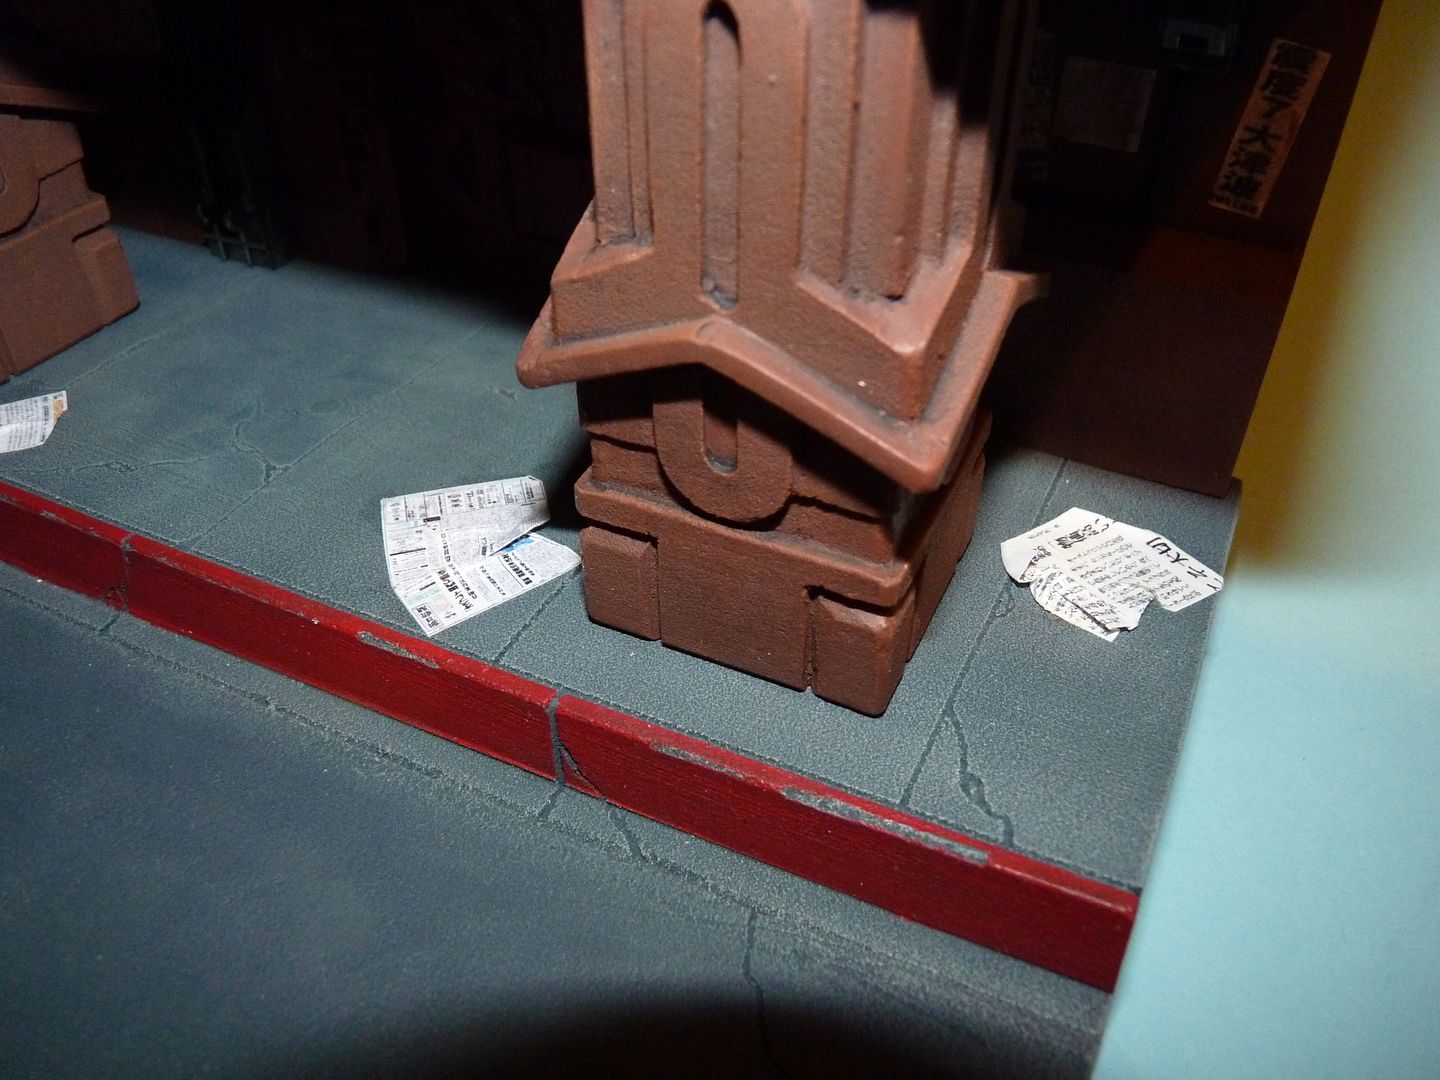
Close up....note the headline....
Sedan in place.....
 |
|
| Back to top |
|
|
|
|
|
|
|
|
|
|
|
|
You cannot post new topics in this forum
You cannot reply to topics in this forum
You cannot edit your posts in this forum
You cannot delete your posts in this forum
You cannot vote in polls in this forum
|
|
|
|
|
|
|
|


