 |
 |
|
 |
|
| Author |
Message |
8th_Passenger
Community Member

Joined: 28 Nov 2009
Posts: 443
Location: Hertfordshire, UK
|
 Posted: Sun Jul 27, 2014 2:36 pm Post subject: Posted: Sun Jul 27, 2014 2:36 pm Post subject: |
 |
|
Time for an update on the flamethrower.
I've had time lately to get my head back into gear.
I'm hoping to keep up the momentum.
On my last job I had access to a milling machine. So I milled a flat on some hex steel bar. This is to hang the pony tank off.
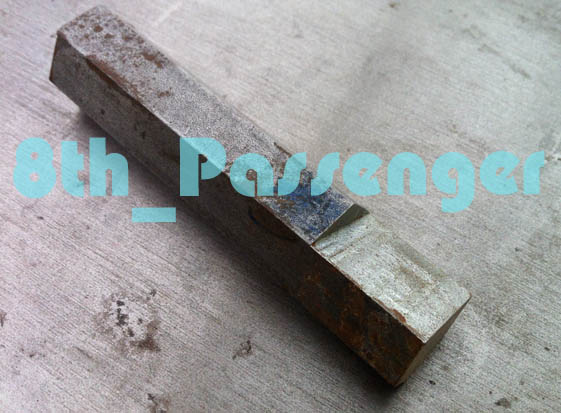
To fit the hex bar I had to cut a hex shaped notch out of the main body.
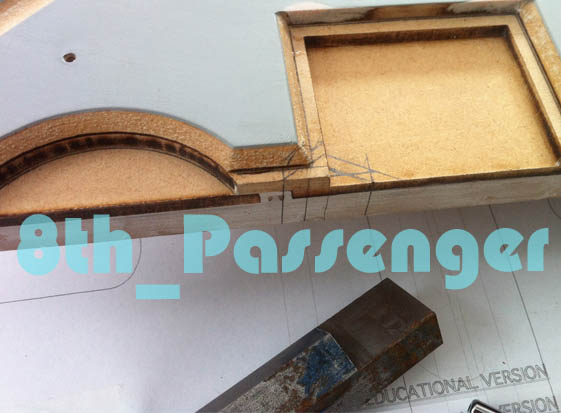
Like so.
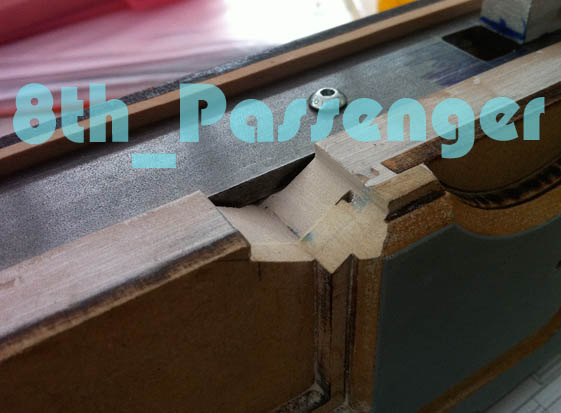
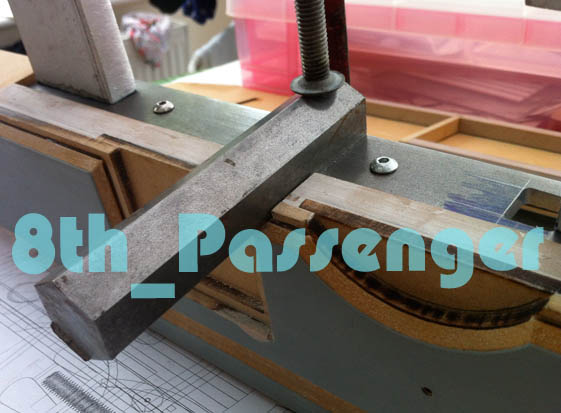
Here it is dry fitted. I will bolt it on first. Then hopefully have it welded in position.
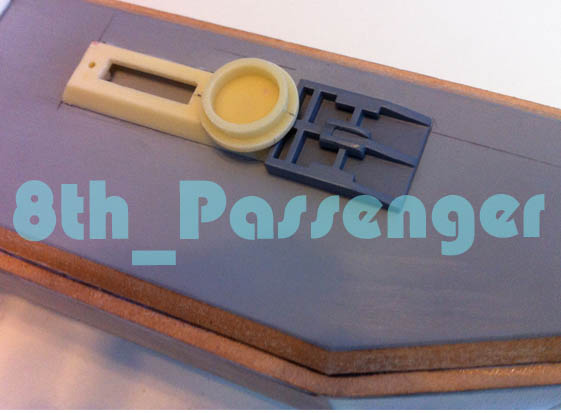
I finally bought some silicone and fastcast so I could mould the details from the last post. Here are some of them.
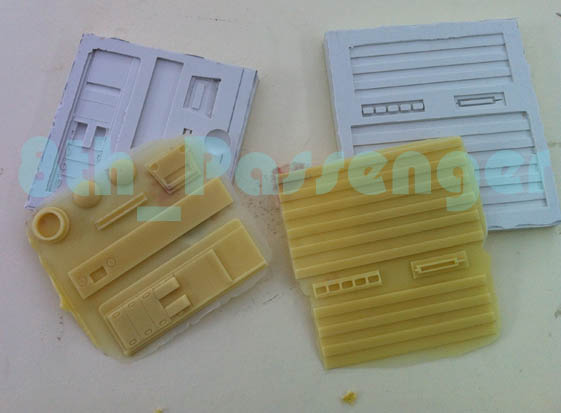
And here trimmed and laid on the side panel.
So next I have to mold the Tamiya parts Pro-mod kindly sent me. These will be a two part mold and I hope to cast these in white metal.
More soon. I hope.
Colin
_________________
Ripley: What's it key on?
Ash: Micro changes in air density. |
|
| Back to top |
|
|
|
|
 |
|
 |
|
|
|
|
| Author |
Message |
joberg
Community Member
.jpg)
Joined: 06 Oct 2008
Posts: 9447
|
| Posted: Tue Jul 29, 2014 8:47 am Post subject: |
|
|
Beauty Colin (like the use of Lego for your molds  )...crisp molding for sure! )...crisp molding for sure! |
|
| Back to top |
|
|
|
|
|
|
|
|
|
|
|
| Author |
Message |
SKIN JOB 66
Community Member

Joined: 16 Jan 2008
Posts: 2724
Location: FRANCE
|
| Posted: Wed Jul 30, 2014 3:56 am Post subject: |
|
|
BRILLIANT work Colin !
Love it !!!
(and I don't talk about that lego mold !)

Fred
_________________
THE FUTURE IS A THING OF THE PAST |
|
| Back to top |
|
|
|
|
|
|
|
|
|
|
|
| Author |
Message |
8th_Passenger
Community Member
Joined: 28 Nov 2009
Posts: 443
Location: Hertfordshire, UK
|
| Posted: Sat Aug 02, 2014 5:09 pm Post subject: |
|
|
Thanks joberg and Fred for your comments.
I've had that Lego for over 20 years. Very useful for doing two part moulds.
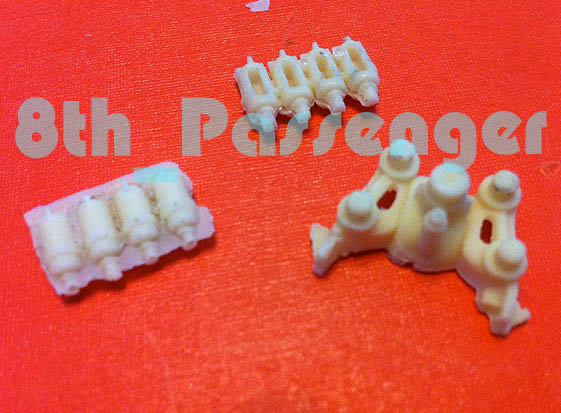
I thought I would have a go at casting the Tamiya 8-RAD parts in white metal. It was a semi successful endeavor. The back came out well!
But the front not so well. It probably needs a centrifugal casting machine to capture the very small details.
So I reverted to Plan A which was fast cast. These were better. I may have another go at moulding them to see if I can get slightly better casts.
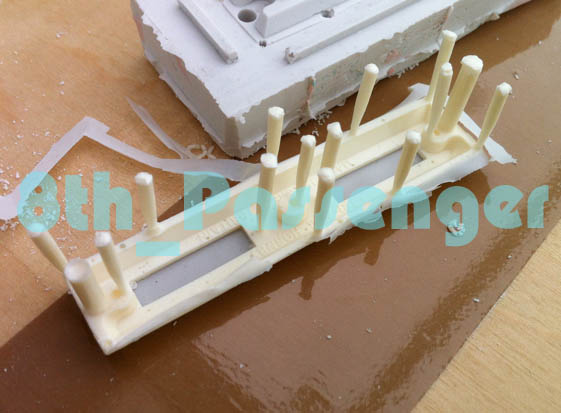
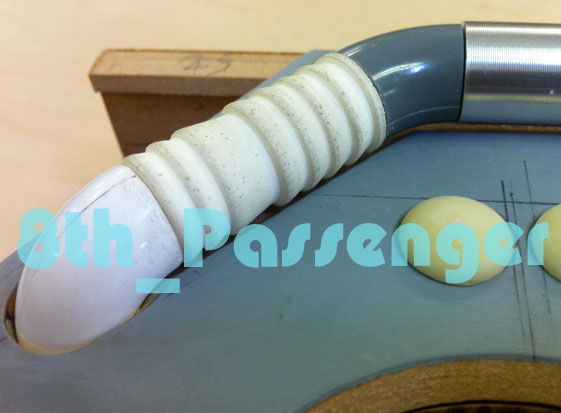
The moulding of the Hornby Pier however...
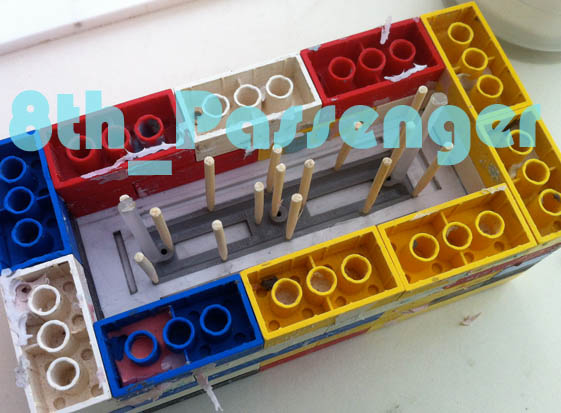
came out well.
Here's the forward right side detail taking shape. It's still a work in progress!
I'm aware I've been posting very similar updates of these side details lately. Today I finally glued them in position.
Detail of the rear left (upside down).
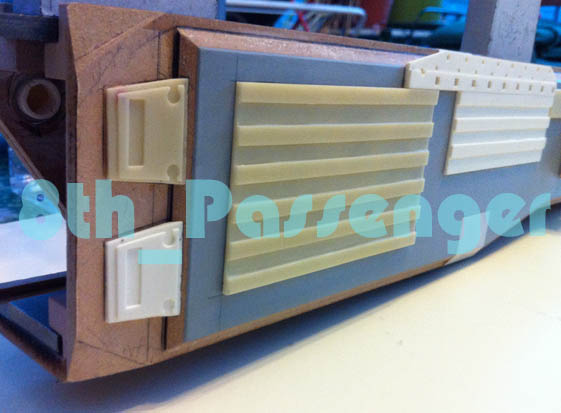
The right side.
I finally feel like I'm making progress again. Next job is to work out and fabricate the rest of the small details on the left side, underside and turn the pipe detail on the right side.
I also hope to make a start on the emitter.
More soon.
Colin
_________________
Ripley: What's it key on?
Ash: Micro changes in air density. |
|
| Back to top |
|
|
|
|
|
|
|
|
|
|
|
| Author |
Message |
joberg
Community Member
Joined: 06 Oct 2008
Posts: 9447
|
| Posted: Sun Aug 03, 2014 8:28 am Post subject: |
|
|
Wonderful update Colin...it's taking shape for sure
Eager to see the next update! |
|
| Back to top |
|
|
|
|
|
|
|
|
|
|
|
| Author |
Message |
8th_Passenger
Community Member
Joined: 28 Nov 2009
Posts: 443
Location: Hertfordshire, UK
|
| Posted: Wed Aug 06, 2014 4:38 pm Post subject: |
|
|
Thank you joberg.
Here's another update. I've made some good progress over the last few days.
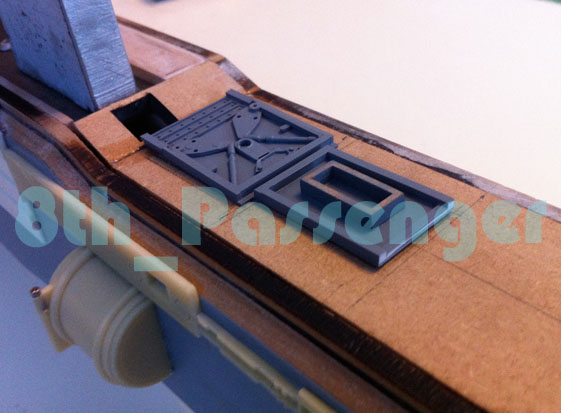
To detail the panel which looks a bit like the mount for a tank track I used some panel pins, US bolts 2/56 (I think!) , a steel washer and some laser cut parts.
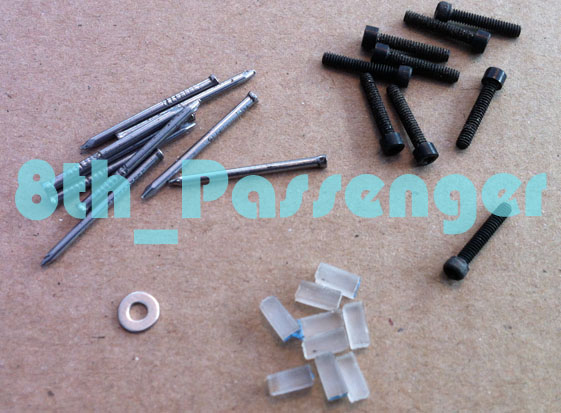
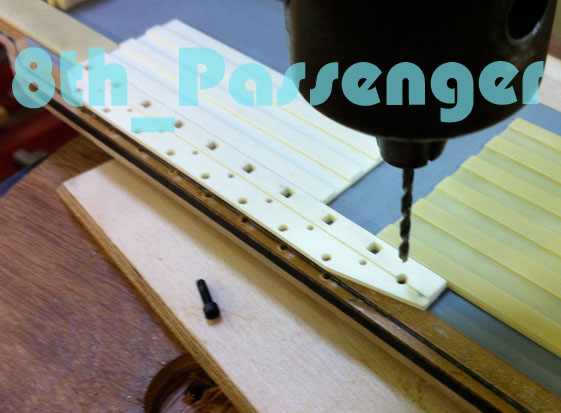
I drilled out the holes so I could mount the panel pins and bolts thru into the main body.
With everything in position it looks like this.
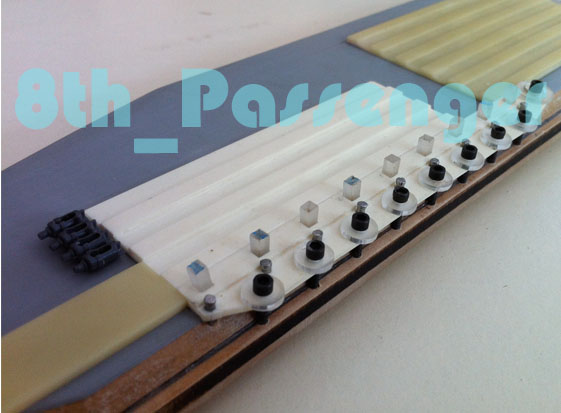
These are the Tamiya kit parts placed in position.
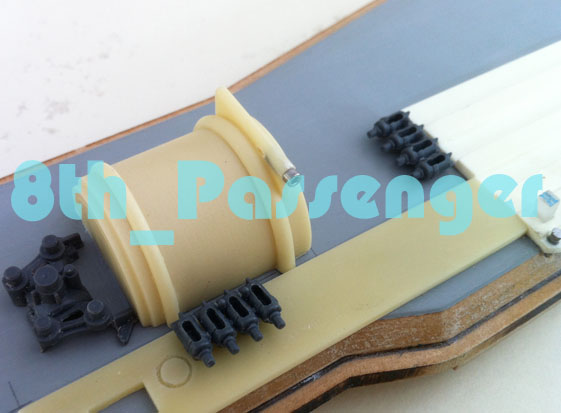
I turned up the bottom section of the pipe detail on the right side in fast cast.
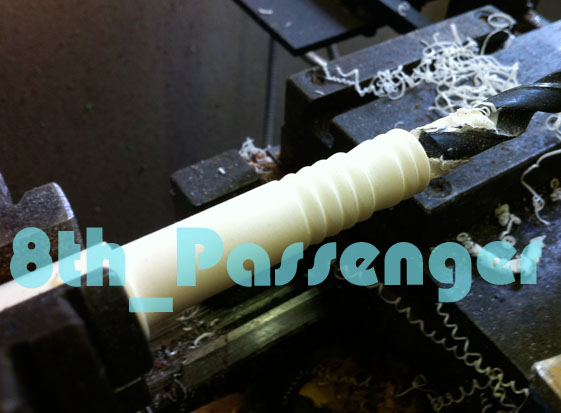
The longer pipe I've turned up in aluminum. I need to turn the detail into this.
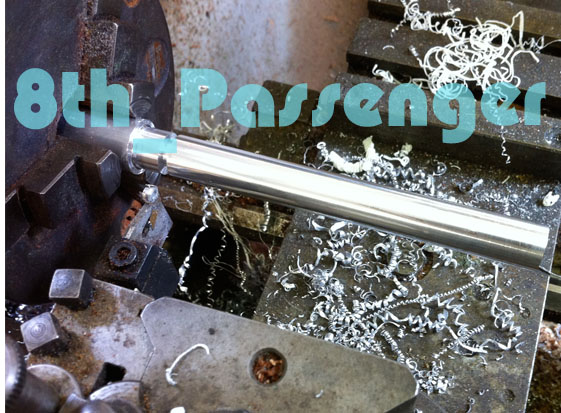
Here they are in position. Once I have the aluminum turned up I'll glue and blend it all together, then mould it.
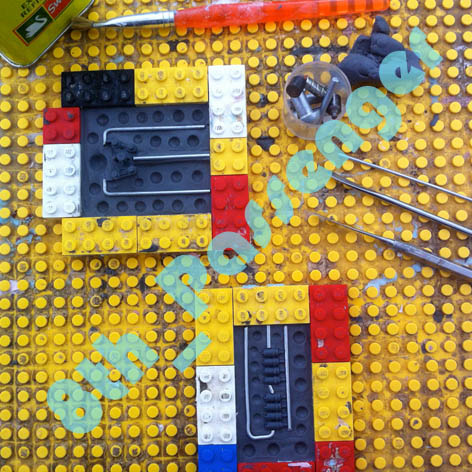
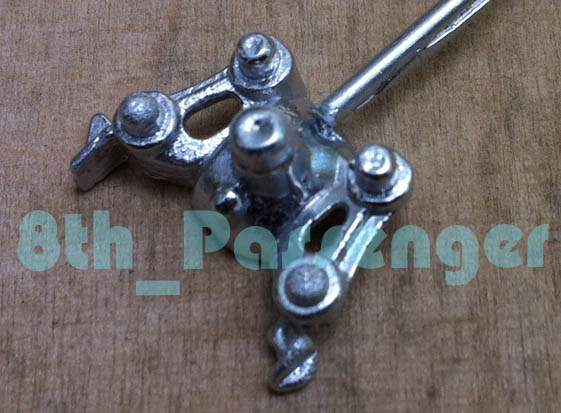
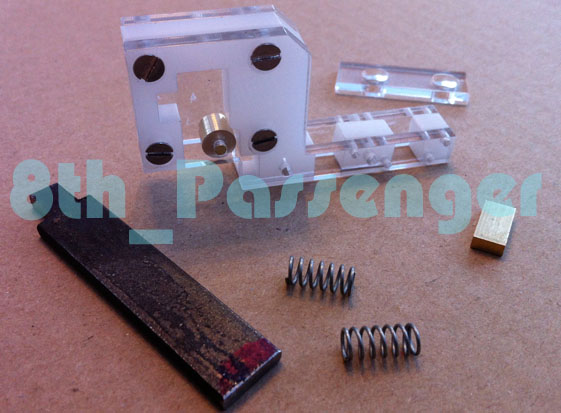
These are the parts for the trigger mechanism.
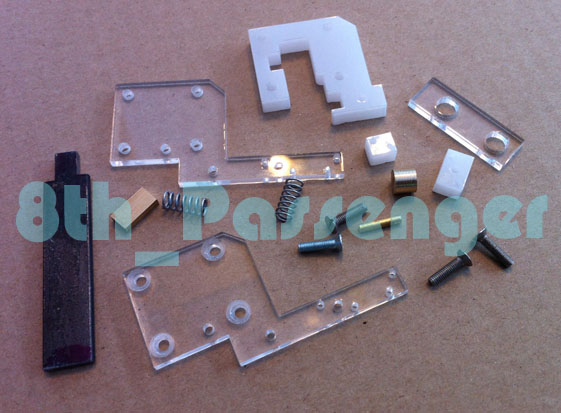
I need to silver solder the trigger together and the mount it into the assembly.
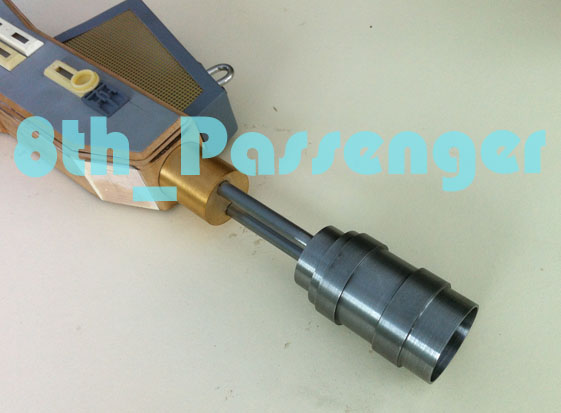
I've made a start on the emitter.

I bored out the center to reduce weight.
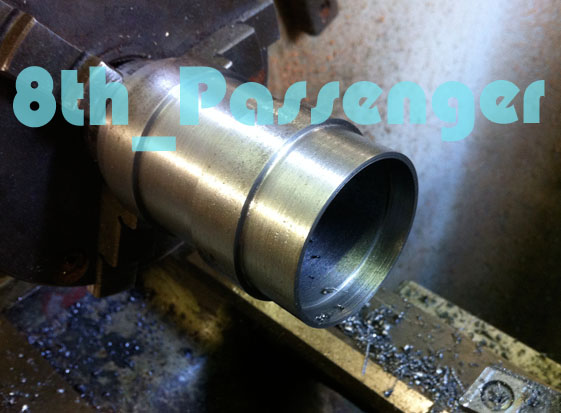
Here it is mounted in position. I need to turn up and mill the end piece.
Finally here is a possibility for one of the underside details.
On a roll. Hopefully more soon.
Colin
_________________
Ripley: What's it key on?
Ash: Micro changes in air density. |
|
| Back to top |
|
|
|
|
|
|
|
|
|
|
|
| Author |
Message |
joberg
Community Member
Joined: 06 Oct 2008
Posts: 9447
|
| Posted: Thu Aug 07, 2014 10:01 am Post subject: |
|
|
"On a roll"...no kidding  Excellent update there Colin. That emitter is scrumptious for sure! It's looking more and more like that flame thrower will be ready to cook some critters sooner rather than later Excellent update there Colin. That emitter is scrumptious for sure! It's looking more and more like that flame thrower will be ready to cook some critters sooner rather than later |
|
| Back to top |
|
|
|
|
|
|
|
|
|
|
|
| Author |
Message |
8th_Passenger
Community Member
Joined: 28 Nov 2009
Posts: 443
Location: Hertfordshire, UK
|
| Posted: Thu Aug 07, 2014 12:26 pm Post subject: |
|
|
Thanks joberg.
Scrumptious and flamethrower in the same sentence! Is that right?
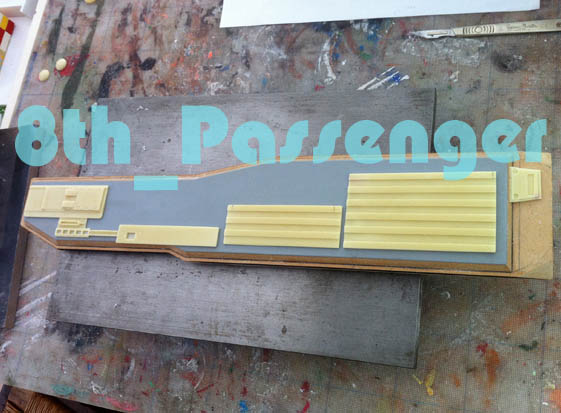
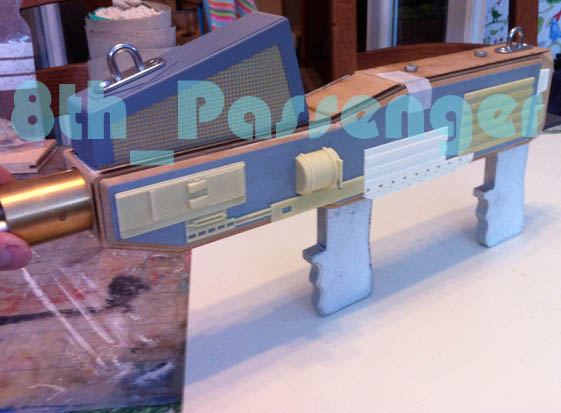
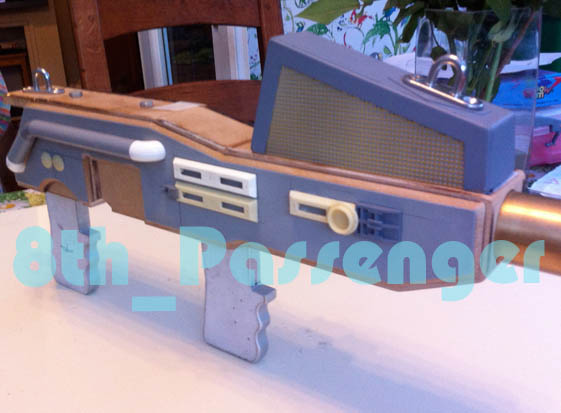
Here's a couple of overall shots.
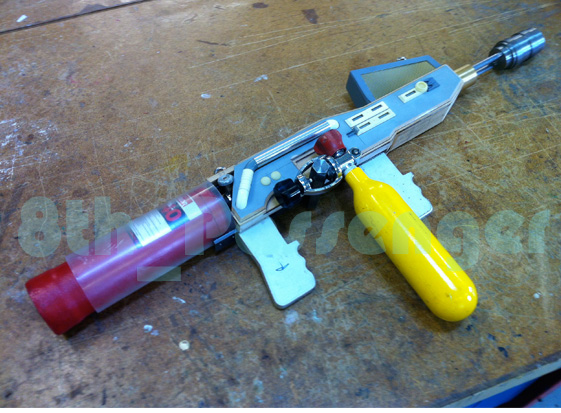

Today I bolted the hex bar onto my internal structure so the tank hangs off it unaided now.
Also I tapped the steel flat which protrudes out of the back so I can bolt the rear tube in place. Acrylic at this stage but hopefully steel or aluminium by the time I'm finished.
I feel I need a mechanical fixing to secure the propane bottle in place. Maybe grub screws. The question is would I still need to put the Gaffer tape on to be screen accurate!? I suppose it's added detail!
In need to plan a bit now before I can make much more progress with the construction. But I hope to keep on a roll.
It's getting really really heavy. I'm aware that every time I put it down something might ping off! There is the second tank and Nostromo ariel to go on yet.
Getting there but still a way to go.
Colin
_________________
Ripley: What's it key on?
Ash: Micro changes in air density. |
|
| Back to top |
|
|
|
|
|
|
|
|
|
|
|
| Author |
Message |
Starrigger
Community Member
Joined: 16 Aug 2009
Posts: 202
|
| Posted: Thu Aug 07, 2014 3:59 pm Post subject: |
|
|
VERY scrumptious indeed!
_________________
Come on over to my place - CGiWorlds.com |
|
| Back to top |
|
|
|
|
|
|
|
|
|
|
|
| Author |
Message |
8th_Passenger
Community Member
Joined: 28 Nov 2009
Posts: 443
Location: Hertfordshire, UK
|
| Posted: Fri Aug 08, 2014 3:13 am Post subject: |
|
|
Thank you Starrigger.
Colin
_________________
Ripley: What's it key on?
Ash: Micro changes in air density. |
|
| Back to top |
|
|
|
|
|
|
|
|
|
|
|
| Author |
Message |
8th_Passenger
Community Member
Joined: 28 Nov 2009
Posts: 443
Location: Hertfordshire, UK
|
| Posted: Fri Aug 08, 2014 3:18 am Post subject: |
|
|
Thank you Starrigger.
Colin
_________________
Ripley: What's it key on?
Ash: Micro changes in air density. |
|
| Back to top |
|
|
|
|
|
|
|
|
|
|
|
| Author |
Message |
joberg
Community Member
Joined: 06 Oct 2008
Posts: 9447
|
| Posted: Fri Aug 08, 2014 1:17 pm Post subject: |
|
|
Wouldn't mind having that weapon in my collection Colin
As for scrumptious and flame thrower in the same sentence...you'll have to forgive me; I was hungry at the time  |
|
| Back to top |
|
|
|
|
|
|
|
|
|
|
|
| Author |
Message |
8th_Passenger
Community Member
Joined: 28 Nov 2009
Posts: 443
Location: Hertfordshire, UK
|
| Posted: Sun Aug 10, 2014 12:52 pm Post subject: |
|
|
Thank you joberg.
This will be my last update for a while. I need to plan and start new bits to move forward.
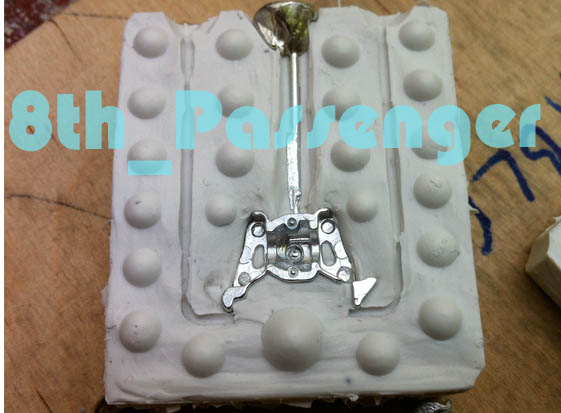
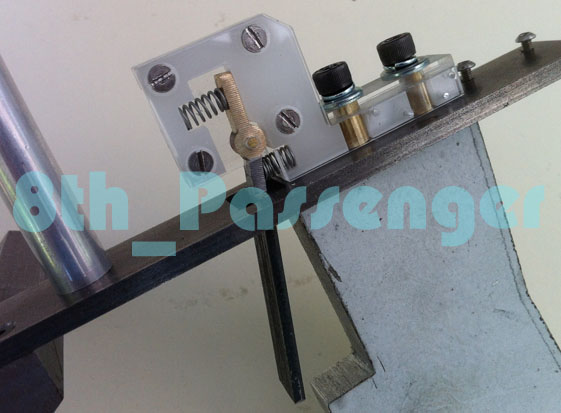
But here's where I'm at. I silver soldered the triggers together and assembled the trigger mechanisms. They need a bit of packing to level the levers in line with the grips. I was happy with how they turned out.
.jpg)
I added some K&S tube (to run the bolts through), giving the assembly a bit more strength.
More soon...
Colin
_________________
Ripley: What's it key on?
Ash: Micro changes in air density. |
|
| Back to top |
|
|
|
|
|
|
|
|
|
|
|
| Author |
Message |
joberg
Community Member
Joined: 06 Oct 2008
Posts: 9447
|
| Posted: Sun Aug 10, 2014 1:02 pm Post subject: |
|
|
| Seems solid to me Colin and those trigger mechanisms are a beauty |
|
| Back to top |
|
|
|
|
|
|
|
|
|
|
|
| Author |
Message |
SKIN JOB 66
Community Member
Joined: 16 Jan 2008
Posts: 2724
Location: FRANCE
|
| Posted: Wed Aug 13, 2014 5:20 pm Post subject: |
|
|
WOW Colin, amazing progress on this flamethrower !!!!!!!
It begins to look like the real thing... BRAVO !!!
Fred
_________________
THE FUTURE IS A THING OF THE PAST |
|
| Back to top |
|
|
|
|
|
|
|
|
|
|
|
| Author |
Message |
8th_Passenger
Community Member
Joined: 28 Nov 2009
Posts: 443
Location: Hertfordshire, UK
|
| Posted: Fri Aug 15, 2014 1:14 pm Post subject: |
|
|
Thank you Fred.
Colin
_________________
Ripley: What's it key on?
Ash: Micro changes in air density. |
|
| Back to top |
|
|
|
|
|
|
|
|
|
|
|
| Author |
Message |
Toa Quarax
Joined: 17 Apr 2014
Posts: 9
Location: Ontario, Canada
|
|
| Back to top |
|
|
|
|
|
|
|
|
|
|
|
| Author |
Message |
8th_Passenger
Community Member
Joined: 28 Nov 2009
Posts: 443
Location: Hertfordshire, UK
|
| Posted: Sat Aug 30, 2014 4:28 am Post subject: |
|
|
Thanks for that link Toa Quarax.
Really useful little film. I may have to go and see it if I can.
Thanks for sharing.
Colin
_________________
Ripley: What's it key on?
Ash: Micro changes in air density. |
|
| Back to top |
|
|
|
|
|
|
|
|
|
|
|
| Author |
Message |
Toa Quarax
Joined: 17 Apr 2014
Posts: 9
Location: Ontario, Canada
|
|
| Back to top |
|
|
|
|
|
|
|
|
|
|
|
| Author |
Message |
joberg
Community Member
Joined: 06 Oct 2008
Posts: 9447
|
| Posted: Sun Sep 07, 2014 8:39 am Post subject: |
|
|
TFS Toa Quarax...and welcome to Propsummit  |
|
| Back to top |
|
|
|
|
|
|
|
|
|
|
|
|
You cannot post new topics in this forum
You cannot reply to topics in this forum
You cannot edit your posts in this forum
You cannot delete your posts in this forum
You cannot vote in polls in this forum
|
|
|
|
|
|
|
|


