 |
 |
|
 |
|
| Author |
Message |
The Loyalizer
Community Member

Joined: 08 Oct 2007
Posts: 742
Location: Down in 4th Sector, Chinatown
|
 Posted: Mon Jul 18, 2011 2:23 am Post subject: Posted: Mon Jul 18, 2011 2:23 am Post subject: |
 |
|
Thanks Joberg, this project's been a wealth of learning. The final surface finish wasn't smooth enough in my opinion to support a white base color without showing off a lot of flaws, so I retained the marking design, but went with a green color scheme for it. I weighed it the other day, and it weighed in at just a hair under 2 lbs which is much better than the 10-15 the other one weighs in at.
After getting the base painting done, I applied some weathering to it. This one wont be looking fresh from the factory. I painted the hand grip and the fore grip in black Plastidip to break up the monotony of that much OD green paint.
I still need to cast up a few detail pieces, and install the top rails and the selector switches. This time around I'm planning on scanning in the color off the rifle's magazine and frame then doing the logos and magazine markings so that hopefully the stickers will color match better.
_________________

"We began to recognize in them a strange obsession..."
http://fcomin.cgsociety.org/gallery/ |
|
| Back to top |
|
|
|
|
 |
|
 |
|
|
|
|
| Author |
Message |
The Loyalizer
Community Member
Joined: 08 Oct 2007
Posts: 742
Location: Down in 4th Sector, Chinatown
|
| Posted: Mon Aug 01, 2011 5:34 pm Post subject: |
|
|
Well upon closer review, it turns out I used the wrong set of blueprints and the scale is off on that last build. Too thick in the cross section. I didn't have the other build handy so I missed it until I had it side by side.
I dug out the CARB rifle that I did last year and looked over the build. After having gotten better references on it I noticed a lot of things that were wrong with it, including the overall size. So I decided I could do better.
Unlike the previous one, I didn't want to carve it out of wood, and wanted to build it with an eye towards casting it later. After taking a look at how Spat did his pulse rifles, I got the idea to do this one in two separate halves that could be easily molded and then bonded/bolted together.
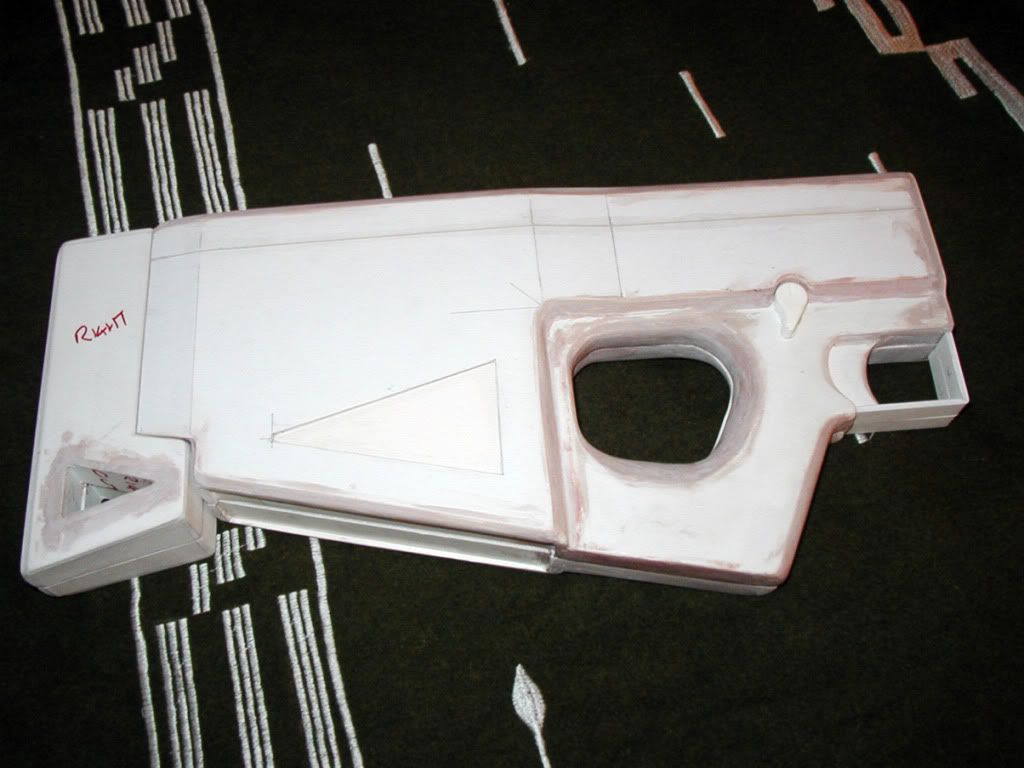
My first step was to go back and refine my original blueprints, using Weta's images as a template. After scaling it down a bit, I printed out the blueprints and transferred them to foam core boards of various thickness and several sheets of hot press illustration board. Much cutting and many xacto blades later I had the rough form in the desired thickness. The pistol grip was then sanded into shape using a dremel tool and some sanding blocks.
After getting the main body built up, I constructed the stock separately and then attached it to both halves. Then I used bondo and acrylic modelling paste to fill in rough areas. The modelling paste is a good way to seal off the exposed foam as its thick enough to fill in and wont melt the foam. Since its basically marble dust suspended in an acrylic emulsion when it dries its solid and can be sanded to shape, or you can go over it with bondo without worrying that it'll eat the foam.
The rifle in its current state.
Size and detail comparison with the older build:
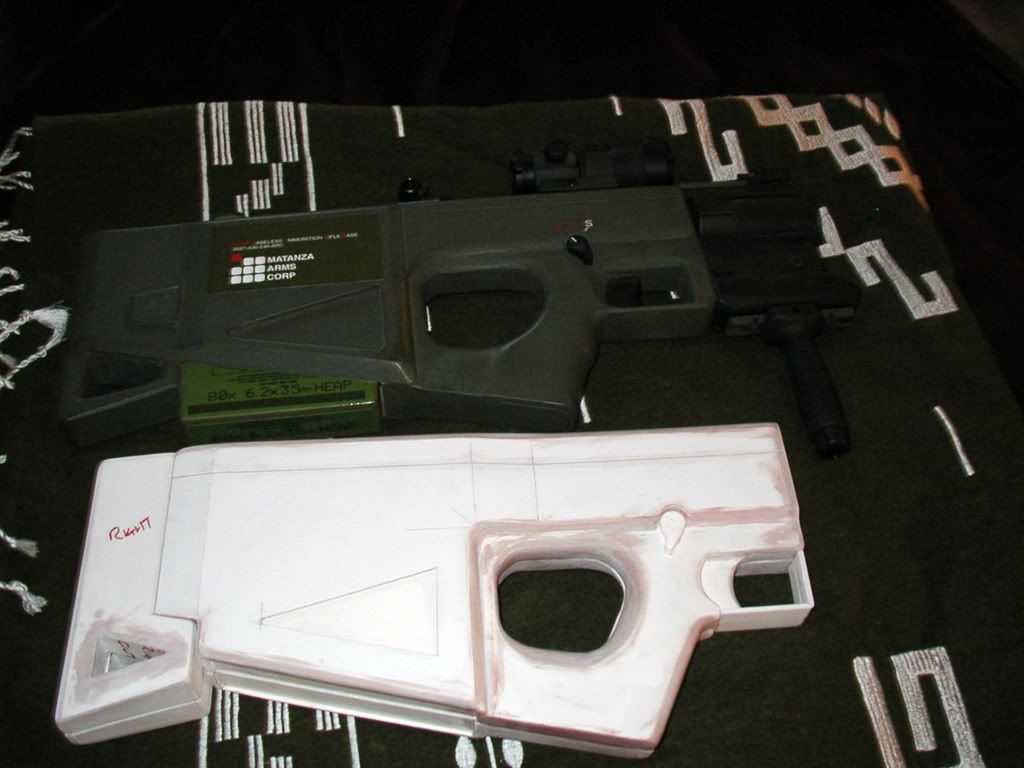
My next step is to set up the molds for the rifle halves. Then it'll be on to building the magazine box and a few other external details. Once I have the base rifle body done, I'll move on to building the different barrel and hand guard components. Unfortunately much as I would have liked to do a removable box mag, I couldn't figure out how to engineer the mold. Maybe on a later build I'll give it a go. On this one the box mag will be cast separately as a solid block angled to fit the shape of the mag well and then bolted on.
_________________
"We began to recognize in them a strange obsession..."
http://fcomin.cgsociety.org/gallery/ |
|
| Back to top |
|
|
|
|
|
|
|
|
|
|
|
| Author |
Message |
joberg
Community Member
.jpg)
Joined: 06 Oct 2008
Posts: 9471
|
| Posted: Sun Aug 07, 2011 4:26 pm Post subject: |
|
|
Good stuff all in all...love the rifle and love that WIP  |
|
| Back to top |
|
|
|
|
|
|
|
|
|
|
|
| Author |
Message |
The Loyalizer
Community Member
Joined: 08 Oct 2007
Posts: 742
Location: Down in 4th Sector, Chinatown
|
| Posted: Sun Aug 07, 2011 10:07 pm Post subject: |
|
|
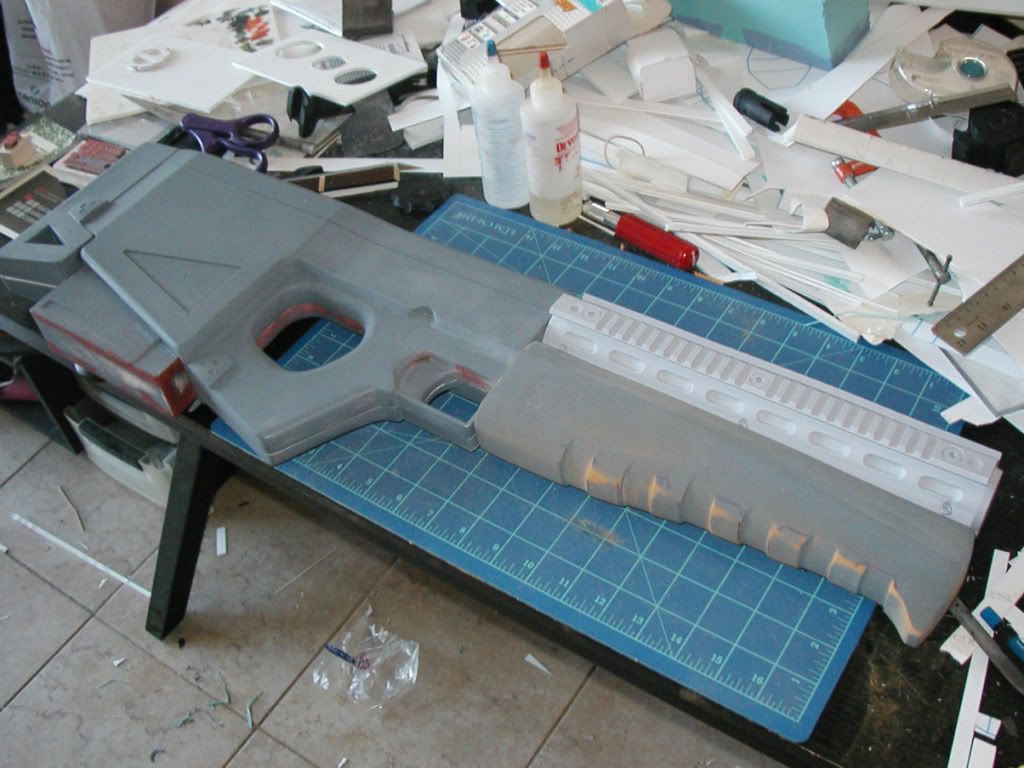
More primer, more sanding, more filling. Its getting close to where I'll be able to toss the halves into the silicone soon.
Currently, I've gotten the molds done for the top rail, the frame buttons, the G-36 flash hider, and the cocking dial on the top. I still have to do the mold for the box mag.
I should be getting an M4 floating barrel frame this week, which has the four rails on it, so I don't have to build that up from scratch. The bottom hand guard will have to be scratch built tho, but I'm waiting on getting the barrel cast first before I tackle that.
I was pondering the idea of getting a custom rubber stamp made for doing the body markings, so I hit the frame wtih a couple stamps I had lying around just to see what it might look like.
The progress thus far:
_________________
"We began to recognize in them a strange obsession..."
http://fcomin.cgsociety.org/gallery/ |
|
| Back to top |
|
|
|
|
|
|
|
|
|
|
|
| Author |
Message |
nonner242
Community Member

Joined: 25 Jun 2011
Posts: 77
Location: OHIO USA
|
| Posted: Sun Aug 07, 2011 10:16 pm Post subject: |
|
|
Looks GREAT!
What about using a custom Decal? |
|
| Back to top |
|
|
|
|
|
|
|
|
|
|
|
| Author |
Message |
The Loyalizer
Community Member
Joined: 08 Oct 2007
Posts: 742
Location: Down in 4th Sector, Chinatown
|
| Posted: Mon Aug 08, 2011 3:51 am Post subject: |
|
|
Thanks! I'm hoping the rest of the build goes smoothly.
Yeah custom decals would be the best solution, but I haven't got a clue where I'd go to get those done. I know there is decal paper available that you run through your printer, but I know my printer treats white as empty space in the color process, so I'm not sure if that would work, considering the whole decal is white save for one red square. 
I've also thought about going with custom cut automotive vinyl decals. The kind where you peel off the backing, then lay down the whole top sheet and when the decal is set, you peel off the top backing leaving only the lettering in place. I did that on another project and the vinyl was thin enough that it didn't appear overly raised.
Any suggestions would help tho
_________________
"We began to recognize in them a strange obsession..."
http://fcomin.cgsociety.org/gallery/ |
|
| Back to top |
|
|
|
|
|
|
|
|
|
|
|
| Author |
Message |
nonner242
Community Member
Joined: 25 Jun 2011
Posts: 77
Location: OHIO USA
|
| Posted: Mon Aug 08, 2011 1:33 pm Post subject: |
|
|
| Quote: | | I know there is decal paper available that you run through your printer, but I know my printer treats white as empty space in the color process, so I'm not sure if that would work, considering the whole decal is white save for one red square. |
Its simple, So simple it is missed...
You paint the area White, then put the decal over it and the "clear" printed parts are white. Or make a stencil and paint it. |
|
| Back to top |
|
|
|
|
|
|
|
|
|
|
|
| Author |
Message |
The Loyalizer
Community Member
Joined: 08 Oct 2007
Posts: 742
Location: Down in 4th Sector, Chinatown
|
| Posted: Mon Aug 08, 2011 6:09 pm Post subject: |
|
|
You know until you mentioned it I hadn't thought of it. May have to try that.
_________________
"We began to recognize in them a strange obsession..."
http://fcomin.cgsociety.org/gallery/ |
|
| Back to top |
|
|
|
|
|
|
|
|
|
|
|
| Author |
Message |
nonner242
Community Member
Joined: 25 Jun 2011
Posts: 77
Location: OHIO USA
|
| Posted: Mon Aug 08, 2011 6:51 pm Post subject: |
|
|
It has work for me on many custom decals...only can think of a couple times it was not the best option. But some times the easiest way is overlooked cuz its too simple.  |
|
| Back to top |
|
|
|
|
|
|
|
|
|
|
|
| Author |
Message |
joberg
Community Member
Joined: 06 Oct 2008
Posts: 9471
|
| Posted: Tue Aug 09, 2011 8:04 am Post subject: |
|
|
| Looking good; it's truly the work of an artist/propmaker for sure... |
|
| Back to top |
|
|
|
|
|
|
|
|
|
|
|
| Author |
Message |
The Loyalizer
Community Member
Joined: 08 Oct 2007
Posts: 742
Location: Down in 4th Sector, Chinatown
|
| Posted: Thu Aug 11, 2011 7:46 pm Post subject: |
|
|
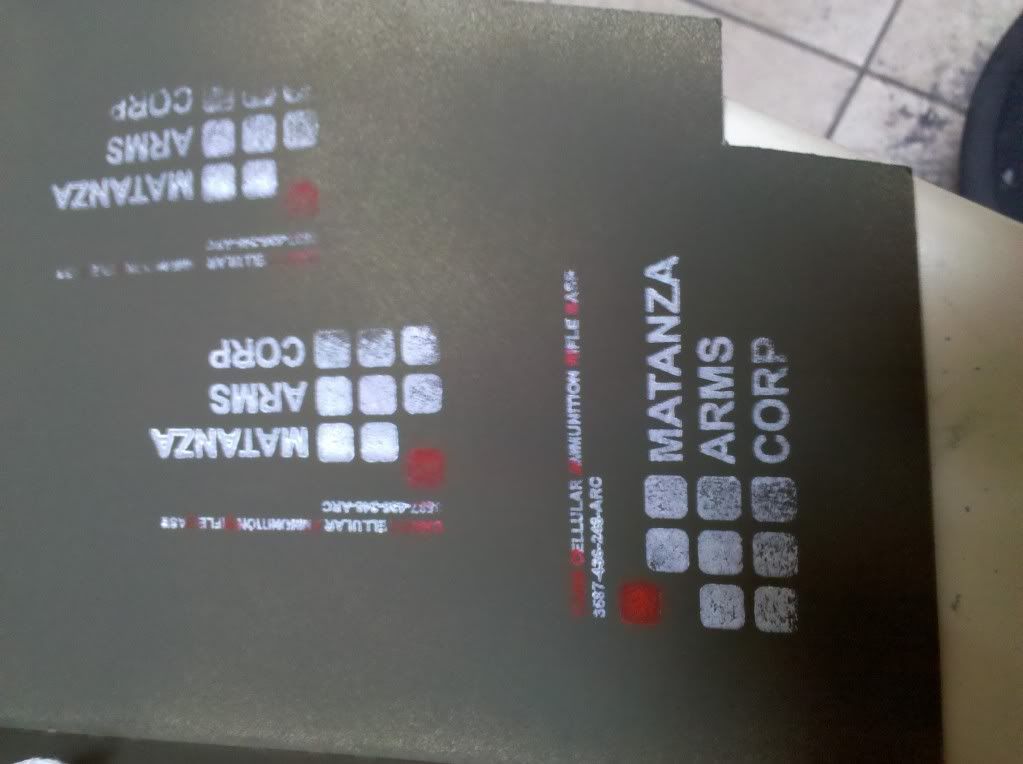
Found a place that does custom rubber stamps, so I had one with the Matanza logo made up. They also carry stamp pads with silver ink. Decided to give it a shot.
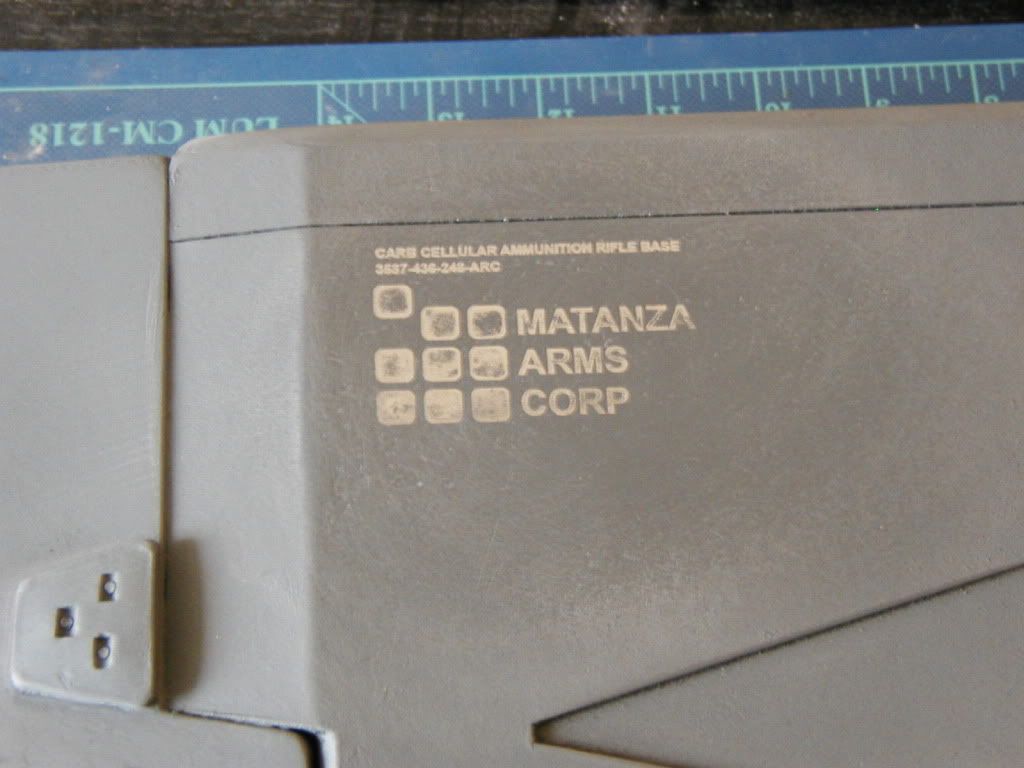
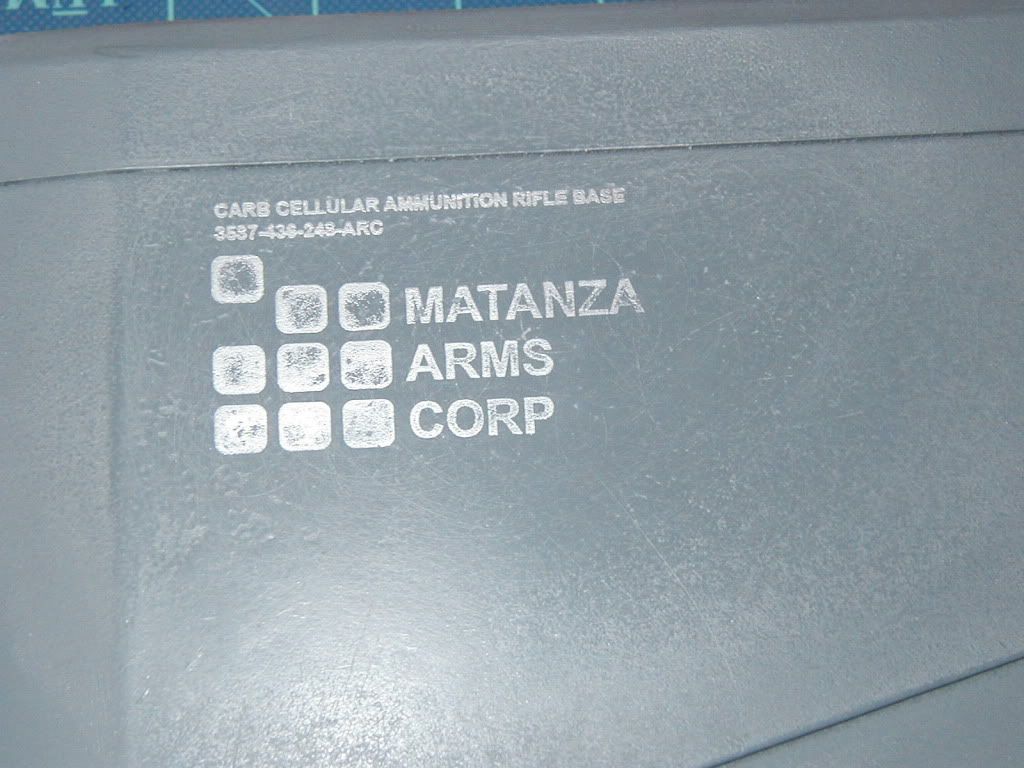
More than likely when I go over that ink with a flat clear the silver will dull out to a grey, but that will still work. And the stamp gives it a nice worn in look.
_________________
"We began to recognize in them a strange obsession..."
http://fcomin.cgsociety.org/gallery/ |
|
| Back to top |
|
|
|
|
|
|
|
|
|
|
|
| Author |
Message |
nonner242
Community Member
Joined: 25 Jun 2011
Posts: 77
Location: OHIO USA
|
| Posted: Thu Aug 11, 2011 7:58 pm Post subject: |
|
|
I dig it!!
What if you have 2 stamp.
One white or silver for your white text and such.
And one made just for the red parts
It will be like a mini painting puzzle. |
|
| Back to top |
|
|
|
|
|
|
|
|
|
|
|
| Author |
Message |
joberg
Community Member
Joined: 06 Oct 2008
Posts: 9471
|
| Posted: Fri Aug 12, 2011 7:57 am Post subject: |
|
|
| Love the rubber stamp idea! Good call on that one (and it has the used look to boot...love it ) |
|
| Back to top |
|
|
|
|
|
|
|
|
|
|
|
| Author |
Message |
The Loyalizer
Community Member
Joined: 08 Oct 2007
Posts: 742
Location: Down in 4th Sector, Chinatown
|
| Posted: Fri Aug 12, 2011 6:11 pm Post subject: |
|
|
| nonner242 wrote: | I dig it!!
What if you have 2 stamp.
One white or silver for your white text and such.
And one made just for the red parts
It will be like a mini painting puzzle. |
Lol that would drive me bonkers trying to register them. I may try applying white and red paint to the stamp though to see if I can get it to work that way.
EDIT: Used white and red acrylic paint, it works pretty well, but I'll need to get a red that's not transparent.
_________________
"We began to recognize in them a strange obsession..."
http://fcomin.cgsociety.org/gallery/ |
|
| Back to top |
|
|
|
|
|
|
|
|
|
|
|
| Author |
Message |
The Loyalizer
Community Member
Joined: 08 Oct 2007
Posts: 742
Location: Down in 4th Sector, Chinatown
|
| Posted: Tue Aug 30, 2011 7:35 pm Post subject: |
|
|
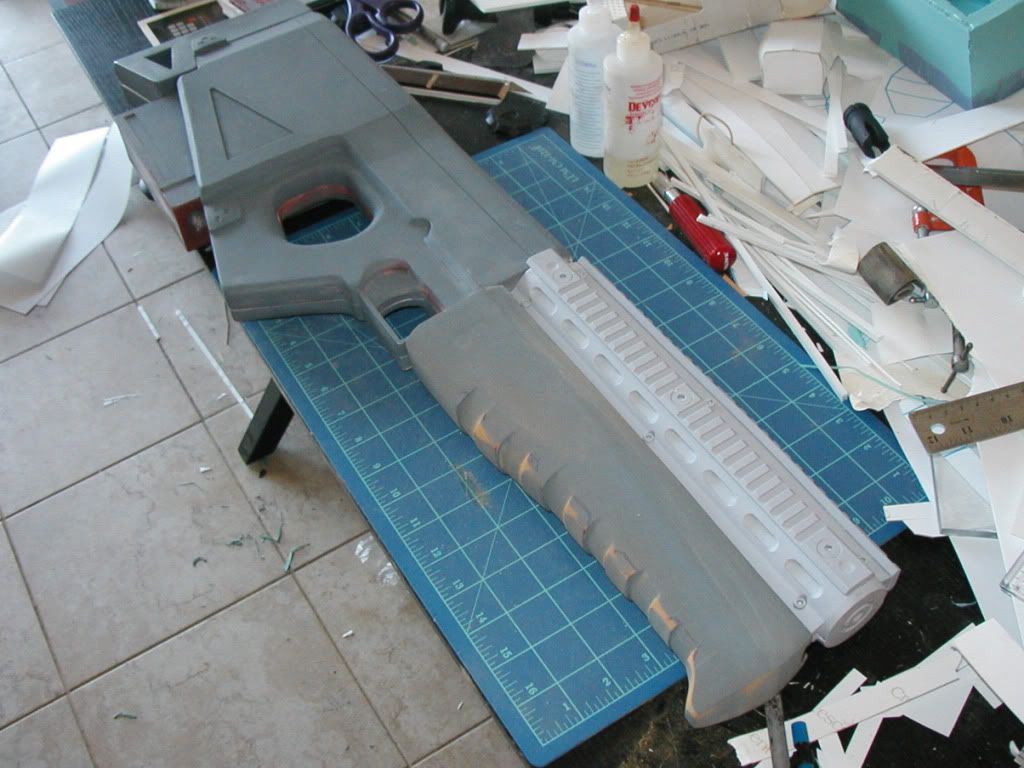
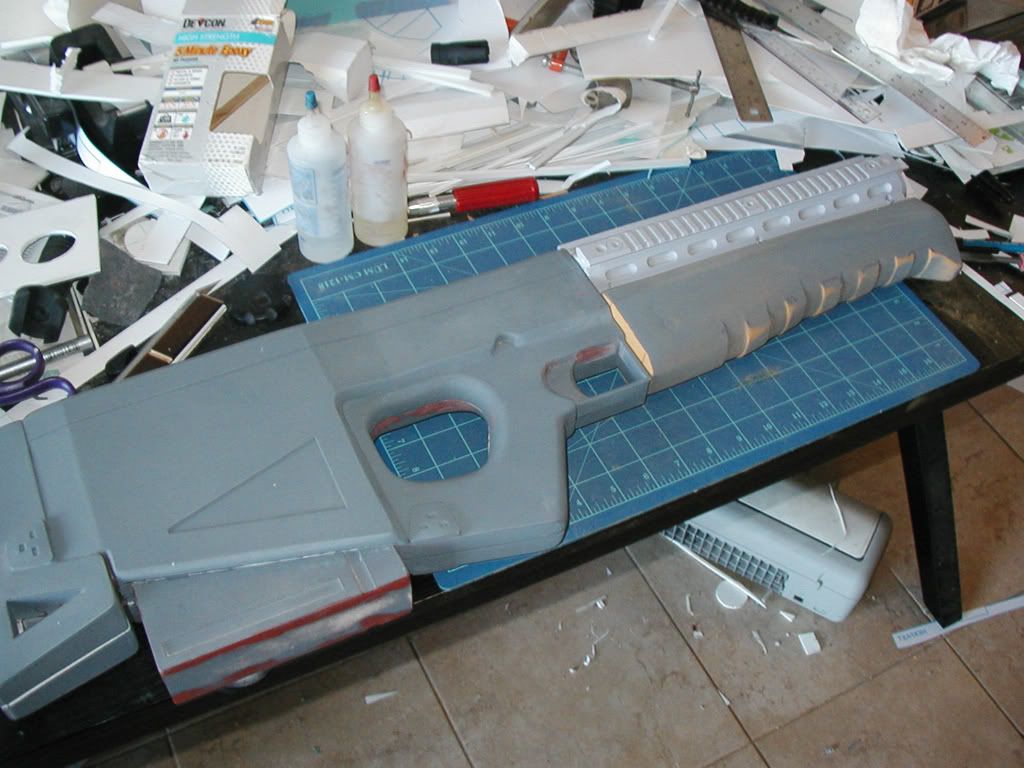
First pull of the rifle barrel. Parts are laid out to test the fit and proportions. The box mag has been molded, but I haven't gotten around to casting it yet. Up next on the list will be to mold the body halves, then the foregrip.
_________________
"We began to recognize in them a strange obsession..."
http://fcomin.cgsociety.org/gallery/ |
|
| Back to top |
|
|
|
|
|
|
|
|
|
|
|
| Author |
Message |
joberg
Community Member
Joined: 06 Oct 2008
Posts: 9471
|
| Posted: Wed Aug 31, 2011 11:47 am Post subject: |
|
|
| Oooh love it a lot: great details on that upper piece It's taking shape for sure. |
|
| Back to top |
|
|
|
|
|
|
|
|
|
|
|
| Author |
Message |
SKIN JOB 66
Community Member

Joined: 16 Jan 2008
Posts: 2724
Location: FRANCE
|
| Posted: Wed Aug 31, 2011 5:10 pm Post subject: |
|
|
Great work once again, love the details !!!
Fred
_________________
THE FUTURE IS A THING OF THE PAST |
|
| Back to top |
|
|
|
|
|
|
|
|
|
|
|
| Author |
Message |
The Loyalizer
Community Member
Joined: 08 Oct 2007
Posts: 742
Location: Down in 4th Sector, Chinatown
|
| Posted: Wed Aug 31, 2011 5:35 pm Post subject: |
|
|
Thanks guys. I was lucky enough to be able to find a hand guard from an AR-15 that had the four rails already attached. Was not looking forward to the idea of having to fabricate that by hand.
_________________
"We began to recognize in them a strange obsession..."
http://fcomin.cgsociety.org/gallery/ |
|
| Back to top |
|
|
|
|
|
|
|
|
|
|
|
| Author |
Message |
The Loyalizer
Community Member
Joined: 08 Oct 2007
Posts: 742
Location: Down in 4th Sector, Chinatown
|
| Posted: Wed Nov 02, 2011 12:25 am Post subject: |
|
|
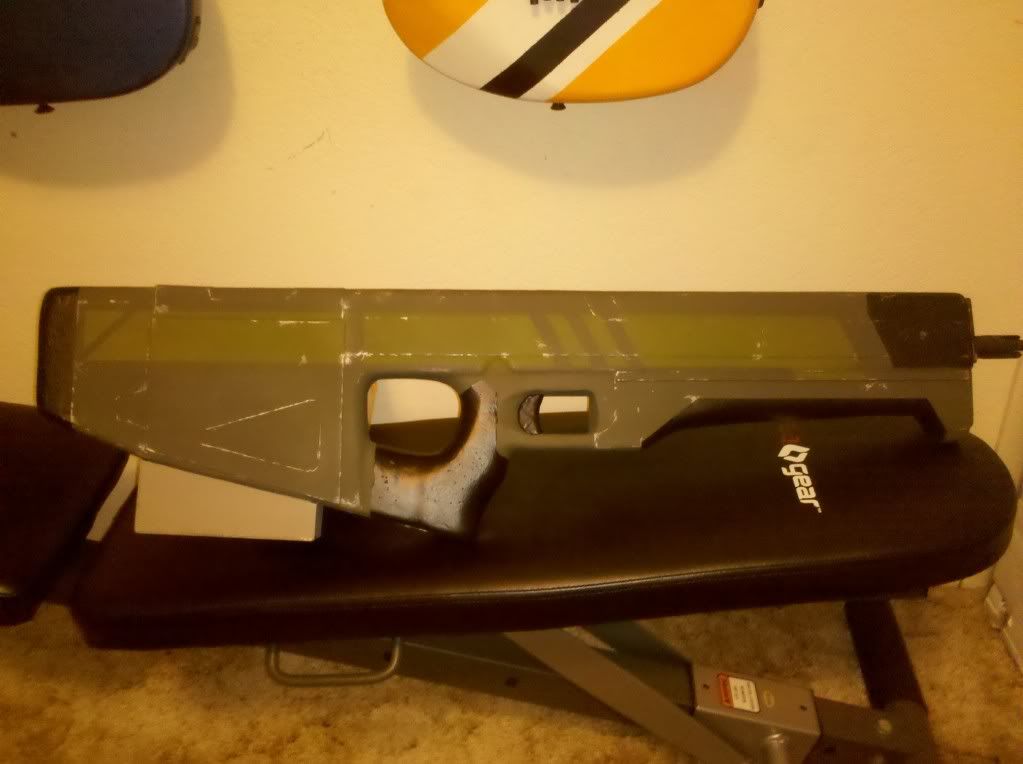
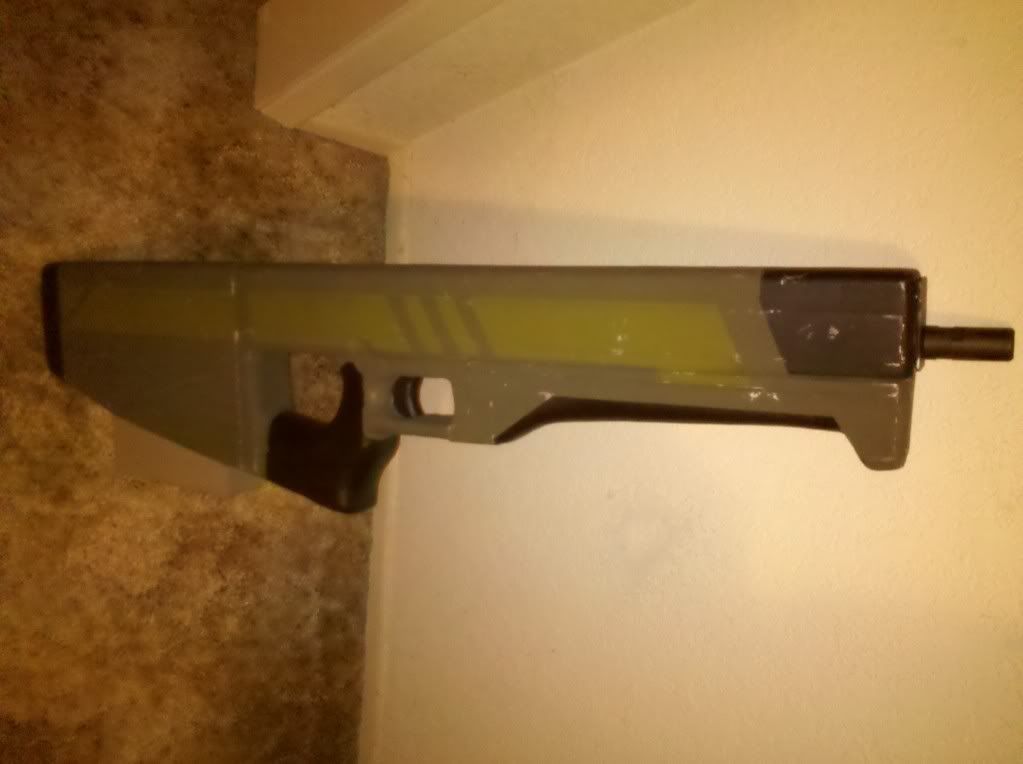
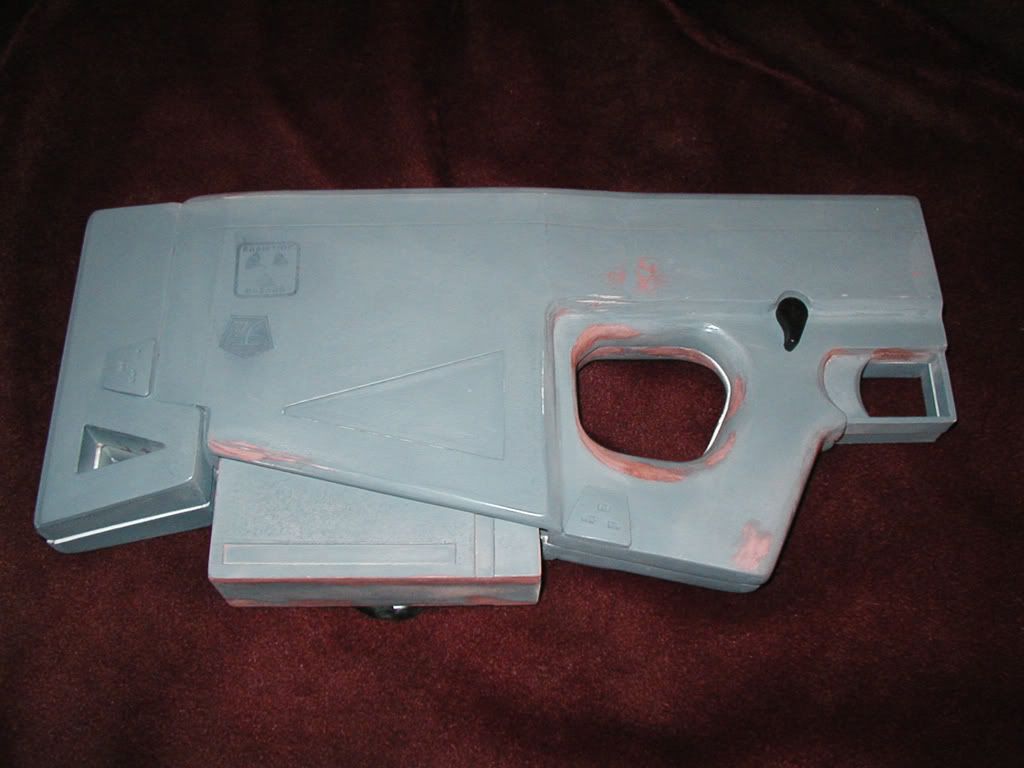
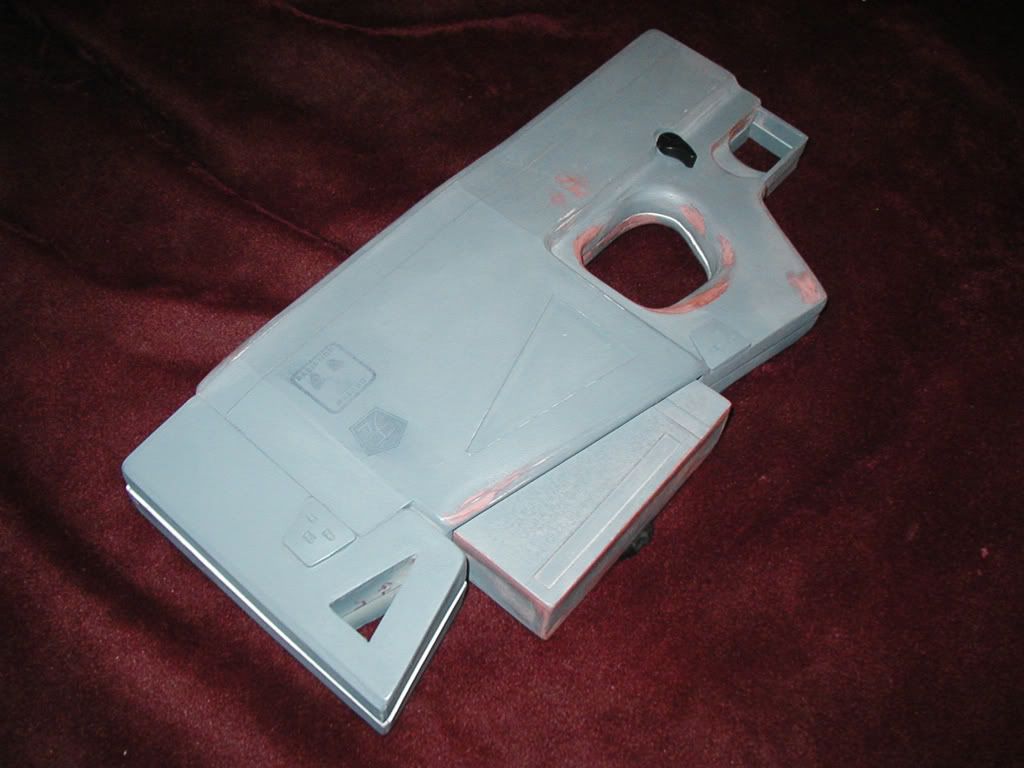
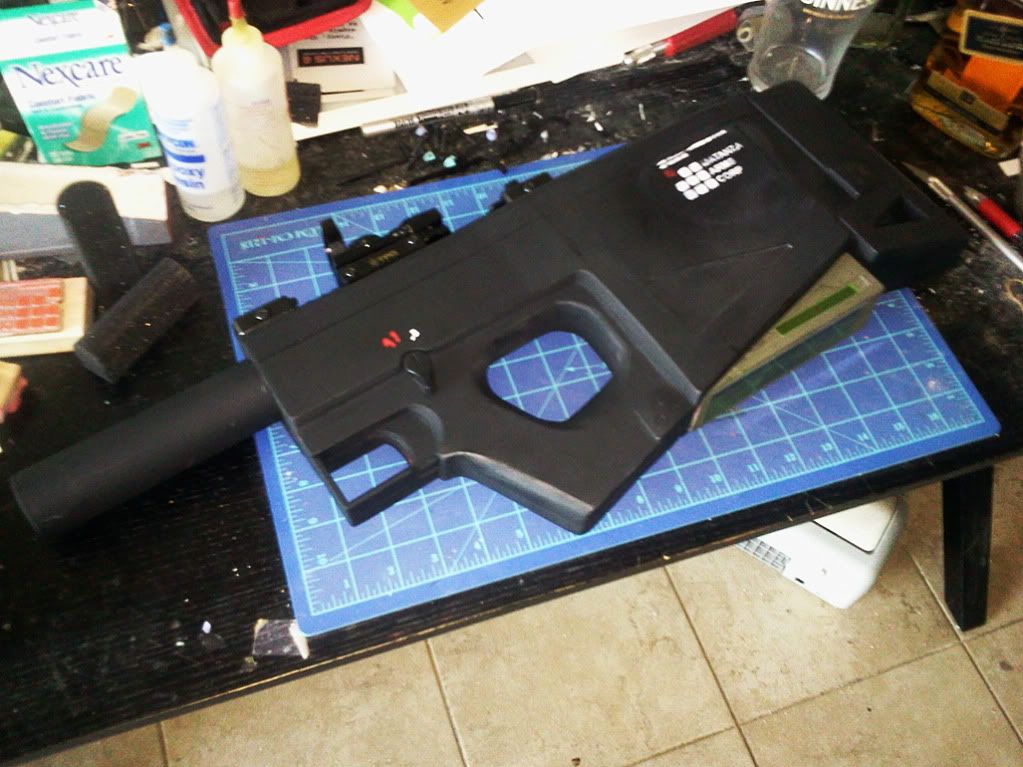
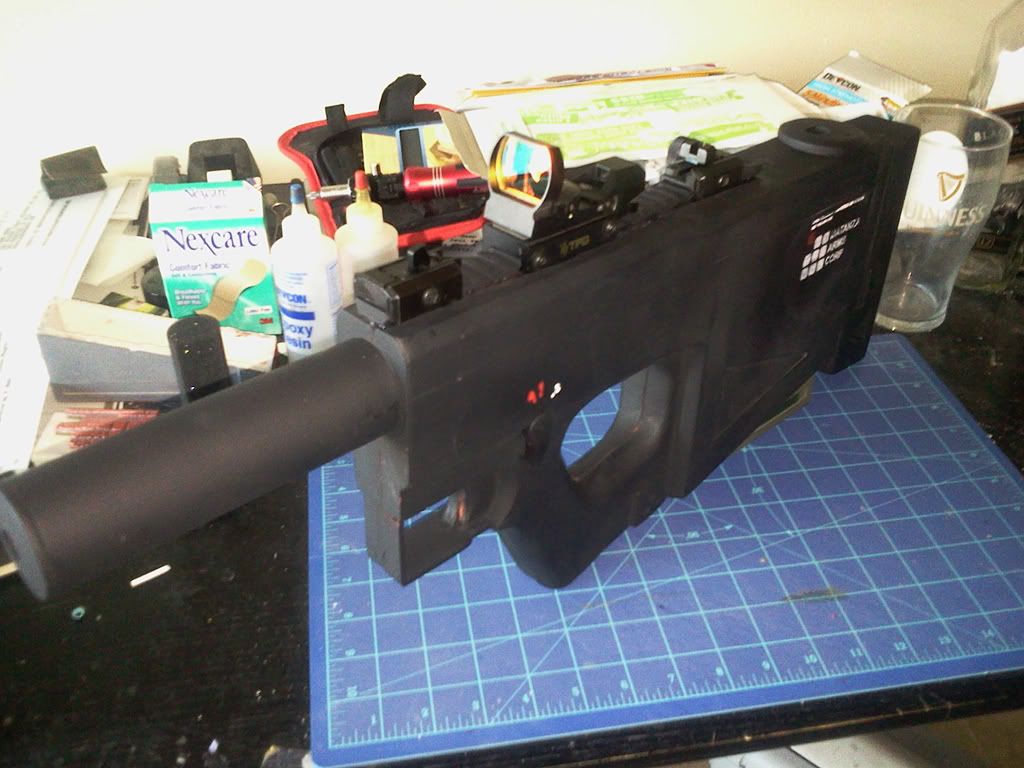
Update:
Molds have been finished for the body halves. Ran into a few problems with the resin kicking way too early (was using smooth cast Onyx). However I was able to salvage one set of castings. I decided to work those up as a custom stealth model.
This beast is heavy. Just the body alone weighs in around 12-15 pounds. Might need to find some way to make it lighter, otherwise the full rifle will weigh a ton. Any suggestions are welcome.
Anyhow, pics:
_________________
"We began to recognize in them a strange obsession..."
http://fcomin.cgsociety.org/gallery/ |
|
| Back to top |
|
|
|
|
|
|
|
|
|
|
|
| Author |
Message |
joberg
Community Member
Joined: 06 Oct 2008
Posts: 9471
|
| Posted: Wed Nov 02, 2011 7:12 am Post subject: |
|
|
Yep, that's on the heavy side for a rifle for sure Vacu-form with a wooden form inside the two halves to give it some heft? Or modify the mould to make it hollow or make it a slush cast? or...
Besides that, very good work |
|
| Back to top |
|
|
|
|
|
|
|
|
|
|
|
|
You cannot post new topics in this forum
You cannot reply to topics in this forum
You cannot edit your posts in this forum
You cannot delete your posts in this forum
You cannot vote in polls in this forum
|
|
|
|
|
|
|
|


